
How Do I Enable Audio on Safari: Simple Steps to Get Sound in Your Browser
Safari is a popular web browser used by millions of people around the world. While it offers a seamless browsing experience, some users may occasionally encounter issues with audio playback. Whether you are trying to watch a video, listen to music, or participate in a virtual meeting, having no sound can be frustrating. However, enabling audio on Safari is a simple task that can be accomplished with just a few clicks. In this article, we will guide you through the steps to get sound in your browser, ensuring that you can fully enjoy your online multimedia experience on Safari.
One of the common reasons for audio not working on Safari is a simple setting that might have been accidentally changed or turned off. By following the steps outlined in this article, you will learn how to troubleshoot and fix any audio issues you may encounter in your Safari browser. Whether it is a quick adjustment of the browser’s settings or updating your plugins and extensions, we have got you covered. So, read on to discover the simple steps to enable audio on Safari and get back to enjoying your favorite audio content hassle-free.
Table of Contents
Adjusting Audio Settings On Safari’s Preferences
Adjusting the audio settings on Safari preferences is a simple way to enable sound in your browser. To access the audio settings, open Safari and click on “Safari” in the menu bar. From the drop-down menu, select “Preferences.” A new window will appear with various tabs. Click on the “Websites” tab located at the top of the window.
Within the “Websites” tab, you will find the “Audio” section on the left-hand side. Here, you can customize how Safari handles audio on different websites. You can choose to allow or block audio on specific websites, as well as change the default behavior for all websites.
To enable audio on a specific website, click on the drop-down menu next to the website’s name and select “Allow” or “Allow Autoplay.” This will ensure that audio plays on that particular site.
By adjusting the audio settings on Safari’s preferences, you can have greater control over how sound is handled in your browser, ensuring a more enjoyable browsing experience.
Troubleshooting Common Audio Issues In Safari
If you’re experiencing audio problems while using Safari, there are several common issues that you can troubleshoot to get sound back in your browser. One of the most common solutions is to check your system volume and ensure it is not muted or set too low. Additionally, you should also verify that the audio is not muted within Safari itself by checking the speaker icon on the browser’s toolbar.
Another troubleshooting step is to clear your browser cache and cookies, as a corrupted cache or cookie file may be causing the audio problem. To do this, go to Safari’s preferences, click on the “Privacy” tab, and then select “Manage Website Data” to remove any cached data associated with audio-related websites.
If the issue persists, you can try disabling any extensions or plugins that might be interfering with Safari’s audio playback. Simply go to Safari’s preferences, click on the “Extensions” tab, and disable any audio-related extensions.
Finally, updating Safari to the latest version and ensuring that your plugins are up to date can also resolve audio issues. This ensures that you have the latest bug fixes and improvements for optimal audio performance.
By following these troubleshooting steps, you should be able to identify and resolve common audio issues in Safari, allowing you to enjoy sound in your browser once again.
Enabling Audio For Specific Websites On Safari
Enabling audio for specific websites on Safari can be a useful feature, especially if you frequently visit certain websites that require sound. Fortunately, Safari allows you to customize the audio settings on a per-website basis. Here’s how you can do it:
1. Open Safari on your Mac or iOS device and navigate to the website for which you want to enable audio.
2. Once the website is loaded, click on “Safari” in the menu bar at the top of your screen.
3. From the drop-down menu, select “Settings for This Website.”
4. A pop-up window will appear, displaying various settings for the selected website. Look for the “Auto-Play” section.
5. In the Auto-Play section, you will find an option for audio playback. By default, it is set to “Stop Media with Sound.” Click on the drop-down menu next to it.
6. You will see three options: “Allow All Auto-Play,” “Stop Media with Sound,” and “Never Auto-Play.” Choose the “Allow All Auto-Play” option to enable audio for the website.
7. Close the settings window, and the changes will take effect immediately.
By following these simple steps, you can easily enable audio for specific websites on Safari, ensuring an enhanced browsing experience tailored to your preferences.
Checking Hardware And Software Settings For Audio In Safari
If you’re experiencing audio issues on Safari, it’s essential to inspect both your hardware and software settings to ensure everything is configured correctly.
Hardware settings: 1. Check your device’s physical volume controls and make sure they are turned up and not muted. This may seem obvious, but it’s always worth double-checking. 2. Ensure that your headphones or speakers are properly connected to your device. Inspect the cables and connectors to rule out any potential issues. 3. Try plugging your audio output device into a different port or using it with another device. This will help identify if the problem lies with the device or the port.
Software settings: 1. Launch Safari and navigate to Safari Preferences. 2. Go to the “Websites” tab and select “Audio” from the left sidebar. 3. Check if the “When visiting other websites” option is set to “Allow Auto-Play” or “Allow All Auto-Play.” 4. Ensure that the specific website you’re trying to play audio from is not listed under the “Configured Websites” section with the “Stop media with sound” option selected.
By checking both hardware and software settings, you can troubleshoot and potentially resolve any audio issues you may be experiencing in Safari.
Updating Safari And Plugins For Optimal Audio Performance
Safari, like any other browser, periodically releases updates to enhance its performance and fix any bugs or glitches that may affect audio playback. Keeping Safari up to date not only ensures a smoother browsing experience but also optimizes audio performance.
To update Safari, follow these simple steps: 1. Open the App Store on your Mac. 2. Click on the Updates tab located at the top of the App Store window. 3. If a Safari update is available, you will see it listed among the available updates. Click the Update button next to Safari to start the update process.
Additionally, outdated or incompatible plugins can also cause audio issues in Safari. Plugins are used to enhance browser functionality, but sometimes they can conflict with audio settings. Therefore, it is crucial to update plugins regularly.
To update plugins in Safari: 1. Open Safari and click on the Safari menu in the top-left corner. 2. Select Preferences from the dropdown menu. 3. Go to the Websites tab. 4. On the left-hand side, select Plugins. 5. Update or enable any plugins that are outdated or disabled.
By keeping Safari and its plugins updated, you can ensure optimal audio performance and eliminate any potential issues related to outdated software.
Exploring Alternative Browsers If Audio Issues Persist On Safari
If you have exhausted all possible solutions and still cannot get sound in Safari, it may be time to consider exploring alternative browsers. While Safari is a popular choice and generally reliable, it is always good to have backup options available. Here are a few alternative browsers you can try:
1. Google Chrome: Chrome is known for its excellent compatibility and performance. It offers a wide range of extensions and plugins, making it a versatile choice. Simply download and install Chrome, then import your bookmarks and settings from Safari.
2. Mozilla Firefox: Firefox is another popular browser known for its privacy features and customizable interface. It supports most websites and offers a smooth browsing experience. Importing bookmarks from Safari is also possible in Firefox.
3. Microsoft Edge: As Microsoft’s default browser, Edge has gained popularity for its fast and secure browsing experience. It has similar features to Chrome and Firefox, and you can easily import your settings from Safari.
Remember, each browser has its own set of features and compatibility, so it may take some time to get used to a new one. However, exploring alternative browsers can be a viable solution if audio issues persist in Safari.
1. How do I check if audio is enabled on Safari?
To check if audio is enabled on Safari, open Safari and navigate to any website with audio or video content. If you can hear the sound, audio is already enabled. If not, proceed to the next step.
2. How do I enable audio on Safari?
To enable audio on Safari, click on the Safari menu in the top left corner of your screen, and select “Preferences.” In the Preferences window, click on the “Websites” tab. On the left sidebar, locate the “Audio” category. Make sure the “Allow websites to play sound” option is checked.
3. Why can’t I hear any audio on Safari?
If you can’t hear any audio on Safari, there could be several reasons. First, ensure that your device’s volume is turned up and not muted. Additionally, check if audio is enabled in Safari’s preferences as described in the previous FAQ. If the issue persists, try clearing your browser cache or restarting your device.
4. How can I update Safari to enable audio?
Updating Safari to the latest version can sometimes resolve audio-related issues. To update Safari, click on the Apple menu, select “App Store,” and click on the “Updates” tab. If a Safari update is available, click on the “Update” button next to it.
5. What should I do if enabling audio doesn’t work on Safari?
If enabling audio on Safari doesn’t work, you can try a few troubleshooting steps. First, restart your device and check if audio works after the restart. If not, try using a different browser to confirm if the issue is specific to Safari. If audio works on other browsers, you may need to seek further assistance from Apple support or a technical professional.
Wrapping Up
In conclusion, enabling audio in Safari is a simple process that can greatly enhance your browsing experience. By following the steps outlined in this article, you can ensure that your browser is properly configured to play audio on various websites. Whether you’re watching videos, listening to music, or engaging in online conferences, having sound in your browser is essential. With just a few clicks, you can enable audio on Safari and enjoy a seamless and immersive browsing experience.
Furthermore, enabling audio in Safari is not only easy but also essential for accessing a wide range of online content. Many websites rely on sound to provide important information or enhance the user experience, and without audio capabilities, you may miss out on valuable content. By enabling audio in Safari, you can make the most of your browsing sessions and fully engage with the multimedia elements of the websites you visit. So, don’t hesitate to follow the simple steps outlined in this article to get sound in your browser and enhance your overall web browsing experience.
Leave a Comment Cancel reply
Save my name, email, and website in this browser for the next time I comment.
3 Ways to Fix No Sound in Safari on Mac

Paurush dabbles around iOS and Mac while his close encounters are with Android and Windows. Before becoming a writer, he produced videos for brands like Mr. Phone and Digit. On weekends, he is a full-time cinephile trying to reduce his never-ending watchlist, often making it longer.
- Check if your currently opened tab is set to Mute. If yes, click the Mute icon to unmute the audio.
- Open Safari > Safari Settings > Websites tab > Auto-Play > click the website > choose Allow All Auto-Play.
- Open Settings > Sound > Output > check the output source.
Basic Fixes
- Check Mac volume levels: Ensure that you have set the volume level to high on your Mac so you can hear the audio while using Safari.
- Force quit and relaunch Safari: Click on the Apple logo > select Force Quit > Safari > Force Quit.
- Update macOS: This will install the latest version of Safari on your Mac.
Fix 1: Check if Your Currently Opened Tab Is Muted
While browsing, many enjoy listening to music or watching videos on YouTube . The first thing you must check in Safari is the tab on which the media is playing is muted. Every browser gives you the option to mute your currently opened tab. In the case of Safari, you can easily check the same by following these steps.
Step 1: Play an audio or video in a Safari tab.
Step 2: While the media plays, you will notice an audio (speaker) icon on the right of your tab.
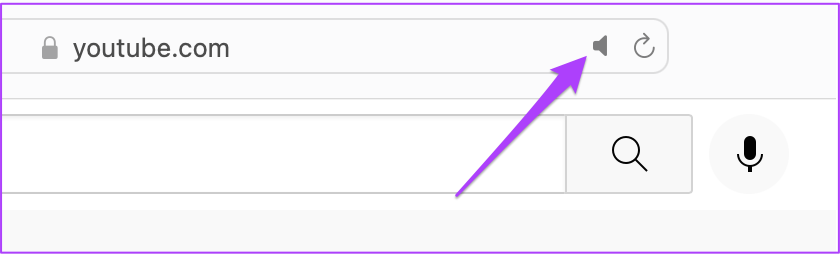
Step 3: Click the tab to unmute audio.

The Mute Tab option allows you to instantly mute audio for any audio or video playing on that tab. So, if you’ve muted a tab by mistake and forgotten about it, check the address bar in Safari.
Fix 2: Check Output Source on Your Mac
If the first two steps have not solved the issue, take a deep dive. If you can’t hear anything even after unmuting the tab and bumping up the volume, then something else is amiss.
By default, Mac uses the built-in speakers as a default output source. If you’ve connected earphones or external speakers, your Mac may not have switched the output source back to the internal speakers. However, you must check that from sound settings. Follow these steps.
Open Settings > Sound > Output > check the output source .

Additionally, you can also check if Output Volume is set to maximum or closer to that level.

Fix 3: Check Safari Preferences for Website Autoplay
Sometimes, we open websites that start playing media automatically. To save yourself from this situation, Safari users can turn off auto-play and mute audio while browsing that particular website.
If selecting the right Output Source does not help, the next step is to check whether Stop Media with Sound is still enabled. Follow these steps.
Step 1: Open the website that causes the playback issue in Safari browser > click on Safari > Settings for (website name) .
You will see a pop-up menu appearing right below the currently opened tab.

Step 2: Check for Stop Media with Sound enabled alongside Auto-Play .

Step 3: Tap on the option to reveal a dropdown menu > choose Allow All Auto-Play .

Step 4: Close the menu by clicking anywhere on the webpage.
Alternatively, you can choose to do the same from Safari Preferences. Follow these steps.
Step 1: Click on Safari at the top menu bar and choose Settings .

Step 2: Click on the Websites tab and choose Auto-Play from the left menu.

Step 3: In the Auto-Play tab on the right, select the website name.
Step 4: Click the dropdown tab on the right side > select Allow All Auto-Play .

Tip: Learn how to delete website trackers from Safari .
Was this helpful?
Last updated on 31 July, 2024
The above article may contain affiliate links which help support Guiding Tech. However, it does not affect our editorial integrity. The content remains unbiased and authentic.
Leave a Reply Cancel reply
Your email address will not be published. Required fields are marked *

The article above may contain affiliate links which help support Guiding Tech. The content remains unbiased and authentic and will never affect our editorial integrity.
DID YOU KNOW

Paurush Chaudhary
More in mac.

How to Mute Yourself or Others on FaceTime

4 Fixes for Apps Not Opening on Mac
Join the newsletter.
Get Guiding Tech articles delivered to your inbox.
Safari User Guide
- Get started
- Go to a website
- Bookmark webpages to revisit
- See your favorite websites
- Use tabs for webpages
- Import bookmarks and passwords
- Pay with Apple Pay
- Autofill credit card info
- View links from friends
- Keep a Reading List
- Hide ads when reading
- Translate a webpage
- Download items from the web
- Add passes to Wallet
- Save part or all of a webpage
- Print or create a PDF of a webpage
- Interact with text in a picture
- Change your homepage
- Customize a start page
- Create a profile
- Block pop-ups
- Make Safari your default web browser
- Hide your email address
- Manage cookies
- Clear your browsing history
- Browse privately
- Prevent cross-site tracking
- See who tried to track you
- Change Safari settings
- Keyboard and other shortcuts
Change Websites settings in Safari on Mac
To change these settings, choose Safari > Settings, then click Websites.
The settings you can customize (such as Reader and Content Blockers) are listed on the left.
To apply a setting to a website on the right, first select the setting, then choose the option you want from the pop-menu next to the website.
Open Safari for me
Annoying Audio Playing in Safari? Here’s How to Find and Mute Noisy Safari Tabs

Your changes have been saved
Email is sent
Email has already been sent
Please verify your email address.
You’ve reached your account maximum for followed topics.
I Use This App to Run Windows 11 on My Mac: Here's How
Here's how i turn these 7 common smartphone photography disasters into wins, how to use gemini in google sheets.
Opening multiple tabs is a handy feature in browsers like Safari, allowing you to view multiple webpages in a single window. This provides for a smoother web browsing experience and helps reduce desktop clutter. However, unwanted audio may suddenly begin playing from one of the tabs, disrupting your workflow with the current tab you’re on.
This may make you manually check each tab to look for the culprit. But there are several ways to efficiently manage audio in Safari tabs without the need to check them one by one.
How to Know If Which Safari Tab Is Playing Audio
It can be downright frustrating to go to each tab one by one just to find that single tab playing audio. In the past, you even needed to scroll down through the webpage to find the random ad or video that automatically played. However, browsers now make it easier for you to know if the current tab you’re viewing is playing audio or not.
Related: How to Quickly Access Sites in Safari on a Mac Using Pinned Tab
In Safari, simply look for the Audio button in the Smart Search field. If the icon is in solid blue with sound waves, then the current tab is playing audio. Otherwise, the audio button will appear gray with no sound waves.
To check other tabs, look for an audio icon in the tab bar to see which ones are playing audio.
How to Mute Tab Audio
There are several ways to mute tabs playing audio in Safari.
Mute Audio From the Current Tab
If the audio is on the tab you’re currently viewing, simply click the Audio button . You should see Mute This Tab on the Smart Search field as you hover your mouse over the Audio button . Just click the button again to unmute it.
Mute Audio From Other Tabs
If audio is playing simultaneously from different tabs, and you want to mute all the other audio except the audio from the tab you’re currently viewing, simply Option-click the Audio button in the Smart Search field from your current tab. A Mute Other Tabs message should appear in the Smart Search field. Alternatively, you can Control-click the Audio button, then click Mute Other Tabs .
On the other hand, if you’re on a tab that is not playing audio, and you want to mute audio from other tabs, simply click the Audio button to automatically mute the audio from all other tabs.
Manually Mute Audio From Tabs
You also have the option to manually mute audio from each tab. If a tab is playing audio, an Audio button should appear on the right side of that tab. Just click this button to mute the tab manually. You can also Control-click the Audio button and select Mute This Tab .
How to See Websites Currently Playing Audio
If you have multiple tabs opened and you want to see the tabs that are currently playing audio, go to the Smart Search field, then click and hold the Audio button . A popup menu will appear, listing the websites that are playing audio. Click one of these websites to go to the tab where audio is currently playing.
Aside from the list, the popup menu will also give you other options, like Mute Other Tabs and Mute This Tab , if the tab you’re on is playing audio. You can also choose Enter Picture in Picture if the audio playing is from a video.
Quickly Mute Unwanted Sound
Opening multiple tabs is a great way to manage our online workflows better, reduce desktop clutter, and keep important websites within reach. However, a common cause of annoyance with having multiple tabs open is when audio automatically plays from a particular tab.
With Safari, you can easily find, manage, and mute audio from your tabs. You can even manually mute them or mute all of them with just one click.
- Safari Browser

How to Enable Safari Web Browser Audio on Your iPhone?

Having trouble with Safari audio on your iPhone? You’re not alone. Many iPhone users face issues with iPhone audio auto-play in Safari, especially when it comes to playing media smoothly. In this guide, we’ll take you through adjusting Safari settings to fix these problems.
We’ll also cover how to troubleshoot Safari audio by tweaking Safari audio preferences to ensure your browser works the way you need it to. By the end of this article, you’ll have the knowledge to manage and enjoy audio playback on your iPhone without hassle.
Enabling Audio Auto-play in Safari
To enable Safari audio on your iPhone, start by opening the Settings app.

Scroll down and tap on Safari.

Here, you’ll find the Safari auto-play settings. Tap on Auto-Play, and select “Allow All Auto-Play” to ensure your audio plays without interruptions.
This tweak in your iPhone Safari audio settings will refine your browsing. If you’re still facing issues, check the Safari website preferences for any specific site settings that might be blocking audio. This simple step can resolve many iPhone audio troubleshooting problems.
Turning Off Safari Audio
To disable Safari audio, you can close the tab playing the sound or use the iPhone Safari audio controls to pause or mute the audio. For a specific tab, tap the speaker icon to mute Safari tab.
If you’re looking to silence all sounds, adjust the volume settings or switch your device to silent mode to mute iPhone. If you encounter any issues, Safari audio troubleshooting steps include checking for updates, restarting the browser, or resetting your device settings.

Troubleshooting Audio Issues on Safari
Facing Safari audio problems on your iPhone can be frustrating. If you’re dealing with iPhone Safari sound not working, start by checking your Safari audio settings.
Check that your device isn’t in silent mode, and volume is up. In Safari preferences, go to Settings > Safari > Clear History and Website Data, which can resolve many iPhone sound issues.
Also, check for software updates, as updates often fix bugs that cause troubleshooting problems.
Enabling Audio and Video on Safari
To enable Safari audio and video on your iPhone, start by ensuring your device is updated to the latest iOS version. Access the Settings app, move down the list, and choose Safari. Within Safari settings, you’ll find the option for Safari media playback.
Here, personalize the iPhone Safari video settings according to your preferences. To enable Safari autoplay, go to the Auto-Play section and toggle the switch to allow videos and audio to play automatically. This is where you can fine-tune your Safari autoplay preferences to either play everything automatically or require manual play.

Importance of Safari Audio on iPhone
When browsing the web on your iPhone, having audio functionality in Safari can significantly enhance your overall experience. The Safari audio importance cannot be overstated, as it brings your web browsing to life by enabling you to listen to multimedia content directly from websites.
One of the standout iPhone Safari features is its ability to handle various audio formats seamlessly. This means you can enjoy podcasts, music, and videos without needing extra apps or downloads. This integration is crucial for users who consume a lot of audio content on their devices.
The role of audio in web browsing is pivotal. It allows you to interact with websites that offer audio-based information, like news sites, educational platforms, and entertainment portals. Whether you’re listening to a news report, an online course, or streaming a live event, audio functionality ensures you don’t miss out on any important information.

Moreover, the multimedia experience on your iPhone is significantly elevated with Safari’s audio capabilities. Websites today are rich with multimedia content, and having the ability to hear audio directly from the browser enhances your interaction with such sites.
The Safari audio benefits are numerous. It provides a seamless and integrated way to access audio content, improving convenience and efficiency. Whether you’re multitasking, on the go, or simply prefer listening over reading, Safari’s audio functionality is a game-changer for iPhone users.
Enabling Safari audio on your iPhone is crucial for a seamless browsing experience, especially when you want to enjoy multimedia content without interruptions. Adjusting your iPhone Safari settings ensures that you can automatically play audio on your favorite websites.
In our Safari auto-play recap, we highlighted the importance of tweaking these settings to fit your iPhone audio preferences. By following the steps discussed, you can effortlessly manage your audio playback and enhance your overall Safari usage.
Our Tech Essentials:

Dell Vostro 3910 Desktop Computer | 12th Gen Intel 4-Core Processor | 16GB DDR4 RAM | 256GB SSD + 1TB HDD | Intel UHD Graphics 730 | WiFi 6 | DVD-RW | Display Port | HDMI | Windows 11 Pro

Saqico Battery Pack for Oculus Quest 2, 5000mAh Head Strap Battery Pack Compatible with Oculus/Meta Quest 2 Lightweight and Portable VR Extend Power Accessories for Extra 2-4H Playtime

Hisense 58-Inch Class U6HF Series ULED 4K UHD Smart Fire TV (58U6HF) - QLED, 600-Nit Dolby Vision, HDR 10 plus, 240 Motion Rate, Voice Remote, Compatible with Alexa, Black

Amazon Fire HD 8 Plus tablet, 8” HD Display, 32 GB, 30% faster processor, 3GB RAM, wireless charging, (2022 release), Gray

Dell OptiPlex 7050 Micro Computer, Intel Quad Core i5-6500T up to 3.1GHz, 16G DDR4, 256G SSD, Windows 10 Pro 64 Bit-Multi-Language Supports English/Spanish/French(Renewed)
Related posts:.

Oluwadamilola Osisanya
Leave a Comment Cancel reply
Save my name, email, and website in this browser for the next time I comment.
This site uses Akismet to reduce spam. Learn how your comment data is processed .

How To Fix Web Browser Audio (Chrome, Safari, Firefox, Etc.)

In today's multimedia era, browsing the internet often involves playing various audio and video clips on your browser. Whether it's Google Chrome, Apple Safari, Microsoft Edge, Internet Explorer, Opera or Mozilla Firefox, each browser has its own media features. Sometimes, you may face audio issues while playing content.
How do I fix audio issues in my web browser? Web browser audio issues often have to do with the device's audio input/output configurations rather than the browser. However, extensions, apps, add-ons, cache, cookies, improper installation and outdated browser versions could be the cause behind browser-based audio issues.
Audio issues are most often at the operating system level. However, browsers may also cause issues with computer audio. What works for one browser doesn't necessarily fix the problem on another. In this article, we'll discuss how to fix audio issues in 6 common web browsers.
Table Of Contents
How to fix general audio i/o issues in a computer, how to fix audio issues in google chrome, how to fix audio issues in apple safari, how to fix audio issues in mozilla firefox, how to fix audio issues in microsoft edge, how to fix audio issues in microsoft internet explorer, how to fix audio issues in the opera web browser, related questions.
As I mentioned above, audio issues in computers and mobile devices are typically at the operating system level rather than in the web browser itself. Before trying to fix the browser, consider troubleshooting the audio I/O of the device itself.
Let's consider Windows and Mac operating systems and their audio I/O.
To find and/or change the audio input in Windows, go to:
Select the appropriate input device from the list.
To find and/or change the audio output in Windows, go to:
Select the appropriate output device from the list.
Additionally, newer versions of Windows have what is called the Volume Mixer. This mixer controls the volumes of whatever applications and devices are running/connected to the computer. Open this window to ensure the browser is unmuted and the volume is turned up.
To find and/or change the audio input in Mac, go to:
To find and/or change the audio output on Mac, go to:
If the device(s) (microphone, headphones , speakers, audio interface, etc.) are not available, try disconnecting the device(s) and reconnecting them.
If reconnecting doesn't work, restarting the computer may work to solve the problem.
If there are still issues where the device and operating system aren't communicating, you'll likely have to download and install the appropriate driver for the specific device. Search “[device name] driver [operating system name] download” into Google, and you'll likely find what you need.
Another point worth mentioning is to ensure that the computer, the device (if applicable) and the browser's media are not muted or turned all the way down.
For example, computers will have volume controls and mute buttons. External audio devices often come with volume controls as well. Finally, the website on the browser responsible for playing audio may be muted.
If the issue persists beyond these points, it may be that the device is broken or, in some cases, that the browser is actually to blame. With the latter in mind, let's move on to the rest of this article.
Related articles: • Do Microphones Need Drivers To Work Properly With Computers? • Are Speakers (& Studio Monitors) Input Or Output Devices? • Are Headphones Input Or Output Devices? • Are Microphones Input Or Output Devices? • Does HDMI Carry Audio Signals?
If you've gone through the troubleshooting listed above and still can't fix the audio issues in Google Chrome, try the following:
- Disable Extensions
- Clear Cache And Cookies
Reset Chrome Settings
Update chrome, disable extensions in google chrome.
Go to the browser extensions list. If you have an extension named Pepper Flash, make sure to disable it, as this often creates audio issues. Also, delete all other extensions and reinstall them. If you are then getting sound, then an extension was the issue.
Clear Cache And Cookies In Google Chrome
On your browser, click on the three dots at the top right, select More Tools and hit Clear Browsing Data.
In the window that appears, select All Time for a thorough cleaning. Click on Clear Data, restart your computer and test if the audio issue is fixed.
Go to Settings on your Chrome browser and select the Advanced tab. Select Reset and let the process begin to refresh your browser settings.
Select the Update Google Chrome link after clicking the three dots at the browser's top right corner. If no update is available, click on Help and About Google Chrome. The browser will check, download and install available updates. Relaunch the browser to complete the installation.
Related article: How To Record Audio On A Chromebook
If you've gone through the troubleshooting listed above and still can't fix the audio issues in Apple Safari, try the following:
- Check For Interfering Apps
- Restart The Sound Controller
Check For Interfering Apps In Apple Safari
Some apps, like certain screen recorders, may install dedicated audio output drivers that may interfere with your browser's audio output. To fix that, choose Sound on the System Preferences and click on the Output tab. If you see an output option selected that looks like an app, uninstall it and remove all the files placed by it on your Mac. Relaunch Safari and check the audio.
Restart The Sound Controller For Apple Safari
Go to Applications and open Utilities, further launching the Activity Monitor. In the search bar, type ‘coreaudiod', open the same and click X' in the toolbar to quit it. This will restart the controller. Open Safari and test the audio issue by playing something.
If you've gone through the troubleshooting listed above and still can't fix the audio issues in Mozilla Firefox, try the following:
- Update Firefox
- Restart Firefox
- Disable Add-Ons
Update Mozilla Firefox
Make sure to update your browser to keep it running right. Reach the menu icon on the browser's top right and click Help. Click on About Firefox to download any available updates.
Restart Mozilla Firefox
If there is no update available, or if updating Firefox didn't resolve your issue, then go ahead with Fix 6.
Disable Add-Ons In Mozilla Firefox
Sometimes, add-ons can affect the functionality of the browser. Go to Help and restart the browser with all add-ons disabled. Restart in Safe Mode and play content to test the issue.
If you've gone through the troubleshooting listed above and still can't fix the audio issues in Microsoft Edge, try the following:
- Clear Browsing History And Cache
- Turn Off Adobe Flash
- Restart Edge
Clear Browsing History And Cache In Microsoft Edge
Select the Hub icon on the browser's top right, and click on Settings. Click on Choose what to clear and select the specific items you want to clear—once done, restart Edge.
Turn Off Adobe Flash For Microsoft Edge
Click on Settings and go to View Advanced Settings. Click on Use Adobe Flash player, disable the same and restart the browser.
If you've gone through the troubleshooting listed above and still can't fix the audio issues in Microsoft Internet Explorer, try the following:
- Clear Flash Player Settings
- Uncheck ActiveX Filtering
- Enable Sound In Settings
Clear Flash Player Settings For Microsoft Internet Explorer
Open the Control Panel and open Flash Player settings. Go to the Advanced tab and press the Delete All button in the Browsing Data and Settings. Restart your computer and see if you can fix the issue.
Uncheck ActiveX Filtering In Microsoft Internet Explorer
Open Settings from the browser's top right corner. Select Safety and disable ActiveX Filtering by clicking it. Check if the issue is fixed.
Enable Sound In Settings In Microsoft Internet Explorer
Open the browser, and press Alt. In the next menu, click Tools, then Internet Options. On the Advanced tab, go to Multimedia and turn the checkmark for Play Sounds in Webpages on. Apply the settings and restart your computer.
Disable Add-Ons In Microsoft Internet Explorer
Open Command Prompt, search for cmd', and press Enter. Type “%ProgramFiles%\Internet Explorer\iexplore.exe” -extoff and press Enter. Press Alt to open the IE menu, and click Tools > Manage Add-ons. Click on All add-ons under Show, select all the add-ons and choose Disable. Restart the browser and see if the issue is fixed.
If you've gone through the troubleshooting listed above and still can't fix the audio issues in Opera, try the following:
- Disable All Extensions
Reinstall Opera
Disable all extensions in opera.
A faulty extension may disrupt browser functions. Open Opera and click on the Menu icon. Select Extensions in the drop-down and open Extensions in the secondary drop-down. In the pop-up, choose all extensions that you want to disable. Relaunch the browser and play content.
If nothing works, try reinstalling the browser if it doesn't play audio files.
While one or more of the above solutions must fix the problem, if your browser doesn't seem to work with all the aforementioned solutions, you can always try using another browser and continue streaming.
How do we connect a microphone to a computer? Connecting a microphone to a computer requires an audio interface. Audio interfaces physically connect mics to computers and convert analog audio signals into digital info. USB mics contain simple but limited interfaces, whereas standalone interfaces can connect entire studios to a single computer.
Further reading: How To Connect A Microphone To A Computer (A Detailed Guide)
How do we connect speakers of all types to our computers? The way in which we connect an external speaker to a computer depends on the type of speaker. Bluetooth speakers are connected wirelessly via Bluetooth; USB speakers connect via USB cables, and typical speakers require some sort of interface (whether internal or external) to connect to a computer.
Further reading: How To Connect Speakers To A Computer (All Speaker Types)
Leave A Comment!
Have any thoughts, questions or concerns? I invite you to add them to the comment section at the bottom of the page! I'd love to hear your insights and inquiries and will do my best to add to the conversation. Thanks!
This article has been approved in accordance with the My New Microphone Editorial Policy .

Audio Engineer
Arthur is the owner of Fox Media Tech and the author of My New Microphone. He's an audio engineer by trade and has worked professionally in the audio industry since 2015 with experience in studio recording, radio, television, composition, sound design, music production, and content production. He has a passion for music production and releases music as "Arthur Fox". This website is where he share his love and knowledge for all things audio.
Similar Posts

Composing With Musical Intervals
Intervals are the basis of harmony and harmony is important to us as musicians, composers, and music producers. This article will discuss what intervals are and tips on how to use them in compositions. A Single Note Holds A Lot Of Information More Notes, More Information But there’s not really music in a single note. One way…

Top 11 Benefits Of Learning & Playing Cello
The cello is an essential instrument of many orchestras, string and chamber ensembles and even finds itself in genres such as rock, pop, metal and more. There are a surprising number of benefits associated with learning how to play the cello and practicing/playing regularly. You could be wondering whether it’s worth bowing your first cello,…

Top 11 Ways To Make Money As A Songwriter
Money is important, and as songwriters, there are plenty of ways to earn a living. Whether your goal is to go full-time or to produce some extra money on the side, it’s useful to know the income streams available to make a living with your art. The types and viability of the income streams available…

Is Padauk A Good Guitar Tonewood? Electric, Acoustic & Bass
Guitars are made of numerous different parts, many of which are made of wood. The choice of wood in the guitar body (the solid body and laminate in electric guitars and the sides, back and top of acoustic guitars), neck and fretboard all contribute to the overall playability, feel and, of course, tone of the…

What Is 500 Series Audio Equipment & Is It Worth It?
When looking into hardware equipment for an audio studio, perusers will likely come across 500 Series equipment. From microphone preamplifiers and DI boxes to equalizers, compressors and other effects, 500 series gear is readily available. What is 500 Series Audio Gear? The 500 Series is a modular format for audio equipment developed by API in…

Do You Need To Know Piano To Play Synthesizer?
Synthesizers are, for many, the ultimate musical instrument. Indeed, they can bend and break all known rules and make sounds that suit the space age and any of your favourite sci-fi movies. Most of them, though, come with a keyboard controller. So, the question arises: do you need to learn piano to play the synthesizer?…
Leave a Reply
Your email address will not be published. Required fields are marked *
This site uses Akismet to reduce spam. Learn how your comment data is processed .
To revisit this article, visit My Profile, then View saved stories .
- The Big Story
- Newsletters
- Steven Levy's Plaintext Column
- WIRED Classics from the Archive
- WIRED Insider
- WIRED Consulting
How to Turn Off Autoplay in Your Browser

At some point, you've probably had your web browsing rudely interrupted by an unexpected burst of music or other audio—usually accompanying some kind of video content on the page that you're viewing.
Sometimes these videos are adverts, sometimes they're content posted by users, but the clip and the accompanying sounds that go along with it are often not what you want to focus on. They can also start up at the most inconvenient times: You don't want an ad blaring through your laptop speakers when you're studying in a coffee shop, for example.
It doesn't have to be this way, because there are settings in all the popular browsers that can stop this behavior. It's also worth checking the settings for the sites you use to see if there are options you can tweak.
In the case of YouTube, for example, click your profile avatar (top right), then Settings . Under Playback and performance , turn off the Inline playback toggle switch so videos don't start running as you hover the cursor over them. On Netflix, click your profile avatar (top right), then Account . Click your account name, then Change next to Playback settings , and uncheck the Autoplay previews whilst browsing on all devices box.
Other sites have similar settings, but if you can't find what you're after, you can make some changes at the browser level as well.

AutoplayStopper will block media as it attempts to play.
While there was, once upon a time, a setting inside Chrome to stop video and audio from autoplaying as soon as a page was loaded, it's now been excised from the browser. To get the same end results you need to turn to a third-party browser extension, and one of the best is AutoplayStopper .

It's free, it's simple to use, and it does the job effectively. Videos still show up onscreen, but you're only shown a static thumbnail—they're not allowed to start playing without your approval. If you decide that you do want to see a video, just click on it.
The AutoplayStopper icon in the Chrome toolbar keeps track of how many videos have been blocked. If you right-click on it and choose Options , you can add particular websites that you want to be exempt from the AutoplayStopper restrictions.
There is one setting built into Chrome that you can take advantage of: If there's one particular website that's always interrupting your browsing with audio that starts up automatically, right-click on the browser tab at the top and pick Mute site —you won't hear a peep from any more pages on that particular site.

Setting autoplay options in Safari on macOS.
The options built into Safari cover the bases pretty well when it comes to controlling autoplay behavior—which is just as well, as Apple's browser isn't as well provided with third-party extensions as some of its competitors.
To stop media from automatically playing on a specific site in the browser, open the Safari menu and choose Settings for ... (the site name will be listed here). Next to Auto-Play you'll see that there are three options: Allow All Auto-Play , Stop Media with Sound (videos with audio are blocked), and Never Auto-Play (all videos are blocked).
To control autoplay in Safari more generally, open the Safari menu and pick Preferences . Open the Auto-Play tab, and you'll see you can set the options for the site you're currently on. Any sites that you've previously customized are listed here too.
At the bottom, there's another drop-down menu that lets you configure any websites that haven't yet been customized individually. To remove a website's individual setting, click on its entry in the list and then choose Remove .

Firefox enables you to block audio on its own, or both audio and video.
Firefox comes with a specific setting for media autoplay, so you don't necessarily have to rely on an extension. To find it, open the browser menu (the three horizontal lines, top right), then choose Settings , Privacy & security , and Settings next to Autoplay .
You've got three options, which are fairly self-explanatory: Allow Audio and Video , Block Audio , and Block Audio and Video . That middle option gives you an alternative between the two extremes of all or nothing—you can use it if you're happy for videos to play silently as soon as they're loaded on a particular page.
To make an exception, click the icon next to a website URL (it'll usually be a padlock), then click the connection link, More Information and Permissions : You can make changes under Autoplay . There's also the option to quickly mute a site by right-clicking on its tab and choosing Mute Tab from the menu that pops up.
With everything handled by the browser, there's less demand for autoplay add-ons, but you can still find ones that apply to specific sites: Autoplay No More , for example, will stop videos from automatically playing on YouTube, Vimeo, and several other sites.

You can block media from autoplaying in the Edge settings.
Microsoft Edge is based on the same Chromium code as Google Chrome these days, and so you can use the same browser extensions with it. Rather than just recommend the same add-on a second time though, we'll give you an alternative to try: Video Autoplay Blocker .
It does exactly what its name might suggest, stopping videos from playing without your express permission. That permission can be granted by simply clicking on the video you want to watch—and until that happens you'll just see a static thumbnail.
Unlike Chrome, Edge does still have a built-in setting for controlling autoplaying media. Open the "edge://flags" page, search for Show block option in autoplay settings , and change it to Enabled . You can then click the three dots (top right), Settings , Cookies and site permissions, and Media autoplay , and change the Control if audio and video play automatically on sites option to Block (or Limit to be less restrictive).
Finally, you can quickly silence a site in particular by right-clicking on the header of the tab that it's open in and choosing Mute tab . At the moment you can't mute sites in their entirety using the integrated options in Edge, as you can with Chrome.
- 📩 The latest on tech, science, and more: Get our newsletters !
- The aftermath of a self-driving tragedy
- How people actually make money from crypto
- The best binoculars to zoom in on real life
- Facebook has a child predation problem
- Mercury could be littered with diamonds
- 👁️ Explore AI like never before with our new database
- 💻 Upgrade your work game with our Gear team’s favorite laptops , keyboards , typing alternatives , and noise-canceling headphones

WIRED COUPONS
Turbo Tax Live Assisted - 10% off
H&R Block Coupons & Offers
Enjoy $15 Off Your Orders With Instacart Coupon
DoorDash Promo Code: 25% off your order
2 for $40 on Select Kids' Hoodies & Joggers Finish Line Deal
Save Up to 60%- Groupon Oil Change
How To Allow Safari To Access Microphone

- Software & Applications
- Browsers & Extensions

Introduction
Safari, the sleek and intuitive web browser developed by Apple, offers a seamless and secure browsing experience for its users. With its robust features and user-friendly interface, Safari has become a popular choice for Mac and iOS users. One of the key functionalities that Safari provides is the ability to access the microphone for various web applications and services. Whether you want to make voice calls, participate in online meetings, or use voice recognition features, allowing Safari to access your microphone is essential for a smooth and efficient browsing experience.
In this comprehensive guide, we will walk you through the step-by-step process of enabling microphone access in Safari. By following these simple instructions, you can ensure that Safari is equipped to utilize your microphone for a wide range of online activities, enhancing your browsing experience and productivity.
So, if you've ever encountered the frustrating "Safari cannot access the microphone" message or simply want to proactively enable this feature, you've come to the right place. Let's dive into the easy-to-follow steps that will empower you to grant Safari the necessary permissions to access your microphone seamlessly.
Step 1: Open Safari Preferences
To begin the process of allowing Safari to access your microphone, the first step is to open the Safari Preferences . This can be easily accomplished by launching the Safari browser on your Mac or iOS device. Once Safari is open, navigate to the top-left corner of the screen and click on the "Safari" menu located in the menu bar. A drop-down menu will appear, and you should select "Preferences" from the options listed. Alternatively, you can use the keyboard shortcut "Command + ," to directly access the Preferences window.
Upon selecting "Preferences," a new window will open, presenting a range of customizable settings and options for Safari. This window serves as the central hub for configuring various aspects of the browser, including privacy, security, and website permissions. The Preferences window is designed to provide users with comprehensive control over their browsing experience, empowering them to tailor Safari to their specific preferences and requirements.
Once you have accessed the Preferences window, you are now ready to proceed to the next step in the process of enabling microphone access for Safari. This initial step sets the stage for the subsequent actions that will ultimately allow you to grant Safari the necessary permissions to utilize your microphone effectively.
By following these straightforward instructions and navigating to the Safari Preferences, you have taken the crucial first step towards enabling microphone access in Safari. With the Preferences window now open, you are poised to delve into the subsequent steps that will lead you to successfully configure Safari to access your microphone, unlocking a host of interactive and productivity-enhancing features within the browser.
Step 2: Go to Websites Tab
After accessing the Safari Preferences window, the next pivotal step in the process of allowing Safari to access your microphone involves navigating to the "Websites" tab. This tab serves as a comprehensive hub for managing website-specific settings and permissions, empowering users to customize their browsing experience based on individual preferences and requirements.
Upon entering the Preferences window, you will notice a series of tabs at the top of the window, including "General," "Tabs," "Search," "Extensions," "Privacy," "Security," and "Websites." To proceed with enabling microphone access, you should click on the "Websites" tab, which is strategically positioned to provide users with centralized control over various website-related settings and permissions within Safari.
Once you have selected the "Websites" tab, a diverse array of website-specific settings and permissions will be displayed, allowing you to fine-tune Safari's behavior when interacting with different websites. This intuitive interface is designed to offer users a high degree of flexibility and control, enabling them to manage permissions for features such as camera access, microphone access, location services, and more on a per-website basis.
The "Websites" tab is structured to provide a seamless and organized overview of the websites you visit, along with the corresponding permissions and settings associated with each site. This user-centric approach ensures that you can effortlessly manage and customize Safari's behavior when accessing different websites, tailoring the browsing experience to align with your preferences and privacy considerations.
By navigating to the "Websites" tab within the Safari Preferences window, you have positioned yourself to delve into the granular details of website-specific settings, including the crucial aspect of enabling microphone access. This strategic maneuver sets the stage for the subsequent steps that will lead you to effectively configure Safari to access your microphone, paving the way for a seamless and enriched browsing experience.
In summary, the "Websites" tab serves as a pivotal gateway to fine-tuning Safari's behavior when interacting with various websites, offering a user-friendly interface that empowers you to manage microphone access and other permissions with precision and ease. With this essential step completed, you are now ready to progress to the subsequent actions that will culminate in granting Safari the necessary permissions to utilize your microphone effectively.
Step 3: Select Microphone from the Left Sidebar
Upon reaching the "Websites" tab within the Safari Preferences window, you will encounter a well-organized interface that empowers you to manage a diverse array of website-specific settings and permissions. Positioned prominently within this tab is the left sidebar, a navigational aid that provides convenient access to a range of crucial features and functionalities. To proceed with enabling microphone access for Safari, your next decisive action involves selecting the "Microphone" option from the left sidebar, a pivotal maneuver that will pave the way for configuring Safari to utilize your microphone effectively.
As you direct your attention to the left sidebar within the "Websites" tab, you will notice a comprehensive list of website-specific permissions and settings, meticulously categorized to facilitate seamless navigation and customization. The left sidebar serves as a central hub for accessing and managing a host of essential features, including microphone access, camera access, location services, and more, enabling you to tailor Safari's behavior when interacting with different websites.
To proceed with selecting the "Microphone" option, simply locate and click on the "Microphone" entry within the left sidebar. This intuitive action will direct your focus to the corresponding settings and permissions associated with microphone access, presenting you with a range of configurable options that are designed to provide a high degree of control and flexibility.
Upon selecting the "Microphone" option, you will be presented with a detailed overview of websites that have requested microphone access, along with the corresponding permissions status for each site. This insightful display empowers you to make informed decisions regarding microphone access, allowing you to customize Safari's behavior based on your preferences and privacy considerations.
By selecting the "Microphone" option from the left sidebar, you have taken a crucial step towards configuring Safari to access your microphone seamlessly. This strategic maneuver positions you to delve into the granular details of microphone permissions, empowering you to manage and customize microphone access for different websites with precision and ease.
In summary, the process of selecting the "Microphone" option from the left sidebar within the "Websites" tab is a pivotal action that sets the stage for fine-tuning Safari's microphone access settings. With this essential step completed, you are now prepared to progress to the subsequent actions that will culminate in granting Safari the necessary permissions to utilize your microphone effectively, enhancing your browsing experience and productivity.
Step 4: Allow Safari to Access Microphone
After navigating to the "Microphone" settings within the left sidebar of the "Websites" tab in Safari Preferences, you are now poised to take the final decisive action of allowing Safari to access your microphone. This pivotal step involves configuring the microphone permissions for specific websites, granting Safari the necessary access to utilize your microphone seamlessly.
Upon selecting the "Microphone" option, you will be presented with a comprehensive list of websites that have requested microphone access. Each website entry is accompanied by a dropdown menu that allows you to specify the microphone access setting for that particular site. The dropdown menu provides three distinct options: "Deny," "Ask," and "Allow."
To enable microphone access for a specific website, simply click on the dropdown menu next to the respective site and select the "Allow" option. This affirmative action signals to Safari that the selected website is authorized to access your microphone, paving the way for a seamless and interactive browsing experience. By choosing the "Allow" option, you are effectively granting Safari the permission it needs to utilize your microphone when interacting with the designated website.
Furthermore, the "Ask" option provides a balanced approach by prompting Safari to request permission to access your microphone whenever you visit the corresponding website. This proactive mechanism ensures that you retain control over microphone access, allowing you to make informed decisions in real-time based on your preferences and privacy considerations.
In contrast, the "Deny" option empowers you to restrict microphone access for specific websites, thereby preventing Safari from utilizing your microphone when interacting with the designated sites. This granular control over microphone permissions aligns with Safari's commitment to user privacy and security, enabling you to tailor the browser's behavior to align with your individual preferences and requirements.
By leveraging the intuitive dropdown menu within the "Microphone" settings, you can effectively configure Safari to access your microphone in a manner that aligns with your privacy considerations and browsing habits. This user-centric approach empowers you to manage microphone permissions with precision and ease, ensuring that Safari interacts with websites in accordance with your preferences.
In summary, the process of allowing Safari to access your microphone involves selecting the appropriate microphone access setting for specific websites within the "Microphone" settings. By choosing the "Allow" option for designated sites, you are empowering Safari to utilize your microphone seamlessly, unlocking a host of interactive and productivity-enhancing features within the browser. With this essential step completed, you have successfully configured Safari to access your microphone, enhancing your browsing experience and enabling seamless interaction with a diverse range of web-based services and applications.
In conclusion, enabling microphone access in Safari is a straightforward yet pivotal process that empowers users to harness the full potential of the browser's interactive and productivity-enhancing features. By following the step-by-step instructions outlined in this comprehensive guide, you have gained the knowledge and insights necessary to configure Safari to access your microphone seamlessly, unlocking a host of capabilities that enrich your browsing experience.
From navigating to the Safari Preferences and accessing the Websites tab to selecting the Microphone option within the left sidebar and configuring microphone permissions for specific websites, each step in the process plays a crucial role in empowering you to tailor Safari's behavior to align with your individual preferences and privacy considerations.
By allowing Safari to access your microphone, you open the door to a myriad of possibilities, including making voice calls, participating in online meetings, utilizing voice recognition features, and engaging with a diverse range of web-based services and applications that leverage microphone functionality. This seamless integration of microphone access enhances your ability to interact with websites in a dynamic and immersive manner, fostering a more engaging and productive browsing experience.
Furthermore, the user-centric approach adopted by Safari in managing microphone permissions reflects the browser's commitment to privacy and security. By providing users with granular control over microphone access for specific websites, Safari empowers individuals to make informed decisions and tailor their browsing experience to align with their unique preferences and requirements.
As technology continues to evolve and web-based interactions become increasingly integral to our daily lives, the ability to enable microphone access in Safari assumes greater significance. Whether for personal or professional use, the seamless integration of microphone functionality within Safari enhances the browser's versatility and empowers users to leverage the full spectrum of interactive features available on the web.
In essence, by following the steps outlined in this guide and allowing Safari to access your microphone, you have taken a proactive step towards enhancing your browsing experience and embracing the myriad opportunities for seamless and immersive interactions on the web. With microphone access configured to align with your preferences, you are well-equipped to leverage the full potential of Safari, embracing a dynamic and engaging browsing experience that caters to your individual needs and preferences.
Leave a Reply Cancel reply
Your email address will not be published. Required fields are marked *
Save my name, email, and website in this browser for the next time I comment.
- Crowdfunding
- Cryptocurrency
- Digital Banking
- Digital Payments
- Investments
- Console Gaming
- Mobile Gaming
- VR/AR Gaming
- Gadget Usage
- Gaming Tips
- Online Safety
- Software Tutorials
- Tech Setup & Troubleshooting
- Buyer’s Guides
- Comparative Analysis
- Gadget Reviews
- Service Reviews
- Software Reviews
- Mobile Devices
- PCs & Laptops
- Smart Home Gadgets
- Content Creation Tools
- Digital Photography
- Video & Music Streaming
- Online Security
- Online Services
- Web Hosting
- WiFi & Ethernet
- Browsers & Extensions
- Communication Platforms
- Operating Systems
- Productivity Tools
- AI & Machine Learning
- Cybersecurity
- Emerging Tech
- IoT & Smart Devices
- Virtual & Augmented Reality
- Latest News
- AI Developments
- Fintech Updates
- Gaming News
- New Product Launches
- 12 Best Free AI Image Sharpeners in 2024 WebPCMobile
Sanjuksha Nirgude Soaring High with Robotics
Related post, unveiling the secrets of sls printing and its role in robotics, unleashing efficiency: the role of robotic process automation in industry 4.0, advancing cybersecurity: the integration of robotics with emerging sms phishing alert tools – innovations, challenges, and future perspectives, robotics redefining long-term investment horizons, bridging software development and robotics for enhanced automation, the role of robotics in cnc machining for large part production, related posts.

How To Allow Mic On Safari

How Do I Enable My Mic In Safari Discord

How To Change Safari Privacy Settings On Mac

How To Search In Safari IPhone

Where Is Safari Preferences

How To Enable Safari On IPhone

How To Stop Google From Asking To Sign In On Safari

How To Unblock On Safari
Recent stories.

12 Best Free AI Image Sharpeners in 2024 (Web/PC/Mobile)

OpenStack Backup and Recovery Software

Apple Wallet Availability in the PocketGuard App: Sync your Apple Card, Apple Cash, and Savings from Apple Card Accounts

5 Ways to Improve IT Automation

What is Building Information Modelling?

How to Use Email Blasts Marketing To Take Control of Your Market

Learn To Convert Scanned Documents Into Editable Text With OCR
- Privacy Overview
- Strictly Necessary Cookies
This website uses cookies so that we can provide you with the best user experience possible. Cookie information is stored in your browser and performs functions such as recognising you when you return to our website and helping our team to understand which sections of the website you find most interesting and useful.
Strictly Necessary Cookie should be enabled at all times so that we can save your preferences for cookie settings.
If you disable this cookie, we will not be able to save your preferences. This means that every time you visit this website you will need to enable or disable cookies again.
- Web Browser
- Google Chrome Browser
- Mozilla Firefox Browser
- Microsoft Edge Browser
- Apple Safari Browser
- Tor Browser
- Opera Browser
- DuckDuckGo Browser
- Brave Browser
How to disable or enable auto-play videos in Apple Safari Browser ?
Auto-play videos, although they may prove convenient, annoy us, mostly, while we search on the internet. The default Apple Web browser, Safari, gives users an option of either allowing a video to play as soon as it opens the page, or not. Though this is an excellent feature aimed at enhancing a user’s experience, not every person appreciates this The next part of the paper will focus on why one would activate or deactivate auto-playing videos in Safari, as well as how these activities can be carried out.
What is Autoplay?
Autoplay is a website feature that allows video or audio to play without user intervention. The goal was to improve the user experience by making content more engaging and interactive. However as autoplay became more widely adopted by websites, users began reporting problems with the feature. These range from the inability to prevent unwanted sounds through sudden bursts of music, and even playing a video or song that was never intended for public viewing.
The main problem with autoplay is that it becomes a distraction. When you go to a website, for example, your intention may be to get certain information or perhaps do something. Autoplaying media turns your attention away and, even more annoying, it’s hard to stop them manually.
One problem with autoplay is that it can be overwhelming. The variety of audio and video available on media-heavy webpages can be tough. Even more so, if you’re using a mobile phone with limited battery power and data capacity.
Why Disable Autoplay?
You may need to disable autoplay for several different reasons. One problem is that autoplay can be annoying if you’re going to a web site full of videos and sound. Second, autoplay uses data and drains your battery life if you’re using a mobile device. Besides being distracting, it can also be annoying. If you’re trying to work in a quiet environment, this could get really on your nerves.
Disabling autoplay can also help protect your privacy. Some websites even use autoplay media to monitor your behavior and collect information about you. If you disable autoplay, websites can’t hoard too much data about yourself.
As a whole, autoplay can be helpful in some situations and it can also become an irritation. If autoplay is getting in your way, though, you might want to kill the feature at its source-in your browser.
Benefits of Enabling/Disabling the Feature:
Benefits of enabling auto-play:.
- Seamless Experience: It is a crucial element as well since if one wants to watch such videos seamlessly, auto-play is needed in which the video commences playing upon loading of the page and without pressing on any button.
- Convenience: Users would rather have automatic playback such as some news sites and social networking pages.
Benefits of Disabling Auto-Play:
- Data Conservation: For instance, a video that auto-plays as it is being downloaded may not be playable for users with limited bands. So this implies that in order to cut down on data usage one needs to turn off auto-play.
- Reduced Distractions: Some of the users will see it as an obstruction that hinders them from picking a specified set of videos that are relevant to them.
Steps to Enable Auto-Play Videos in Safari:
Step 1: Open Safari Preferences
Go to safari, select “preferences” on the tiptop menu bar and press it.
Step 2: Navigate to Websites
Go to menu bar and click preferences, after that we go to websites tab.
Step 3: Auto-Play Settings

Go to the Left Side and click on Auto-Play.
Step 4: Enable Auto-Play
For the desired site, you will select the “allow all auto play” option.

Step 5: Confirm Changes
To save your preferences, go to “OK” in the Preferences window.
Steps to Disable Auto-Play Videos in Safari:
From there head towards the menu bar and choose “Safari” then “Preferences”.
Click “webs” in the settings page.
On the list beside select Auto-Play.

Step 4: Disable Auto-Play
Choose “shut off medial with audio” to turn off the automatic playing of video on the website.
-660.jpg "safari browser audio settings")
Next, close the preferences window and you will have saved your settings.
Disabling Autoplay on Safari for iOS:
- Accessing Safari Settings on iOS:- Open your iOS device and bring up the “Settings” app from the home screen. Keep scrolling until you see Safari, then tap on it. On the right-hand side of your screen, there should now be a list of Safari settings.
- Stopping Autoplay in Videos and Audio:- Under the “Settings for Websites” section, tap on “Auto-Play.” You’ll now see three options: Allow All Auto-Play, Stop Media with Sound and Never Auto Play selections. To turn off autoplay completely, choose “Never Auto Play.” With this option selected no video or audio content will start playing automatically on any website.
- Troubleshooting Common Issues:- If you’ve followed the steps above but still experience autoplay, there are a few things you can try:
- Autoplay Still Active After Disabling:- If you still hear autoplay content after disabling it, clear your cache and cookies. However, these files sometimes interfere with Safari’s settings and cause unwelcome behavior.
- Reset Safari Autoplay Settings to Default:- If it’s still not working, you can reset Safari’s autoplay settings to defaults by going to “Safari” > Preferences>Web sites-AutoPlay and clicking on the Reset Default button in the lower right hand corner of window.
Conclusion:
Managing autoplay in Safari for personalizing browsing adventure. They enable people to toggle between two modes – “autopilot” and by-schedule at their convenience. Auto play videos can be enabled or disabled using these simple steps. Safari, travel great and manage it on your own.
Please Login to comment...
Similar reads.
- Geeks Premier League
- Web Browsers
- Apple Safari
- Geeks Premier League 2023
- Discord Emojis List 2024: Copy and Paste
- Best Adblockers for Twitch TV: Enjoy Ad-Free Streaming in 2024
- PS4 vs. PS5: Which PlayStation Should You Buy in 2024?
- Best Mobile Game Controllers in 2024: Top Picks for iPhone and Android
- 15 Most Important Aptitude Topics For Placements [2024]
Improve your Coding Skills with Practice
What kind of Experience do you want to share?
- Skip to main content
- Skip to search
- Skip to select language
- Sign up for free
Cross-browser audio basics
This article provides:
- a basic guide to creating a cross-browser HTML audio player with all the associated attributes, properties, and events explained
- a guide to custom controls created using the Media API
Basic Audio example
The code below is an example of a basic audio implementation using HTML5:
Note: You can also use an MP4 file instead of MP3. MP4 files typically contain AAC encoded audio. You can use type="audio/mp4" . (Currently, browsers that support mp3 also support mp4 audio).
- Here we define an <audio> element with multiple sources — we do this as not all browsers support the same audio formats. To ensure reasonable coverage, we should specify at least two different formats. The two formats that will give maximum coverage are mp3 and ogg vorbis.
- src contains the path to the audio file to be loaded (relative or absolute).
- type is used to inform the browser of the file type. If omitted, most browsers will attempt to guess this from the file extension.
- If the <audio> element is not supported then <audio> and <source> will be ignored. However, any supported text or elements that you define within <audio> will be displayed or acted upon. So the ideal place to create a fallback or inform of incompatibility is before the closing </audio> tag. In this case, we've provided a simple paragraph including a link to download the audio directly.
- The controls attribute on the <audio> element is specified when we require the browser to provide us with default playback controls. If you don't specify this attribute, no controls will appear — and you will instead have to create your own controls and program their functionality using the Media API (see below). However, that can be a good approach, because the default controls look different among various browsers. So creating your own controls ensures a consistent look for the controls across all browsers.
HTML audio in detail
Now we've looked at a basic example, let's now explore the different aspects of HTML audio in more detail.
Audio HTML attributes
We can specify a number of attributes with the audio tag to further determine the way audio is initialized.
Specifying autoplay will cause the audio to start playing as soon as possible and without any user interaction — in short, the audio will autoplay.
Note: This value is often ignored on mobile platforms, and its use is not recommended unless really necessary. Autoplaying audio (and video) is usually really annoying. Plus browsers have policies that will block autoplay entirely in many situations. See the Autoplay guide for media and Web Audio APIs for details.
The loop attribute will ensure that upon getting to the end of the audio clip, the audio clip will loop back to the beginning and start playing again.
If you want the audio to start muted (no volume), add the muted attribute.
Note: This value is often ignored on mobile platforms.
The preload attribute allows you to specify a preference for how the browser preloads the audio, in other words, which part of the file it downloads when the <audio> element is initialized, and before the play button is pressed.
preload can take 3 different values:
- none : Don't download anything before the play button is pressed.
- metadata : Download the audio metadata; this is usually the best option, as it allows you to access and display information such as audio length, and allow the browser to work out which audio file it should use.
- auto : Download the whole audio file as soon as possible. This is generally not a good option unless you can guarantee your users will have a fast network connection.
We specify the controls attribute when we require the browser to provide us with its default playback controls.
As mentioned above, you can use the <source> element to specify one or more source audio files. Alternatively, you can include the src attribute directly on the <audio> element to specify a single source file.
As mentioned above, to be sure that the browser knows what type of file is being specified, it's good practice to specify a type attribute alongside the src attribute. The type attribute specifies the MIME type or Internet Media Type of the file.
Manipulating the Audio Element with JavaScript
In addition to being able to specify various attributes in HTML, the <audio> element comes complete with several properties and methods that you can manipulate via JavaScript.
Given the following HTML:
You can grab the <audio> element like this:
Alternatively, you can create a new element. Here's an example of creating an <audio> element, setting the media to play, playing and pausing, and then playing from 5 seconds into the audio:
Let's explore the available properties and methods in more detail.
The play() method is used to tell the audio to play. It takes no parameters.
The pause() method is used to tell the audio to pause. It takes no parameters.
Note: There is no stop method — to implement a stop function, you'd have to pause the media then set the currentTime property value to 0.
canPlayType
The canPlayType() method asks the browser whether a certain audio file type is supported. It takes the mime type of the type to check as a parameter.
canPlayType() returns one of three values:
- "" (an empty string)
In practice, we usually check if the result is true or false. Non-empty strings are true.
Note: A very early spec specified that the browser should return no instead of an empty string, but thankfully the number of people using older browsers that implement this version of the spec are few and far between.
currentTime
The currentTime property gets or sets the current time the audio should play at. This is useful in many ways, for example since play() does not take a parameter we need to set the point to play from separately if we don't want it to be 0.
The value of currentTime is a number which represents the time in seconds.
The volume property allows us to set the audio volume, as a number between 0 and 1.
Creating your own custom audio player
The JavaScript media API allows you to create your own custom player. Let's take a look at a very minimal example. We can combine HTML and JavaScript to create a very simple player with a play and a pause button. First, we'll set up the audio in the HTML, without the controls attribute, since we are creating our own controls:
Next, we attach some functionality to the player using JavaScript:
Media loading events
Above we have shown how you can create a very simple audio player, but what if we want to show progress, buffering and only activate the buttons when the media is ready to play? Fortunately, there are a number of events we can use to let our player know exactly what is happening.
First, let's take a look at the media loading process in order:
The loadstart event tells us that load process has started and the browser is connecting to the media.
durationchange
If you just want to know as soon as the duration of your media is established, this is the event for you. This can be useful because the initial value for duration is NaN (Not a Number), which you probably don't want to display to your users.
loadedmetadata
Metadata can consist of more than just duration — if you want to wait for all the metadata to download before doing something, you can detect the loadedmetadata event.
The loadeddata event is fired when the first bit of media arrives. The playhead is in position but not quite ready to play.
The progress event indicates that the download of media is still in progress. It is good practice to display some kind of 'loader' at this point.
canplay is a useful event to detect should you want to determine whether the media is ready to play. You could, for example, disable custom controls until this event occurs.
canplaythrough
canplaythrough is similar to canplay but it lets you know that the media is ready to be played all the way through (that is to say that the file has completely downloaded, or it is estimated that it will download in time so that buffering stops do not occur).
Media loading event order
To recap, the order of the media loading events are:
loadstart > durationchange > loadedmetadata > loadeddata > progress > canplay > canplaythrough
Loading interruption events
We also have a few events available that will fire when there is some kind of interruption to the media loading process.
Media data is no longer being fetched even though the file has not been entirely downloaded.
Media data download has been aborted but not due to an error.
An error is encountered while media data is being downloaded.
The media buffer has been emptied, possibly due to an error or because the load() method was invoked to reload it.
Media data is unexpectedly no longer available.
Media Playing Events
We also have another set of events that are useful for reacting to the state of the media playback.
The timeupdate event is triggered every time the currentTime property changes. In practice, this occurs every 250 milliseconds. This event can be used to trigger the displaying of playback progress.
The playing event is initiated when playback is ready to start after having being paused due to lack of media data.
The waiting event is triggered when playback has stopped due to lack of media data, although it is expected to resume once data becomes available.
The play event is initiated after the play() method is returned or when the autoplay attribute has caused playback to begin. This is when the state of the media switches from paused to playing.
The pause event is triggered after the pause() method is returned. This is when the states switch from playing to paused.
The ended event is initiated when the end of the media is reached.
volumechange
The volumechange event signifies that the volume has changed; that includes being muted.
An Audio Player with Feedback
Consider this snippet of HTML:
Styled like so:
Now let's wire this thing up with JavaScript:
You should end up with something like this:

Seeking using the seek bar
This is a good start, but it would be nice to be able to navigate the audio using the progress bar. Fortunately this isn't too difficult to implement.
First of all, we apply a quick update to the progress bar CSS to display the hand pointer on hover:
Then we add the code that detects the click and moves the 'playhead' to the correct position:
Ok, we're getting there, but there is another piece of useful information we can display: the amount of audio has been buffered or downloaded in advance.
There are a couple of properties we haven't looked at yet, buffered and seekable .
This property lets us know which parts of the audio has been buffered (downloaded in advance). It returns something called a TimeRanges object.
The seekable property informs you of whether you can jump directly to that part of the media without further buffering.
Buffering events
There are also a couple of events related to buffering:
The seeking event is fired when media is being sought.
seeked occurs when the seeking attribute changes to false .
Note: You can read more on Buffering, Seeking and Time Ranges elsewhere.
- Buffering, Seeking and Time Ranges
- HTMLMediaElement events
- Event reference > Media
- Using HTML audio and video
- Creating a cross-browser video player
- jPlayer : An open source audio and video library for jQuery and Zepto.
Looks like no one’s replied in a while. To start the conversation again, simply ask a new question.
Amazon music on iPad through Safari
I’m trying to play songs from Amazon Music on my Safari browser on my iPad and there’s no sound (though it looks like it’s playing). A message suggested changing the auto play settings ‘for this website’ on Safari but can’t see how to do that on the iPad. I can’t use the Amazon Music app as this is a work’s iPad and I can’t download any apps. Any help much appreciated. Tia
iPad (6th gen) WiFi
Posted on Nov 3, 2019 1:34 AM
Posted on Nov 3, 2019 2:17 AM
You may have answered your question in your post :) The amazon music website won't work in safari on the iPad, that auto play pop up is only for safari on the Mac.
You'll only be able to listen to amazon music through the app I'm afraid.
Similar questions
- How to enable audio auto-play in iPad Safari I just signed up for Amazon Music. In order to play a selection, Amazon popped up a dialog stating, "Enable Auto-Play - To play music, you must enable auto-play. " I searched iPad's settings and Safari's settings, but auto-play settings was nowhere to be found. iPad Air 3rd Gen iOS 15.3.1 Some advice anyone? Thank you 3387 3
- MP3’s won’t play After iOS 15 update on iPad and iPhone I can no longer play MP3s from websites directly in the browser… I’ve used DuckDuckGo and Safari it looks like it’s going to play for a second and then I get this screen. This has never ever been an issue I’ve played them from websites this way for years… 4649 6
- Music stops when browsing in Safari I’ve searched and there are posts here from 12 years ago stating the same problem. With Apple Music playing the background it will frequently stop when browsing in Safari (iOS 14, iPad Pro 12.9 2020). I find this ludicruous given Apple’s so-called attention to detail and UI/UX focused approach. Little things like this really let down the experience of iPadOS and iOS. 2302 3
Loading page content
Page content loaded
Nov 3, 2019 2:17 AM in response to Switchqueen
Nov 5, 2019 8:09 AM in response to Brallen01
I am experiencing the same issue with Safari 13.0.3 on macOS. The slide bar looks like it is loading the music, but it is not playing the music. Unless you manually move the slide bar, then the music starts to play. Unfortunately, once the song has completed, it will not autoplay the next song. Have to repeat the steps again. I have tried this with Chrome and Firefox and do not experience this issue.
IMAGES
VIDEO
COMMENTS
Unmute audio. In the Safari app on your Mac, click the muted Audio button in the Smart Search field, or on the right side of the tab in the tab bar. Note: You can mute and unmute audio in tabs that are in the active Safari window as well as in tabs that are in other Safari windows behind the active window. Use tabs for webpages in Safari on Mac ...
To enable audio on Safari, click on the Safari menu in the top left corner of your screen, and select "Preferences.". In the Preferences window, click on the "Websites" tab. On the left sidebar, locate the "Audio" category. Make sure the "Allow websites to play sound" option is checked. 3.
How to enable audio auto-play in iPad Safari I just signed up for Amazon Music. In order to play a selection, Amazon popped up a dialog stating, "Enable Auto-Play - To play music, you must enable auto-play. " I searched iPad's settings and Safari's settings, but auto-play settings was nowhere to be found.
Every browser gives you the option to mute your currently opened tab. In the case of Safari, you can easily check the same by following these steps. Step 1: Play an audio or video in a Safari tab ...
If you're using your computer's built-in speakers. 1. Unplug any headphones or external speakers. 2. On your Mac, choose Apple menu > System Settings, then click Sound in the sidebar. (You may need to scroll down.) 3. Click Output on the right. Make sure [Mac model] Speakers is selected, the "Output volume" slider is not all the way to ...
In the Safari app on your Mac, choose Safari > Settings, then click a settings pane: General: Change your homepage, and choose what to see when you open a window or tab, how long to keep your browsing history, which bookmarks to show in Favorites view, and choose where to save downloads and how long to keep them. Tabs: Choose when to open ...
Change Websites settings in Safari on Mac
To turn on sound in Safari for a specific website, right-click on the browser tab and click on "Settings for [Website Name].". Next, change the Auto-Play adjustment settings from "Stop Media ...
If audio is playing simultaneously from different tabs, and you want to mute all the other audio except the audio from the tab you're currently viewing, simply Option-click the Audio button in the Smart Search field from your current tab. A Mute Other Tabs message should appear in the Smart Search field. Alternatively, you can Control-click ...
To show it, open the Safari menu then choose Preferences, then Advanced, then tick the box marked Show Develop menu in menu bar. The new menu then appears, enabling you to access options such as ...
684,375 points. Posted on Nov 22, 2016 7:04 AM. Try Safari/Preferences/Security and make sure Allow Plug-ins is checked. Then click Plug-in Settings and make sure the plug-ins are enabled. Also check Safari/Preferences/Advanced to see if Stop plug-ins to save power is checked. If so, try unchecking it.
To enable Safari audio on your iPhone, start by opening the Settings app. Scroll down and tap on Safari. Here, you'll find the Safari auto-play settings. Tap on Auto-Play, and select "Allow ...
Tap on "Safari" to reveal a range of settings and options related to the browser's functionality. Within the Safari settings, scroll down to find the "Clear History and Website Data" option. ... In some instances, sound-related problems may arise due to compatibility issues between the website's audio features and the Safari browser on your iPad.
Better Browsing: 30 Hidden Tricks Inside Apple's Safari ...
Clear Cache And Cookies In Google Chrome. On your browser, click on the three dots at the top right, select More Tools and hit Clear Browsing Data. In the window that appears, select All Time for a thorough cleaning. Click on Clear Data, restart your computer and test if the audio issue is fixed.
On Netflix, click your profile avatar (top right), then Account. Click your account name, then Change next to Playback settings, and uncheck the Autoplay previews whilst browsing on all devices ...
You can go to the menu bar in Safari and select Bookmarks > Show Start Page. This will open the Start page in Safari. Click the settings button in the bottom-right corner to start personalization ...
Safari audio (all audio) doesn't come through my headphones, either in Bluetooth mode or with the jack plugged in. It's the only app that behaves this way, and I can't figure out how to fix it. Before it is recommended, yes: I have already checked that the audio settings are correct. Safari is the only app (and the only web browser) doing this.
From the dropdown menu, select "Preferences." Navigate to Websites: Within the Preferences window, locate and click on the "Websites" tab at the top. This section houses various permissions and settings related to web content. Select Microphone: On the left-hand sidebar, select "Microphone" to access the microphone settings.
Step 1: Open Safari Preferences. To begin the process of allowing Safari to access your microphone, the first step is to open the Safari Preferences. This can be easily accomplished by launching the Safari browser on your Mac or iOS device. Once Safari is open, navigate to the top-left corner of the screen and click on the "Safari" menu located ...
Steps to Enable Auto-Play Videos in Safari: Step 1: Open Safari Preferences. Go to safari, select "preferences" on the tiptop menu bar and press it. Step 2: Navigate to Websites. Go to menu bar and click preferences, after that we go to websites tab. Step 3: Auto-Play Settings. Go to the Left Side and click on Auto-Play. Step 4: Enable Auto ...
preload. The preload attribute allows you to specify a preference for how the browser preloads the audio, in other words, which part of the file it downloads when the <audio> element is initialized, and before the play button is pressed.. preload can take 3 different values:. none: Don't download anything before the play button is pressed.; metadata: Download the audio metadata; this is ...
How to enable audio auto-play in iPad Safari I just signed up for Amazon Music. In order to play a selection, Amazon popped up a dialog stating, "Enable Auto-Play - To play music, you must enable auto-play. " I searched iPad's settings and Safari's settings, but auto-play settings was nowhere to be found.