
HIKING in PATAGONIA – The Ultimate Guide to the Best Treks

- Last Updated: February 5, 2024
Everything you need to know about hiking in Patagonia. From trekking in Torres del Paine to El Chalten and everywhere in between, this list of the best hikes in Patagonia will help you plan your big adventure!
Often and widely considered as having the most breathtaking, scenic landscapes in the world, trekking in Patagonia is every hiker’s dream, whether it is for the avid day hiker to the seasoned, experienced multi-day trekker.
Patagonia is a land of dreams, ranging from the raging rivers of the Rio Moscu to the iceberg glacial lakes of Tigre Sur.

The hiking routes take you from lush meadows of wild flowers to snowy-rugged peaks at the base of the world famous Mount Fitz Roy.
Just the thought of hiking in Torres Del Paine National Park sends shivers down my spine. Ever wanted to visit one of the world’s most famous granite peaks? Cerro Torre in Patagonia is your place to do so.
There are literally endless kilometres of hikes to do, but it can be very difficult to choose just one when everything looks like it’s worthy of being on a postcard.
Patagonia truly is one if not the most beautiful places on earth, so where do you begin?
It’s every adventurer’s desire to get a taste of what trekking and hiking in Patagonia is like, so I have established a list of the best day hikes to the some of the world’s most stunning multi-day treks.
READ MORE: Don’t miss our guide on backpacking in Patagonia on a budget.

Table of Contents
Hiking to Mirador Las Torres
Lago grey (grey glacier), the french valley – valle del frances, los cuernos trail, the “o” circuit, short hike to condor lookout, day hike to the base of mount fitz roy – laguna de los tres, day hike to cerro torre, the huemul circuit, laguna esmeralda, glaciar vinciguerra, sierra valdivieso circuit, laguna tigre sur, valle rio moscu, cerro castillo, pumalin park – cascadas waterfalls hike (escondidas), save this pin for later, the best time to go hiking in patagonia.
Early November until late April are generally the best times to go hiking in Patagonia, however this can change from year to year due to varying amounts of snowfall.
Not a fan of the cold? Try and head there in February and March for the warmer months for some great Patagonia trekking.
Also it’s necessary to know that weather in Patagonia is so varied and can change at any time, which can very quickly alter your Patagonia hiking trip. Keep that in mind when planning your adventure.
Hiking according to the seasons in Patagonia has both pros and cons no matter what time of year you decide to go, so if you were going to pick a time, aim for the end of March to mid-April, where weather seems to be slightly cooler but more stable allowing you to enjoy Patagonia in all its glory.
But the best reason for visiting Patagonia at that time of year is to see the entire region in autumn colours! Simply breathtaking.

Hiking In Torres del Paine National Park
When it come to hiking in Patagonia, no trip would be complete without spending at least a few days in Torres del Paine National Park, the crown jewel of Chile.
Whether you’re interested in just heading into the park for a day hike, using one of the accommodations inside the park as a base (we personally recommend EcoCamp ), or carrying all of your camping gear and completing the famous O Circuit, you definitely won’t be disappointed with the trekking here.
- Time Required: 8 to 9 hours
- Distance: 18km
- Difficulty: Hard
- Start / Finish Points: Hotel Las Torres
Widely considered to be the most popular day hike in Torres del Paine, Mirador Las Torres is just one of the magical places you can hike to when in Torres del Paine.
Las Torres translated to English means ‘The Towers’, and mirador means ‘Lookout’ , so you should have an idea of what to expect up there.
The Towers are a series of 3 jagged peaks that literally tower over a turquoise lake below, and chances are you’ve already seen a photo of them at least once in your life.
This particular trek is 18 kilometres of visual delights, despite it being considered as a difficult hike, and the views once you reach the top are just awesome!
Most of the trek is uphill, but don’t let that put you off this classic day hike, as cascading waterfalls, forests beaming with life and boulder fields dominating the higher landscapes and just waiting for you to enjoy.
The last hour is extremely steep, so make sure you save some energy for the final slog.
If you are after a really magical experience spend the night in the park and start hiking up in the dark. If the weather cooperates you’ll be rewarded with Las Torres looking as though they’re on fire with the red sun lighting them up at sunrise.
Las Torres is a hiker’s dream, and if you could only choose one trek in the whole of Patagonia, this would be it! Return via the same way you climbed, starting and finishing at the Hotel Las Torres.
Prefer to hike with a guide? Book your Mirador Las Torres tour here with Get Your Guide.

- Time Required: 3 to 4 hours
- Distance: 11 kilometres
- Difficulty: Easy to moderate
- Start / Finish Points: Mountain Lodge Paine Grande to Refugio Grey
As you might know there are quite a few glaciers in Patagonia (you can even visit some on an amazing glacier cruise in the Chilean fjords ), but this one takes the cake as the best of the best.
Along the famous “W” Trek, towards the western part of the hike, is a long section that follows the Lago Grey lake, which is gradually fed by a huge glacier known as Glaciar Grey.
Here you can expect to see pale blue icebergs floating around in the Lago Grey, as parts of Glaciar Grey collapse into the lake below and it’s a spectacular sight to see!
From Refugio Grey to Mountain Lodge Paine Grande is a 3 to 4 hour hike spanning over 11 kilometres, with little ascent or descent making it a fairly easy day out.
Expect to see vast areas of vegetation, wild flowers and the odd section of track that requires a tricky traverse but nothing too major. Keep an eye out for the majestic Cerro Torre piercing the sky.
Camping is available at Mountain Lodge Paine Grande and Refugio Grey if you want to spend the night there. Otherwise take the ferry to Paine Grande or Refugio Grey and start walking.

Alesha enjoying the view over Grey Glacier.
- Time Required: 3 to 4 hours
- Distance: 12km
- Difficulty: Moderate
- Start / Finish Points: Refugio Los Cuernos
You always have energy in Patagonia, even when you are literally falling asleep, so don’t miss this epic side trip that takes you between the Cerro Paine Grande and the Cuernos del Paine following the flowing river of the Rio Frances.
Why this hike is the one of the most spectacular side trips is because it has frozen waterfalls…how cool is that?!
READ MORE: We’ve just published our best hiking tips after 15 years trekking!
Also pretty dangerous though, so don’t be getting your ice picks out too soon, because there are views much higher up that you can enjoy, such as the 15 minute trek past the Campamento Britanico placing you in an almost cathedral of mountains.
The Mirador right towards the end is complete with a series of tarns beaming the reflections of the surrounding mountains making it that ideal moment to getting that camera of yours out! Camping is available (minus the facilities of toilets etc). Return the same way you came.

- Time Required: 6 hours
- Distance: 22km
- Difficulty: Moderate
- Start / Finish Points: Hotel Las Torres to Refugio Los Cuernos
Based along the front half of the park, home to the W Trek, is a fantastic day hike weaving around a series of steep banks perched along the edges of the Lago Nordenskjold.
Los Cuernos Trail, which means ‘The Horns’ in English and named after the mountains you can see that are shaped like horns, is a beautiful stretch offering views of the Cuernos del Paine, which never cease to amaze, and gorgeous vistas over the lake.
If you still have bounce in your step when you finish the trail, consider a side trips up the Valle del Frances, an additional 12 kilometre stunning section of track.
Plenty of camping is available on the south side of Cuernos Del Paine if you prefer to take more time on this hike (just keep in mind it gets quite windy in these camp spots).

- Time Required: 6-8 days
- Distance: 135km
- Difficulty: Hard
- Start / Finish Points – Hotel Las Torres
Defined as one of the best treks on earth, the Paine Circuit, commonly known to the hiking world as the “O” Circuit due to its shape on a map, is a must do if you have a sense of adventure.
The circuit literally has it all, from pristine forests, meadows of native wild flowers to the grand peaks of Cerro Paine and Cuernos del Paine…and let’s not forget the addition of Las Torres along the eastern side of the trek.
You are best off starting at Hotel Las Torres and heading to Campamento Seron, where views of Cerro Paine (1,508 metres) dominate your surrounds along with rivers flowing off Lago Paine.
Once you connect with the track along the Rio de los Perros, mountains begin to pop-up more frequently along with glaciers, but be sure to pitch your tent at the campsite on Lago Dickinson, as views here are some of the best along the hike.
As you continue to be blown away by Grey Glacier in Torres del Paine (hopefully not by the wind), you find yourself on the trail that begins the “W” trek, which is the shorter, more popular sister of the O Circuit, which begins at Refugio Grey camping area.
Finishing the “O” circuit adds side trips along the French Valley (a must-do hike) and up to Las Torres to watch the sunrise, then heading back down to where you started.
If you want to finish on an alternative route, from Mountain Lodge Paine Grande you can hike along the Rio Grey to the Lago del Toro administration centre.

Trekking In El Chalten
While Torres del Paine is the most popular place to go hiking in Patagonia, the truth is El Chalten is the place that will steal most people’s hearts.
Across the border in Argentina, further north of Perito Moreno and its amazing glacier, is a tiny village called El Chalten that sits in the middle of Los Glaciares National Park.
What makes El Chalten so epic is that not only is entrance to the national park free (yes!!!), all of the hikes start from right in the middle of the village.
So once you’ve finished ticking off the quintessential Torres del Paine treks, head off to tackle some of the best hikes in El Chalten!
- Time Required: 1 hour
- Distance: 2km
- Difficulty : Easy
- Start / Finish Points: El Chaten
Based out of El Chaten is one of the shortest hikes in Patagonia, which mostly consists of a gradual ascent to views from Las Aguilas.
Just because it’s short doesn’t mean it’s not worth doing. The views are quite unexpected, as Viedma Lake appears with a backdrop of stunning, ever-covered mountains of snow.
This is a great hike to do for sunrise in case you don’t feel like camping out in the middle of the park. Return the same way you came.

- Time Required: 8 hours
- Distance: 26km
- Difficulty: Moderate to hard
- Start / Finish Points: Northwest end of El Chalten
This hike will be the one that takes you as close as you can get to the foothill of Mt Fitz Roy, and one of the best hikes in El Chalten.
It’s best off to start early to enjoy the morning alpine glow on the peaks above, but that could be said of most treks in Patagonia.
The trail is pretty mellow to begin with, and there are a few narrow sections through forests which are lovely. Then the hard part comes.
Zig-zagging up and up for the last hour, you will finally reach Laguna de los Tres, with the most epic views of Mt Fitz Roy soaring above you!
Depending how skilled you are in the mountains, there is a climb that proceeds up the peak of Cerro Madsen (1,806 metres) for even better views of Fitz Roy.
Return the same way you came to head back to El Chalten, unless you are deciding to camp at Campamento Poincenot.
Prefer to have a guide? Book your Mount Fitz Roy tour here with Get Your Guide.

- Time Required: 2 days (can be done as a day hike)
- Distance: 19km
- Difficulty: Easy
- Start / Finish Points: El Chalten
A perfect opportunity to get up close and personal with Cerro Torre, reaching into the sky at 3102 metres, can be done as a day hike, but I think it’s pretty cool to take refuge at Campamento de Agostini at the base of Laguna Torre.
This 2-day trek is a culmination of lush meadows, rugged ever-changing glaciers and stunning views of Cerro Torre and its surround snowcapped peaks.
As a side trip, opt for the Mirador Maestri lookout which will add an additional 5 kilometres to your adventure. At Mirador Maestri be prepared for uninterrupted views of Cerro Torre in all its glory!
On return, head back the same way you came with views looking down the Rio Fitz Roy (a glaciated river from Glaciar Torre).
Prefer to have a guide? Book your Cerro Torre tour here with Get Your Guide.

- Days Required: 4 days
- Distance: 63km
- Difficulty: Very difficult
This one is up there as one of the most difficult treks in Patagonia, so be prepared to be fully tested in this stunning lesser-known area of El Chalten.
This Patagonian trek, while demanding in nature, takes you into areas where Cerro Solo can be seen almost standing alone, hence the name ‘solo’.
Mount Huemul is also just as impressive as the contrast between the forest floor, fields of green pastures and rocky spires mix to create stunning views.
The Huemul track puts you to the test with a river crossing almost chest deep as you navigate the Rio Tunel with majestic mountain backdrops.
It only gets harder from here as the Southern Patagonian Ice Field nears, with a climb to Paso del Viento, which is sure to get your blood pumping.
But that’s not all, with a demanding climb to Passo Huemul presenting the clash of Lago Videma (lake) and the walls of the Videma Glaciar.
Views here are gobsmackingly awesome! Take your time to breathe in the fresh air before descending back the way you came.
The Huemul Circuit is considered as a very difficult trek, so its best off to hire a local guide who can help you navigate the rivers and provide insights into one of Patagonia’s most magical areas if you aren’t experienced.
Either way you’ll need a harness and know how to use it, so all hikers on the Huemul Circuit must check in at the information centre before departure to prove they know what they’re doing.

The Best Hikes in Ushuaia
Located at the bottom of Argentina and known as being ‘the end of the world’, Ushuaia is a place that often draws visitors looking to hang out at the bottom of South America. (Click here to read about our experience there.)
It also is a departure point for many people heading off on an expedition to Antarctica.
For those of us that love the outdoors, Ushuaia offers so much more though, and it’s worth spending a few days here to get in some good treks. These are some of the favourite hikes in Ushuaia!
- Distance: 9km
- Start / Finish Points: Refugio Valle Los Lobos
Patagonia isn’t all about multi-day treks, as sometimes the shorter it is the sweeter it tastes. Laguna Esmeralda is an easy 9 kilometre hike to the base of a glacier known as Glaciar Del Albino.
If you prefer to spend extra time taking in the stunning views, a refugios ‘ campsite’ is available near the lake towards the end of the hike allowing you to absorb your surrounds.
At the top, be rewarded with mesmerising views of the Esmeralda Valley down below.
Although this day hike is short, there is an opportunity to put on your crampons and go for a walk along Glaciar del Albino.
The walk on Glaciar del Albino does require advanced hiking skills and that extra bounce in your step, so add up to 4 hours on to your day.
If you’re not fully prepared for it and know what you are doing, don’t go past the 50 metre marker unless your name is Jimmy Chin.
- Days Required: 5 to 6 hours
- Distance: 13km
- Difficulty: Moderate
- Start / Finish Points: Tubera Valle Andorra
This moderately difficult Patagonian trek takes you to a series of glacial lakes with a few steep ascents, making this hike a worthy challenge for avid single day trekkers.
After a series of gradual/steep ascents, Laguna Encatada is finally reached, which is surrounded by lush meadows of grass with reflections of rugged peaks glimmering off its surface.
Hiking to Laguna Encatada provides a unique opportunity to climb the steady peak of Cerro Esfinge, rising to 1275 metres. At the top, the views are breathtaking!
When I think of this hike, I see rugged peaks, flowing hills of dark green grass blowing in the wind with cascading streams of water, and that’s exactly what it is!
The Glaciar Vinciguerra hike sees glaciers precariously wedged between the mountains you are hiking around, as glacial melt trickles past fields of wild flowers.
The water from the glaciers ends up accumulating in glacial lakes where the odd chunk of ice sits bobbing in the freezing waters.
Return the same way you came.
- Time Required: 4 Days
- Distance: 48.5km
- Difficulty: Demanding
- Start / Finish Points: Ruta Nacional 3 or Posada del Peregrine
Deep within the heart of the Fuegian Andes lays one of the more challenging treks in Argentina, but one that you definitely need to consider as a must do hike in Patagonia.
Trekking in the Patagonian Andes wouldn’t be complete with just lush-rugged forests; allow some icy peaks extending from the area’s many glaciers and crystal clear lakes (probably not ideal for swimming) to encompass your surrounds.
This particular trek is a lot quieter than some like the “O” Circuit, as tracks remain barely trodden, so a good sense of direction is always appreciated before attempting this 4 day, 48.5 kilometre trek.
Due to unstable weather conditions in this part of Argentina, it’s always appropriate to take more supplies than you think you will need.
Sierra Valdivieso is a culmination of muddy paths with contrasting streams of blue glimmering glacial water and is something that will acquire your sense of adventure.
This hike in the Fuegian Andes is a classic mix of snow, ice and scree which can be difficult in parts, but once you ascend to the high passes it all makes getting dirty worth it!
Prefer to have a guide? Book your Ushuaia hiking tour with Get Your Guide.

The Best Hikes Along The Carretera Austral
One of the least-visited parts of Patagonia is the long, narrow strip of coastline that makes up the bottom part of Chile.
While most people will make it to Torres del Paine and Puerto Natales , few cross back into the country and continue along the epic highway known as the Carretera Austral.
Public transport is just about non-existent along this long, rugged road, which leaves people to either hitchhike or self-drive between the towns.
When winter comes the place all but shuts down, so that leaves a big part of Chile that not many people see. But that doesn’t mean you shouldn’t check it out!
The Carretera Austral has some insane landscapes and gorgeous mountains and lakes. The coastline is as dramatic as you could imagine, and that all ads up for some amazing hiking!
- Time Required: 4 hours to 2 days (depending on side trips)
- Distance: 8km
- Start / Finish Points: Villa O’Higgins
Patagonia is known for its spectacular glacial landscapes and what better opportunity than to view them by hiking the Laguna Tigre Sur, a moderately difficult hike into some of the most densely populated region of glaciers.
This particular hike is best undertaken with the expertise of a local guide due to it being slightly confusing in regards to finding the correct track to take.
But don’t let that put you off visiting this glaciated area, as Laguna Tigre Sur offers a look into the wilder side of Patagonia, with the odd tricky ridge walk leading you to nearly undiscovered views, glaciers and mountain peaks.
High above the Glaciar Tigre is the Cordon Nevado where chilling winds and extreme temperatures can make things difficult so come prepared for the cold.
There are two side trips to choose from or you can do both with camping spots available. The first side trip leads to the base of the larger Glaciar Tigre Sur where wild flowers thrive in small pockets.
There are a few sections which require the use of your hands to navigate smaller gaps in the larger boulders. At the end of the trail its icebergs galore! Allow 2 hours for this side trip.
The 2 nd side trip continues onto the smaller glacier known as Glaciar Tigre, taking you past large gorges, pristine streams and colourful meadows. Allow 3 hours for this side trip and return the same way you came.
- Time Required: 2 days
- Start / Finish Points: Villa O’Higgins
Similar to what Laguna Tigre Sur provides in terms of glacial views, Valle Rio Moscu is an easy walk generally hiked in 2 days in order to explore a heavily glaciated valley towered by Patagonia’s famous jagged mountain tops.
Hiking at Valle Rio Moscu has a few tricky components such as small stream crossings, best to be taken when the river is low (check with local guides when this is).
The Rio Moscu is a fast-flowing river fed by smaller streams originating from the Cordon de Villa O’Higgins range, while glacial melt from the Ventisquero Rio Moscu contributes an overwhelming amount of water to the raging river.
Ideally it’s best to spend 2 days in the valley as you can explore a spectacular frozen world sitting high in the mountains above.
Camping is available at Refugio Rio Moscu, approximately halfway along the Rio Moscu.

- Days Required: 4 days
- Distance: 62km
- Difficulty: Moderate to demanding
- Start / Finish Points: Las Horquetas Grandes to Villa Cerro Castillo
This 4-day trek will take you through majestic alpine landscapes guaranteed to lead you to plummeting waterfalls, isolated glaciers tucked away into the mountainous backdrops which you will find yourself immersed.
Cerro Castillo is a culmination of everything you think Patagonia is, all jam packed into this one epic Patagonian trek.
It will put you to the test with river crossings in freezing glacial waters, and parts of it needing spot-on navigational skills. Although tracks are well-trodden, they can be impeded by Patagonia’s wild untamed weather.
The whole hike consists of weaving in and out of a valley where mountains range from 1500 metres to a massive 2,675 metres of Cerro Castillo.
Camping is available the whole way along the trek, allowing you to take your time on one of Patagonia’s lesser known hikes which is increasing in popularity.
To gain a different perspective of Cerro Castillo, opt for the side trip into Upper Valle Parada, adding an additional 3 kilometres to your trek, where small lakes such as Laguna Duff remain hidden gems and well worth the extra few hours’ efforts.
The hike finishes at Villa Cerro Castillo, which can be taken by following either the Rio Ibanez or the adjacent path at Morro Rojo peak.
- Days Required: 1 to 2 hours
- Distance: 3.5km
- Start / Finish Points: Caleta Gonzalo
Pumalin Park is one of the world’s most remarkable nature reserves, not just because it is absolutely stunning, but because it would have been wiped off the planet if it wasn’t for a one awesome human being.
Doug Tompkins, the founder of the adventure gear company North Face, bought 400’000 hectares of land that was under threat from logging companies and turned it into a privately-owned by public-accessed park.
He later donated it to the Chilean government under the condition it would continue to be protected. The government agreed, adding more land to it, and today it is South America’s largest national park.
Pumalin Park can be kayaked if you prefer water, as 4 to 10-day kayak trips are available in this stunning part of the world.
However this article is all about hiking in Patagonia, so your best bet is to go for either those shorter hikes taking up to 30 minutes to the more demanding 8-hour plus hikes.
Cascadas is the one to go for as it showcases (as the name suggests) ‘cascading’ waterfalls. You will have to navigate through dense forests and wobbly wooden bridges and ladders before you reach the prize at the end of the trail, being the majestic Cascadas Bajas waterfall.
Camping is available at Rio Gonzalo.

The Ultimate Trekking in Patagonia Packing List
Patagonia is certainly one of the most extreme, potentially harsh climates on earth, therefore it’s necessary to be prepared for all conditions months before you venture to the South American continent.
Hiking gear in Patagonia is quite expensive therefore it’s better to have your gear sorted before you travel to your destination. This packing list for hiking in Patagonia should give you a good idea on what to bring.
- Good quality, lightweight tent. Check out our guide to the best backpacking tents to find one that suits your style and budget.
- Thermal layering including top and pants
- Hiking pants, both long and short, or get convertible pants. These should be waterproof, otherwise get a pair of slip-over waterproof pants as well
- Gore-Tex (waterproof) hiking boots
- Quality backpack for hiking
- Down jacket – these puffy jackets are essential for keeping your torso warm
- Rain and wind jacket – make sure you get a quality jacket that doesn’t leak
- Sleeping bag and silk liner – The warmer the sleeping bag the better
- Cold weather gloves – you will need waterproof gloves aswell as a pair of inner gloves to keep your fingers warm
- Plenty of socks (dry socks are the best)
- A beanie – keeping your head warm is essential
- Hiking poles – if you’re carrying a heavy bag, hiking poles will help you balance. They also provide support for your knees.
- Ability to carry sufficient water (5 litres is ideal)
- Food to last the entire hike. You can pre-order food in some of the refugios in Torres del Paine, but that’s about it. Better to be over-prepared and over-fed then the other way around when hiking.
[box] Have you ever been hiking in Patagonia? Leave a comment below and tell us what your favourite trek was![/box]

Calumn Hockey
Hi, We’re Alesha and Jarryd!

We’ve been traveling the world together since 2008, searching for the planet’s best destinations and adventures.
Love Travel?
Sign up for our free weekly newsletter for the best travel tips, ideas and deals!
We respect your privacy. Unsubscribe at any time.
READ MORE...
Quark Ultramarine Review – Best Polar Expedition Ship [2024]
30 Awesome Things to Do in Easter Island
The Land of Spears and Smiles – Wogasia Spear Festival on the Solomon Islands
Related Posts
Gopro hero 11 review – is it worth upgrading in 2024, looking back on 2018 (and what’s to come in 2019), life on the indian pacific – australia’s ultimate rail journey, the ultimate guide to the lakes loop hike, tajikistan, 18 thoughts on “hiking in patagonia – the ultimate guide to the best treks”.
Happy to read your post. I found your blog is very useful and informative. Thank you for sharing with us.
Actually, I am planning to hike in Patagonia in December. I hope I will have good weather. I loved your article; fascinating and helpful.
Patagonia is such a special place. Hope you get good weather. Even if you don’t it is still so beautiful in the rain or snow. Happy travels
Why you keep lying that Patagonia is chilean? Patagonia is ONLY on the Argentinian side (EAST of Los Andes.
Mt. Fitz has been high on our list since we saw Tommy Caldwell and Alex Honnold do the traverse there. I don’t think we’re up to the standards of the traverse but we’d definitely like to do some hiking around there, looks epic!
Great article guys, thanks!
Glad you enjoyed the article. Hope you get to climb Mt Fitz one day. 🙂
Great work guys, will definitely follow you in instagram, could you recommend some good travel companies who can help me with these hiking circuits, will be a solo traveller.
Hi Basu, thank you so much. We did our hikes through Eco Camp and they were brilliant. They have nice accommodation. We did not go with any other agent. 🙂
Thanks for this comprehensive list of treks near El Chalten. Could you tell me how is the biking scene in the town? I am a cyclist and love to ride in new places I visit. I was planning to take my bike on my trip to El Chalten, but not sure if it will be a good idea.
Glad this article could help. We didn’t go biking ourselves in El Chalten so we can not say about the treks. We are sure there is some in the area. If you contact one of the adventure tour companies they may be able to help. All the best and have a great time.
Fantastic blog! For the short hikes ie. <5 hours, are the trails easy to follow or well marked or do we need to know how to navigate? Thank you!
Thank you so much. Yes the paths are easy to follow and there are signage. You do have to have your own wheels to get to some of the hikes as the tourist shuttle doesn’t go near the beginning of them. Have a great time
This was great! Thanks! I know the answer to this, but I’m going to ask it anyways. Since there are camping spots along the way, are there toilets? Should we buy biodegradable TP for the day hikes?
Hi Sam, there are toilets at the campgrounds. Surprisingly all of them are flush toilets. Toilet paper is provided but always bring your own as the toilets run out. When you are hiking and need to use the bush toilet. Please bury your business and pick up your toilet paper. Thanks
Great Post, looking forward to exploring Patagonia.
Thank you so much
Love your blog 🙂 I wish I had more money to travel, cos nothing is better then collecting memories while traveling.
Thank you so much Miljan. Collecting memories is beautiful
Leave a comment Cancel reply
Save my name, email, and website in this browser for the next time I comment.
Everything You Need to Know About Hiking the Torres del Paine O Circuit
By Author Steph Dyson
Posted on Last updated: 6th October 2023
While the W trek may be what brings the hordes to the park, the O Circuit is Torres del Paine National Park’s undisputed gem.
Untouched landscapes of Magellanic forests, a rich array of wildlife, and more glaciers per day than is probably your fair ratio, this trek goes above and beyond what the W can offer – and you get to finish with the torres themselves anyway.
What’s more, it’s a far quieter route. Since 2017, the O Circuit has only allowed a daily visitor number of 70, which might seem a lot, but in practice means you are unlikely to bump into too many others until you reach camp at night.
As a result, there’s more opportunity for catching a glimpse of the native Patagonian fauna, including guanaco and even pumas, and more time for taking photos free of other hikers. Magic.
I’ve visited the national park on a number of occasions and had the fortune to hike both the W and the Circuit.
Therefore, this guide to the O Circuit in Torres del Paine National Park aims to show you how you arrive prepared for this trek, with everything from booking campgrounds, to sorting food and planning your equipment list included.

Trust me: you’re about to embark on what will soon rank as one of your favorite hikes in Patagonia.
Click to navigate this article:
What is the O Circuit?
The O trek, O Circuit or Full Circuit all refer to the 136-kilometer (85-mile) hike that is the second most popular trail in Torres del Paine National Park in Patagonia*.
The trail begins at the Laguna Amarga entrance to Torres del Paine National Park and completes a full loop of the park, passing anti-clockwise around the back of the Cuernos del Paine, and then up and over the John Gardener Pass and alongside Glacier Grey and the Southern Patagonia Ice Field.

You then join the better-known W trail to end your trek at the striking granite torres (towers) that give the name to the park.
* find out more about the shorter and more popular Patagonia hike, the W or read about the best day hikes in Torres del Paine or this complete guide to Torres del Paine National Park (for hikers and day trippers alike ).
Planning Your Trip to Patagonia?
Save time, stress & money with a customized travel itinerary planned for you by a Patagonia expert
What previous clients have said:
“Steph’s itinerary exceeded all expectations. She provided off-the-beaten-path hikes, great restaurants and accommodations, and very helpful local contacts. Due to the weather we had to deviate from our original plan, however Steph quickly responded to our email during the trip with further recommendations. Her service took all the guesswork out of planning our vacation and led to the most fun and unforgettable trip we have ever had!”
But is the O Circuit really accessible for those without much hiking experience and what’s the ideal number of days to aim for?
Do I need to be really fit and an experienced walker to hike the O Circuit in Torres del Paine?

The O trek is a challenging hike; you’re covering 136 kilometers (85 miles) across just nine days, and you’re also gaining significant elevation on two of those days. You’ll also likely be carrying camping equipment and food on your back, which can wind up being very weighty.
However – and I go into this further in my article about the 14 essential things to know before embarking on the O – ultimately anyone can hike the O Circuit.
Sure, it helps if you’ve broken your boots in, have a decent rucksack that fits and won’t cause you discomfort, and know how to cook up a meal with only a stove and a few pots, but realistically, the only barrier to the O Circuit is your own self-belief.
It remains the longest hike I’ve ever done and while I come from a family of walkers (my dad does four-month long-distance hikes around Europe every other year), it was a challenge, but one that could be overcome with preparation.

Scroll to the FAQ section of this article for more information about how to prepare for this trek.
What is the distance of the O Circuit?
The O Circuit in Torres del Paine is a 136-kilometer (85-mile) hike*. Depending on your fitness levels and your familiarity with carrying a heavy rucksack, it is possible to hike it in anything from six days to eleven. In general, it takes people nine days to hike the O Circuit.
When we did it, we hiked it in nine days, which is what I’ll use to illustrate the trek in this post. I’ll also indicate where and how you could shorten or extend the number of days.
While you are not obliged to stay at every refugio (refuge) or campground in the park (and instead can turn two of the days on the O Circuit into one if you’re a fast, fit hiker), you are required to hike the O Circuit anti-clockwise.
*Differences in distant lengths abound across the internet for this trek! The distances quoted in this article were recorded during our hike of the O Circuit and include the hike from Laguna Amarga to Serón (rather than from Hotel las Torres to Serón where most people start) as well as the hike back from Hotel Las Torres to Laguna Amarga at the end of the trek (and which many people instead opt to take the minibus transfer).
Which months can I hike the O Circuit?
The official opening date of the O Circuit entirely depends on when CONAF decide to open the trail. This normally happens in November, with the hiking season continuing until the end of March and sometimes into April, with November and March being the b e s t times for visiting the national park and Patagonia as a whole .
During the low season (1 st of April until 31 st of October), the O Circuit is closed.
Torres del Paine Circuit map

The cost of hiking the O Circuit in Torres del Paine National Park
Unfortunately, trekking in Torres del Paine National Park isn’t cheap. This is because you have to pay for every campground that you stay at, in addition to a fairly high national park entrance fee.

The cheapest way to hike the O Circuit is to bring all of your own food and camping equipment into the national park with you, leaving you to only pay fees for your bus transport, admission into the national park and campgrounds.
If you to backpack the Torres del Paine O Circuit, you can expect to pay $167,000 CLP ($186 USD)*:
- Return bus from Puerto Natales to Torres del Paine National Park: $22 USD
- Adult entrance fee into the park for three+ days: $49 USD
- Serón Campsite: $25 USD
- Dickson Campsite: $10 USD
- Los Perros Campsite: $10 USD
- Grey Campsite: $10 USD
- Paine Grande Campsite: $12 USD
- Francés or Los Cuernos Campsites: $25 USD
- El Chileno or Las Torres Campsites: $25 USD
We also spent only $17,000 CLP ($27 USD) per person for food for the entire trek)
*all figures are per person, based on two people sharing a tent and trekking the O Circuit in nine days
If you don’t want to have to bring camping equipment and instead want a tent, sleeping bag and sleeping mat set up for you at each campground, you can expect to pay $462,000 CLP ($515 USD)*:
- Adult entrance fee into the park: $49 USD
- Serón Campsite: $70 USD
- Dickson Campsite: $58 USD
- Los Perros Campsite: $58 USD
- Grey Campsite: $58 USD
- Paine Grande Campsite: $60 USD
- Francés or Los Cuernos Campsites: $70 USD
- El Chileno or Las Torres Campsites: $70 USD
If you want to backpack the O Circuit and not carry any food, you can expect to pay an additional $454,000 CLP ($508 USD)* on top of the above prices:
- Serón Campsite: $88 USD
- Dickson Campsite: $61 USD
- Los Perros Campsite: $61 USD
- Grey Campsite: $61 USD
- Paine Grande Campsite: $61 USD
- Francés or Los Cuernos Campsites: $88 USD
- El Chileno or Las Torres Campsites: $88 USD
* all prices are full-board, including breakfast, a packed lunch and dinner
Making camping reservations for the Circuit in Torres del Paine
You can only stay in the official refugios (basic dorm-style accommodation) and campgrounds in the park; wild camping is not permitted and you could well receive a hefty fine for attempting it.

Booking camping pitches or refugio is necessary for hiking the Circuit in Torres del Paine National Park; in fact, you may not be allowed entry into the national park if you cannot show your reservations.
The campground and refuges tend to book up at least four to six months in advance in high season (December through March) and a couple of months in advance for October, November and April.
If you cannot get reservations, it’s sometimes possible to visit the offices in Puerto Natales of Vertice Patagonia and Las Torres (formerly known as Fantastico Sur), who operate the refugios and campgrounds in the park and see if they have space to accommodate you due to a last-minute cancellation.
While you are not obliged to stay at every refugio or campground in the park (and instead can turn two of the days on the O Circuit into one if you’re a fast, fit hiker), you are required to hike the O Circuit anti-clockwise. Therefore, you need to ensure that you make reservations in this direction – you’ll face problems otherwise!
I’ve gone into a surreal level of detail in another post about reservations for Torres del Paine (scroll down for the section about the O Circuit) that should answer all of your questions and give you a sense of prices and facilities available at each of the different overnight stops.
The website Torres Hike shows you the availability of accommodation and allows you to book it directly through them , rather than having to go via the Vertice Patagonia and Las Torres websites. All you need to do is plug in your dates and it’ll show you which campgrounds and refugios are available – saving you LOTS of time.
Equipment for hiking the O Circuit in Torres del Paine
While you can actually stay at refugios every night along the O Circuit (see below), most people instead choose to camp and self-cater – either for monetary reasons or just for the fun of it. This, therefore, adds a considerable degree of weight to your rucksack.
However, every hiker is only as fit and athletic as their rucksack is light and refined.

Regardless of how strong you might be, carrying a four-kilogram tent is going to slow you down dramatically. Ditto overpacking clothing that you never wear and lugging heavy gas bottles and saucepans.
Camping and trekking equipment
My dad does some pretty extreme long-distance hiking across Europe and so he knows a thing or two about packing ultralight. I’ve learned from him that to streamline your pack and your speed, I would highly recommend:
I’ve learned from him that to streamline your pack and your speed, I would highly recommend:
- A comfortable 60-liter rucksack. I found 60 liters was perfectly big enough for hiking the full O Circuit – any bigger and you can start to overpack to fill the space; I highly recommend Berghaus, which has a fully adjustable back system and is available on Amazon or check out the highly-regarded Osprey rucksacks for women on REI | Osprey | Amazon and for men on REI | Osprey | Amazon .
- A lightweight backpacking tent. This is likely the heaviest part of your camping equipment and so needs to not weigh you down; I recommend the Big Agnes Copper Spur HVUL 2 Tent (1.4kg/3lb 1oz), which you can find on REI | Backcountry | Amazon . If you’re after a cheaper option and are in the UK, the Wild Country Zephyros 2 is a great alternative. For those on a budget in the US or Canada, check out the North Face Stormbreak 2 ( REI | Backcountry | Amazon ) or the North Face Stormbreak 3 ( REI ).
- A warm, lightweight sleeping bag. It can get cold on the O Circuit, so you want something that will still provide the warmth you need but won’t be too bulky or provide unnecessary additional weight; I recommend the Rab Ascent 700 Women’s . If you’re in the States or Canada, for women, the Marmot Trestles 30 ( REI | Backcountry | Amazon ); for men, the cheaper Marmot Eco Elite 30 ( REI | Backcountry ).
- A lightweight sleeping pad. A decent sleeping pad is the difference between a comfortable sleep and one spent feeling every single one of the stones underneath the tent; Therm-a-Rest ProLite is good ( REI | Backcountry ) or find a more inexpensive sleeping pad on REI | Backcountry | Amazon .
- A camping stove and fuel. You want something lightweight but powerful that won’t use up too much fuel (because you have to carry it or buy it for elevated prices at the campgrounds!); the MSR Pocket Rocket is a great option, and can be found on REI | Backcountry | Amazon .
- Camping pots. Again, lightweight and non-stick are your mantras here; Head into your local camping store or buy the MSR pots ( REI | Backcountry | Amazon ).
- Collapsible bowl. Being able to fold it down saves space and also makes it a slightly less awkward shape to fit in your rucksack. Several companies are now offering these. You can find them on REI | Backcountry | Amazon
- Camping mug. Go for a durable and lightweight plastic or metal one; Pop into your local supermarket or camping store for a cheap one or buy one on REI | Backcountry | Amazon
- Spork or similar. You don’t want to bring much cutlery but you do want something that doesn’t snap in your rucksack; Opt for titanium for more durability such as these ones on REI | Backcountry | Amazon

Essentials you might not think about:
- Toilet paper. All of the toilets along the W part of the trek have paper, but many of those on the O Circuit don’t. Don’t get caught out!
- A rain cover for your pack. It rains all the time in Torres del Paine National Park and, if your rucksack doesn’t already come with its own rain cover, I suggest buying one. Just make sure it fits securely, as you don’t want it blowing away. This one by Osprey ( REI | Osprey | Amazon ) should fit your rucksack without letting water in at the top where the bag straps are.
- A dry sack to be used as a rucksack liner. In case of heavy rain, you also want to make sure that water doesn’t break through into your bag and get all of your clothes wet, which can still happen, even with a rain cover. I suggest a 35- or 40-liter dry bag that can be used as an internal liner for your bag for all items that need to remain dry and closed up inside your rucksack. Check them out on REI | Backcountry | Amazon
- A book or cards. Some of the days are actually quite short in terms of hiking, so a book or pack of cards is great for periods of downtime.
- A charger for your phone or camera. You can actually find electricity in many of the campgrounds (see the full list of facilities available in this guide to camping in Torres del Paine ), so you’ll want to bring a charger to make use of them and to keep your electronics alive for all the photographs you’ll take!
For clothing, I would also recommend:
- Hiking boots. You want some that are comfortable and that you’ve broken in (i.e. you’ve worn them on a number of occasions before to loosen up the fabric) so that they don’t give you blisters!; Check out the Salomon hiking boots for women on REI | Backcountry | Amazon or the men’s version on REI | Backcountry | Amazon
- Base layer hiking socks (x3 pairs). I wear a thin pair of socks underneath a thicker pair of socks as I’ve found this helps me avoid getting blisters. You may just want the thicker pair, but it’s worth trialing with both on a hike to see which is most comfortable; Get socks on REI | Darn Tough | Amazon
- Outer layer hiking sock (x2 pairs). As above; Get them on REI | Darn Tough | Amazon
- Gore-Tex waterproof jacket. This is essential for keeping you warm and dry – rain is a very common occurrence in the park, even in summer!; I love the Patagonia Storm10 Jacket as it’s an ultralight, easy-to-pack but fully waterproof jacket ( Patagonia ); the North Face Alta Vista Jacket ( Amazon | REI ) is significantly cheaper but offers good weather protection. For him: check out the men’s version of the Patagonia Storm10 Jacket on REI | Backcountry | Patagonia ; the North Face Alta Vista ( Amazon| REI ) is a good shout. I’ve also heard great things about Arc’teryx ( REI | Amazon ) too
- Waterproof and windproof pants. I bought these last-minute in Puerto Natales and was so thankful I had them to protect me not just from the rain but also from the fierce wind; These zip-off rain pants are great for women: available at REI | Amazon ; these rain pants are great for men: available at REI | Amazon .
- Trekking poles. These were essential for the John Gardner Pass, particularly on the way down which was steep and exceedingly muddy. You don’t need to spend loads on them but you do want some that pack down small and light and that are sturdy; Check them out from Black Diamond on REI| Backcountry | Amazon .
- Sandals. We had fairly unusual weather and had to ford a couple of streams that had swollen because of rainfall (something that is very rare but could happen). We found Teva sandals to be the best for this and were also good for evenings when you could wear them with socks and give your feet a break from your hiking boots; Get them for her on REI | Backcountry | Amazon and for him: REI | Backcountry | Amazon – and they’re great for covering long distances in cities comfortably, too!
- Basic short-sleeved or strappy top (x2) for hiking
- Long-sleeved top (x2) for hiking and layering
- Fleece jumper (x2). These are great for the evenings or morning when it’s cold; Check them out for women: REI | Backcountry | Amazon ; for men: on REI | Backcountry | Amazon
- Insulated down jacket. Again, these are great for the cold weather in the mornings and evenings and tend to pack down very small and not weigh much; I love my new Jack Wolfskin down jacket ( Amazon ), as it’s extremely warm and lightweight; REI has great options for men and a helpful guide to choosing one .
- Hiking trousers, zip off at the knee (x2) or shorts. Comfortable trousers that don’t chafe anywhere are essential, while zip-offs allow you to adapt to the weather; Find them for women on REI| Backcountry | Amazon . For men, check these out on REI | Backcountry | Amazon .
- Thermal underwear. I found this was necessary at night time because it can get cold, particularly at the Los Perros and Paso campgrounds; for women: top ( Under Armour | Amazon ) and bottoms ( Under Armour | Amazon ); for men: top ( REI | Under Armour | Amazon ) and bottoms ( Under Armour | Amazon )
- Leggings (x1). I use these for either walking or as warm pajama alternatives. Available from REI | Amazon
- Warm hat, gloves, and scarf or a Buff. Again, you want to stay warm in the evenings when the temperature drops and a buff is good wind protection for your neck and face when you’re hiking; Get a buff from REI | Amazon
For further details and advice, check out this article dedicated to helping you decide what is essential to pack for Torres del Paine (i.e. lightweight gear is your friend). And this one about packing for a trip to Patagonia is pretty damn useful too.
Food for the O Circuit
Long-distance hiking requires you to strike the right balance between food that’s lightweight enough that you can physically carry it and meals that provide enough nourishment for you to wake up in the morning.
It’s a delicate balancing act, but one that’s certainly not impossible. Our rule was to pack out our meals with plenty of carbs while including ingredients and condiments that would provide the flavor and make it more than edible.

Additionally, we wanted meals that cooked quickly so that we weren’t gnawing our arms off at the end of a long day of hiking and ones that didn’t use up all of our fuel for the camping stove too quickly.
Staple dishes that are both lightweight and easy to cook include:
- Quick-cook porridge made using powdered milk and with added sultanas for flavor and additional energy
- “Sandwiches” made from two biscuits with a wedge of cheese between them
- Dried soup in a cup for a quick energy fix
- Bacon and courgette rice – both flavorsome and packed with carbohydrates!
- Chorizo and tomato pasta – also tasty and really quick to cook
If you don’t have time to organize food when you get to Puerto Natales or you’d prefer to do less cooking, Mountain House have a great selection of pre-prepared trekking food available on REI and Amazon , which just needs you to add water. Bear in mind they are fiendishly expensive and home-cooked food is always tastier – but they’re a good option in a pinch!
For a complete list of the food we carried (on a budget of only $17,000 CLP ($27 USD) per person for the entire trek), check out this article on your Torres del Paine menu .
It also lists where you can find additional food and drinks (i.e. beer) at the various campsites and lodges around the park.
If you’re already traveling around Patagonia, where can you get camping equipment for Torres del Paine?
If you are traveling to Patagonia just to hike the O Circuit or are planning on doing a number of different hikes while you’re there (there are some great national parks along the Carretera Austral , for example), I would recommend bringing your own camping and trekking equipment.
Prices for buying this type of gear in Chile are elevated and you’ll likely pay significantly more than you would buying the same items at home.
However, if you are traveling long-term across South America or don’t want to have to carry all of your camping equipment during the rest of your trip, you have three different options available to you:
Buy equipment in Punta Arenas or Puerto Natales
There are a number of hiking and camping equipment shops in these two towns. Punta Arenas is a tax-free zone so prices here are cheaper than you will find in Puerto Natales, although Calle Manuel Bulnes in the latter has some gear shops.
I actually found a pair of waterproof trousers for only $15,000 CLP ($21 USD) in one of the shops there, which is a lot cheaper than I thought they would be.
If you’re looking to buy equipment for camping and hiking in Torres del Paine National Park, you should be able to find everything that you need in these shops, but you will pay an elevated price for good-quality gear.
Estimated additional cost: $360,000 CLP+ ($400 USD+) per person
Rent equipment from Puerto Natales
Your second option is to rent all of your camping and cooking equipment from either Rental Natales (you can book online but they are very expensive), Yaghan House (O’Higgins 584; contact them here to reserve; they also have a 12pm daily talk about the park) or Lili Patagonico’s (Arturo Prat 479; you can book online here ). The latter two have cheap, good-quality rental gear.
Remember to check the equipment thoroughly before committing as it does get a lot of wear and tear on the trail and you want something without holes and with zips that close to keep you warm and dry!
Estimated additional cost: $29,500 CLP ($33 USD) per person per day based on two people sharing a tent
Rent equipment at each campsite in Torres del Paine National Park
Your final option is by the far the most expensive. Each of the main camping grounds in Torres del Paine rents out tents, sleeping bags, and sleeping mats at a premium.

For example, in Grey , you can hire a two-man tent for $29,000 CLP ($32 USD), a sleeping bag for $21,000 CLP ($23 USD), and a sleeping mat for $8,000 CLP ($9 USD), bringing up your overnight cost (including cost of the camping site) to $53,000 CLP ($58 USD) per person per night (based on two sharing).
Bear in mind, this doesn’t include the cost of hiring cooking equipment (which you can’t do at the campsites), so you will also need to pay for meals at each – an additional cost of between $55,000 CLP ($61 USD) and $80,000 CLP ($88 USD).
Estimated additional cost: $462,000 CLP ($515 USD) per person for equipment plus $454,000 CLP ($508 USD) per person for meals for eight days hiking the O Circuit (based on two people sharing a tent).
How to get from Puerto Natales to Torres del Paine National Park
There is plenty of public transport to get you from Puerto Natales to Torres del Paine National Park.
Four companies travel from Puerto Natales to Torres del Paine each morning and all cost around $20,000 CLP ($22 USD) for a return ticket. The return ticket must be used to return with the same company, but can be used on any day or time of bus.
You must buy tickets either online or from the companies’ offices, which are inside the Terminal Rodoviario (Av. España 1455) in Puerto Natales.
If there are a few of you, consider negotiating a group price. We did this and it got us a few thousand pesos off per ticket. It’s advisable to book your bus ticket at least a few days in advance when visiting the park in high season (December through March).
The main bus companies are:
- JB Buses Patagonia (tel. 61/2410 242)
- Transport Maria José (tel. 61/2410 951)
- Buses Juan Ojeda (tel. 9/8943 7808)
- Buses Gómez (tel. 61/2415700)
- Bus Sur (tel. 61/2410 784) – you can book these online and in advance
Between September and April, the buses you want leave at 7am and 7.15am or 7:30am from the bus terminal in Puerto Natales. The buses arrive at Laguna Amarga, where you get off the bus, show your entrance fee (you need to book it here in advance and download the QR code: there is no internet at Laguna Amarga), and start the trek, at 9am and 9.15am/9.30am.
Try and pick an earlier bus; queues can be long for later departures and for those when multiple buses are leaving (and arriving at Laguna Amarga) at the same time.

For the return journey from Laguna Amarga, they pick up at 3pm and 7.45pm each day (pre-pandemic they picked up at 11.30am, 1.30pm/2pm/2.30pm, 6.30pm, and 7.45pm each day but I’m not sure if those times are still correct). The exact times depend on the specific bus company; Bus Sur has the most frequent departures.
From Laguna Amarga, you need to:
- Take a minibus shuttle service to the Welcome Centre (Centro de Bienvenida) from where it’s a nine-kilometer (5.6-mile) hike to reach the Serón campground. These buses leave directly from Laguna Amarga at 9am, 3pm, 5pm and 8pm daily (and will wait while people are showing their ticket to enter the park). From here, there are signposts directing you to the O Circuit.
I used to suggest a direct hike from Laguna Amarga to the Serón campsite, a 14.3-kilometer (8.9-mile) route, however this is now closed to hikers. You must begin hiking from the Welcome Centre (Centro de Bienvenida) instead.
Where do you buy your Torres del Paine national park entrance ticket?
The entrance ticket to Torres del Paine National Park costs $35 USD for an adult and $17 USD for children aged 12 to 17 to stay up to three days in the park. If you plan on staying for over three days in the national park, it will cost you $49 USD for both adults and children.
You must book your entrance ticket before you enter the park using this website . You need to download the QR code in Puerto Natales while you have internet (there is no signal in the park) and may need to show a copy of your passport to prove you do not live in Chile.
Hiking the O Circuit in Nine Days
The following day-by-day route description indicates how you can hike the O Circuit in nine days. There are ways that you can adapt the itinerary, either by reducing the number of days or lengthening them. I indicate where the best places to do this are.
Remember, you are only able to camp in the official campgrounds across the national park, which explains why some of the hiking days are very short – but unless you want to combine two days into one, there’s very little you can do to get around this.

The data and hiking times were compiled from my last trip around the O Circuit. For context, our party consisted of my brother and me (both in our early 30s and reasonably fit) and two mid-60-year-olds (again, reasonably fit). We carried food for all but one day as well as lightweight camping equipment.
Total Distance of the O Circuit: 1362 km (82 mi)
Day One: Laguna Amarga to Serón
Distance hiked: 13 km/8 mi
Hiking duration: Five hours and 30 minutes (including around an hour’s worth of stops).
Average pace: 3.9kph/2.5 mph.
7:00am/7:15am Take the bus from Puerto Natales bus terminal. The early bus you take, the less likely you are to queue behind other hikers to buy tickets when you reach the national park.
9am Arrive at the Laguna Amarga Rangers’ Station and show your pre-purchased ticket ( here ) to the park rangers. This can take up to an hour, depending on the queues.

Today is an easy introduction to Torres del Paine National Park. From the ranger’s station at Laguna Amarga, take a minibus shuttle service to the Welcome Centre (Centro de Bienvenida). These buses leave directly from Laguna Amarga at 9am, 3pm, 5pm and 8pm daily (and will wait while people are showing their ticket to enter the park). From here, there are signposts directing you to the O Circuit.
Alternatively, hike to the Welcome Centre (10 kilometers (6.2 miles)) along the road.
When I visited, I took the now-prohibited trail alongside the Río Paine – a tumbling mass of water – for the vast majority of the day. The trail from the Welcome Centre instead hikes through a forest and joins this river around eight kilometers (five miles) into the hike. From there, you follow the river a further five kilometres (three miles) to reach the Serón campground

4pm Arrive at the Serón campsite. Find a pitch with a little wind protection (there aren’t very many like this!), enjoy a hot shower if you need it (!), and make use of their covered shelter for cooking dinner.
Day Two: Serón to Dickson
Distance hiked: 18.61 km/11.5 mi
Hiking duration: Six hours 15 mins (including one hour’s worth of stops)
Average pace: 3.63 kph/2.25 mph
Elevation change: Up 534 m, down 495 m
8am Rise early for breakfast and a decent morning start to the day’s hiking.

9am Leave camp and begin your trek towards Dickson. The first part of the day is flat as you follow the route of the Río Paine up to Lago Paine. You’ll climb up a number of steep headlands for great mountain views, before continuing along the side of Río Paine towards one of its sources: Lago Dickson.
The views of Lago Dickson and the campground nested on a grassy flat beside are magnificent.
4pm Arrive at Dickson campground and pitch up. There’s a geodesic dome where you’re required to cook all food and various picnic tables dotted around the site for eating. Don’t forget to head to the edge of the river through the woods on the northern side of the campsite to see the hanging glaciers perched vertiginously above Lago Dickson.
Hiking the O Circuit in fewer days: You can combine the trail from Laguna Amarga to Serón and from Serón to Dickson into one long day of hiking. This comes in at 31.6 km (19.6 miles) in total.
Day Three: Dickson to Los Perros
Distance hiked: 12.65 km/7.9 mi
Hiking duration: Five hours 30 mins (one hour 15 minutes of stops)
Average pace: 3 kph/2 mph
Elevation change: Up 575 m, down 208 m
8:30am Wake up and have breakfast

9:30am Leave the camp. The path climbs up into the forest in the south behind the campground, with the trail emerging out of the woods for spectacular views back across the lake in the north and towards John Gardner Pass in the west.
From now on, you can see glaciers in the mountain cliffs ahead, and you’ll pass just before the camp alongside the beautiful Laguna Los Perros, with its namesake glacier hanging above the water.

3:30pm Arrive at Los Perros and find a sheltered spot in and among the trees to pitch up. There’s a hut for cooking and eating at the center of the site, which provides good protection from the weather.
Day Four: Los Perros to Grey
Distance hiked: 18 km/11 mi
Hiking duration: 9 hours (two hours of stopping)
Average pace : 2.3 kph/1.43 mph
Elevation change: Up 690m, down 1516m
6:00am Wake up and have a good breakfast – you’re going to need it for today’s climb!
7:00am Leave camp by 7am at the latest. The weather is better and the wind lower in the early morning, so the quicker you make it over Paso John Gardner the better your chances of sensational views across the Southern Patagonian Icefield.

The trail climbs up through scree and boulders, passing hanging glaciers on each side of the narrowing valley.
It’ll take you around three hours to summit the 1,180-metre (3,871-foot) John Gardner Pass John Gardner, from where, on a clear day, you can expect truly astonishing views across the Southern Patagonian Icefield and Glacier Grey. The latter measures around six kilometers wide at this point and is truly incredible.

The wind can be fierce, so take things carefully as you begin the climb down, which descends via a series of switchbacks and is generally a bit of a muddy and rocky bog.
The path passes alongside Glacier Grey, which you can see through the trees at regular intervals.
1pm Pass Paso, a former CONAF-run but now closed campsite. Continue to Grey, enjoying the different viewpoints of Glacier Grey. The path goes up and down gently for a while, often with fantastic views of the glacier, before passing into a series of different gullies, some of which you must climb out again with the aid of a metal ladder drilled into the rock.

After around 3.6 kilometers (2.3 miles), you reach the first of two wooden bridges perched across two steep river gullies, which can be a trial for anyone with vertigo. Around two kilometers (1.2 miles) after the second, a small pathway leads off the main trail and back to the right; this is Mirador Grey and is the closest viewpoint that you can get of the glacier face on.
5pm Arrive at Grey and stay overnight.

Day Five: Grey to Paine Grande
Distance hiked: 11 km/6.8 mi
Hiking duration : Four hours (one hour of stopping)
Average pace : 2.8 kph/1.75 mph
Elevation change: Up 614 m, down 316 m
8am: Today is a relaxed day, so you can either get up early and go kayaking or ice trekking on the glacier or spend a bit more time in bed.
10am: Take the trail heading south. You’ve now officially joined the W! From here, it’s a further 11 kilometers (seven miles) to reach Paine Grande, with a couple of further viewpoints of the glacier thrown in for good measure. The trail is mostly downhill.

3pm: Arrive at Paine Grande. Pitch up as close to the side of the hill as possible to avoid the wind. There’s a huge shelter with plenty of space for cooking and loads of benches for you to sit and eat. You’ll also find a number of power sockets here.
There are hot showers (four per gender) which open at in the early evening (timings are written on the doors to the toilet block). The queue for the women’s starts early.
Hiking the O Circuit in fewer days: I know of people hiking from Los Perros all the way to Paine Grande. Again, this would be a very long day of hiking and would come in at 26.6 km (16.2 miles) in total.
Day Six: Paine Grande to Francés
Distance hiked: 13 km/8 mi (+ 9 km/5.6 mi for the extension to Mirador Británico), 4 hours hiking
Hiking duration : Five hours 15 mins (one hour 15 mins of stopping) + three hours for extension to Mirador Británico
Average pace : 3.25 kph/2 mph
Elevation change: Up 555 m, down 495 m*
8am: Wake up and eat breakfast. Today will either be long or painfully short – all depending on the weather. Both times I’ve walked Torres del Paine W hike I’ve experienced dreadful weather in the Francés Valley.
9am: Hike to the ranger station and campsite, Campamento Italiano (around two hours), where you leave your rucksack with the ranger. You’ll pick it up on your way back down from the Francés Valley.

This part of the hike marks the central section of the W and it’s all uphill. After an hour’s steep gradient up a rocky, slippery trail to Mirador Francés, look for Glaciar Francés as it clings to the mountainside in the west.
If you’re feeling energetic, and the weather’s playing fair, you can continue climbing to Mirador Británico (an additional 3.5 km each way; around three hours’ return), where you’ll view a ring of toothy granite peaks, including the park’s second most famous landmark, the three-horned Cuernos del Paine.
It’s one of the park’s most stunning viewpoints—when the sky is clear. You may even see an endangered Southern Andean huemul (a type of deer) around here.

Luckily, the hike back is downhill to return to Italiano, where you pick up your rucksack and hike the 30 minutes to reach Francés.
13:00pm-16:00pm Arrive at Francés**, pitch up (some skill will be required to do this on the wooden platforms. Make sure you bring some string or extra guy ropes to help you), and enjoy the views across the lake. Check-in doesn’t start until 2.30pm and hot showers aren’t available until 5pm, so take your time on the hike if the weather is rubbish and it looks like you won’t be making it up to Mirador Británico!
* because of the weather, we didn’t hike up to the Mirador Británico, so this elevation change doesn’t reflect the 500-meter (1,640-feet) elevation gain to reach the mirador.
*if there is no availability at Francés when you go to make your refugio or campsite reservations , you can instead book to stay at Los Cuernos, which is a further 3.5 kilometers (one hour) from Francés.
Day Seven: Francés to El Chileno
Distance hiked: 17 km/10.5 mi
Hiking duration : Six hours (two hours of stopping)
Average pace : 3.7 kph/2 mph
Elevation change: Up 740m, down 360m
8:00am Get up, have breakfast, and pack up your tent.
9:00am Leave the campsite and begin the trek to El Chileno, situated about two hours from the bottom of the towers.

This trek meanders alongside the lake, gaining and losing altitude as it goes, until you reach the start of the valley where it becomes all uphill. The views are incredible but if it’s sunny, it will be hot!

16:00pm Arrive at El Chileno* and pitch your tent. Get everything organized for the morning as you’ll be leaving early. Check with the staff what time sunrise will be the next morning.
*Campamento Torres, the campground just below the towers, is no longer open to the public. It’s not as easy to get to the towers for dawn as the distance is now around four kilometers , rather than one kilometer ; however, it is still possible to do it.
If you can’t get a pitch at Chileno, it is possible to hike from Torres Central/Norte ($15,000 CLP ($21 USD) camping pitch per person). Although you’re not officially supposed to hike from here up to the towers, you can: leave four hours ahead of sunrise. It’s an additional one-hour 45 minutes if starting from Torres Central/Norte to reach the towers.
Day Eight: El Chileno to the Torres and then back to Laguna Amarga
Distance hiked: El Chileno to the Torres 3.8 km/2.3 mi; the Torres to Laguna Amarga 17 km/10.5 mi
Hiking duration : Four hours 50 minutes (45 minutes stoppage)
Average pace : 4.5kph/2.8mph up to the towers; 8.33kph/5mph from the Torres to Laguna Amarga
Elevation change: Up 450m, down 450m to and from the towers; Up 150m, down 630m from El Chileno to Laguna Amarga
4:30am Wake up and take a small bag (including warm clothes and a snack) to see the torres at dawn. Don’t forget your torch as the route is over rocks and can be treacherous.

4:45am Start hiking up to the torres . For us at the very start of March, dawn was at about 7:15am.
8:00am Leave the torres and return to the campsite. Pack up, have breakfast start the long walk down.
12.30pm When you get to Las Torres Hotel car park, there is a shop selling ice creams – have one, you deserve it!

To get the shuttle minibus ($4,000 CLP ($6 USD)) to take you to Laguna Amarga, you need to hike one kilometer down the road towards Torres Central/Norte to reach the Centro de Bienvenida .
Departures leave the Welcome Centre at 8am, 2pm, 4pm and 7pm daily, and take about 30 mins.
If you can face the walk, it’s about another one and a half hours to two hours to the Laguna Amarga Ranger Station where buses are waiting to pick you up.
14:30pm Take the bus from Laguna Amarga back to Puerto Natales.
17:00pm Arrive in Puerto Natales bus station and go and enjoy a pint at Cerveza Baguales on the Plaza de Armas to celebrate!
You’ll most likely need a place to stay for a night or two post-hike, and our guide to the best hotels in Puerto Natales caters to a range of budgets and travel styles.
*If you can’t get a pitch at El Chileno, it is possible to hike from Torres Central/Norte ($15,000 CLP ($21 USD) camping pitch per person). Although you’re not officially supposed to hike from here up to the towers, you can: leave four hours ahead of sunrise.
Make sure you bring a headtorch for climbing in the dark (it will get lighter as you reach the more difficult stretch of hiking just below the towers), plus warm clothing (even including a sleeping bag) to use at the top and keep you cozy as you enjoy the sunrise.
FAQs and further helpful information about the O Circuit
Can you hike the torres del paine circuit with a tour.
Yes, of course. As with the W hike, I don’t think it’s necessary to pay for a tour, particularly as the trails are well-marked and you can book everything online anyway.

If you would rather avoid the hassle of organizing campgrounds, meals, and transport into the park, you can instead take a tour. These cost upwards of $2,495 USD per person.
Luckily, Chile Nativo in Puerto Natales offer readers a 5% discount on any trek (the Circuit or otherwise) if you include the referral code “Worldly Adventurer” when booking with them!
Otherwise, hiking the O Circuit without a guide is very simple, as the path is well-marked and the terrain, while challenging, is easy enough to traverse.
How can I prepare physically for trekking the O Circuit?
When I hiked the O Circuit, I wasn’t the fittest. However, I have a lot of experience of hiking and I don’t think that your legs ever really lose the muscles that allow you to get up and down hills without too much problem.
Therefore, my biggest recommendation for hiking the O Circuit is to ensure that you’ve done a number of hikes in the months and weeks leading up to the trek. These can range from shorter, eight-kilometer (five-mile) wanders to multi-day treks.

The two most important things to consider during your preparatory hikes are:
- To get used to carrying a rucksack with a heavy load . Our packs weighed in at around 35 pounds (16 kilograms) at the beginning of the trek – although, luckily, they got lighter as we hiked because we ate the food (often the heaviest part of your pack!). Carrying a heavy backpack can hurt your shoulders and it’s essential to know that your rucksack fits properly at the shoulders and the waist so that you carry that weight equally across your back. If you’re not sure how to ensure that your backpack fits properly, check out this article from REI or head into a local outdoor store for advice.
- To do some hill climbing. There are three big climbs on the O Circuit: the gain of around 2,260 feet (690 meters) to summit the 3,871-foot (1,180-metre) Paso John Gardner (the highest point on the trek), the elevation gain of 1,640-foot (500-meter) to hike up to Mirador Británico at 2,300 feet (700 meters) and the 2,300-feet (700-meter) elevation gain to reach the base of the torres at 2,952-feet (900 meters) above sea level on the final day. For all three, you’ll want to know psychologically that you can do it because you’ve hiked up a mountain before – a belief system that I’ve learned is often more important than being physically prepared!
Ultimately, you want to know that you’ll be comfortable getting up each morning, shouldering your pack, and being ready to hike for nine or eleven days solid.
Do you need a map for the Circuit?
Yes, it’s always a sensible idea to have a map indicating your route. These are provided upon entry to the national park (after you pay your admission fee). Unfortunately, they’re not waterproof, so consider bringing a plastic map case or just keeping them out of the rain.

Be aware that, while it helps to know where you’re going, the hiking trails are so well-marked that a map isn’t really necessary for the vast majority of the hike.
I would also recommend downloading maps.me , an app that can be used offline and that shows you the hiking trails in the national park and with which you can use GPS to know exactly where you are.
Top tip: When using maps.me, you MUST zoom into Patagonia on the app and then download the necessary map while you still have an internet connection – maps are only available for regions and countries that you have specifically done this for in advance.
Can you stay in refugios instead of camping for the O Circuit, as you can for the W?
While camping is the most popular way of staying in the park during the O Circuit, if you’re concerned about your ability to carry a heavy pack or just don’t enjoy camping, it is possible to hike the full O Circuit and stay almost every night in a comfortable (if basic!) refugio .

Bear in mind that these consist of very basic accommodation in six-bed dormitory rooms, which can be shared by both male and female hikers. It’s cheaper if you bring your own sleeping bag and you will have access to hot showers and toilets (in some cases a separate set to those used by the campers).
You can self-cater if you choose to stay in the refugios , but a lot of people choose to go all in and get meals provided at (almost!) every place.
Your only issue is that day one, Campamento Serón and day three, Campamento Los Perros, only have accommodation in tents.
Y ou can expect to pay $1,031,800 CLP ($1,151 USD)*:
- Serón Campsite: $125 USD dorm bed in refugio + $88 USD full board
- Dickson Campsite: $40 USD dorm bed in refugio (excluding sleeping bag) + $61 USD) full board
- Los Perros Campsite: $58 USD fully-equipped tent + $61 USD full board
- Grey Campsite: $40 USD dorm bed in refugio (excluding sleeping bag) + $61 USD full board
- Paine Grande Campsite: $59 USD dorm bed in refugio (excluding sleeping bag) + $61 USD full board
- Francés or Los Cuernos Campsites: $125 USD refugio + $88 USD full board
- El Chileno or Las Torres Campsites: $125 USD refugio + $88 USD full board
*all figures are per person and trekking the O Circuit in nine days
If you plan on staying in the refugios, you can get away with a 40-litre pack and even smaller if you decide to go fully catered, as all you will need to pack clothing for the duration of the hike.
- You still want a 40-litre backpack that provides decent back support and has a hip strap to support the way that the bag sits on your back. I would highly recommend the Osprey Tempest 40-litre rucksack for women ( REI | Osprey | Amazon ) and the Osprey Talon 44-litre rucksack for men ( REI | Osprey | Amazon )
Can you hike the Torres del Paine Circuit clockwise?
It’s no longer possible to hike the O Circuit counter-clockwise, and although one way that you can amend the route is by entering the O Circuit at Paine Grande (take the Hip Sur catamaran across the lake; information and itineraries here ), hike east to Frances/Los Cuernos, Torres Central/Chileno and then to Seron and continue along the O, finishing where you started at Paine Grande.

From Paine Grande, you can then leave the park along a trail that takes you to Administración, the ranger station in the southwest of the park. This trail has outstanding views back towards Los Cuernos and will add an extra day to your route, with you hiking what is known as the Q Circuit (again for the shape that it makes on the map).
Note: you can only hike this trail south from Paine Grande, not north from Administración.
Friday 26th of January 2024
Do you need to bring a water filter or is there potable water at the campsites? Thanks!
Steph Dyson
Friday 9th of February 2024
There is potable water at the campsites. Steph
Saturday 26th of August 2023
Thanks for all your information!! I'm looking to book for Jan 2024, but I can't figure out if it's too early? How far in advance can you book, do you know?
Wednesday 20th of September 2023
Hi Kara, you need to book asap. January is peak travel month and you might struggle to find availability now. Steph
Pavan Pakala
Tuesday 4th of July 2023
Can I buy park fees ahead of time or can I pay before starting the hike at the entrance? We are doing the O circuit in mid-december and got all the campsites booked. I am seeing conflicting information that we can buy ahead of time. Appreciate the clarification. Thx pav
Wednesday 5th of July 2023
Yes you need to. Buy them here: https://aspticket.cl/ As with everything, it's incredibly glitchy though. Steph
Monday 26th of June 2023
Hey Steph, Thanks for everything you to provide awesome info. Approximately, how many refugios and/or camp permits is given per day on the O circuit? I am curious what the numbers are for our planning purposes since we may have large group to travel in mid December. Thx!
Hi Pavan, 70 hikers are permitted each day. Steph
Sunday 25th of June 2023
Hey Steph, Thanks for all the wonderful info. We are also planning the O circuit either in mid December or late February.
I know there are couple of aggregator websites that allows to book all campsites from one place. Would appreciate any thoughts on the differences between the following sites. https://torreshike.com/en/ https://www.bookingpatagonia.travel/#/ Thanks!
Thanks for the kind words Pavan! I've never used Booking Patagonia but finds Torres Hike is brilliant (although they've had a few problems these past few days because Vertice is rubbish and keeps messing up their system). Steph
Ultimate W Trek Patagonia Map Guide: Tips, Routes, Distances and Essentials for Hikers

Travel Resources
- Accommodation at the best prices.
- Book activities and excursions in Spanish.
- Find cheap flights.
- Rent your Car for Patagonia
- -5% eSIM discount with unlimited data and no roaming charges
- Store your luggage for US$ 5.90 per day
- Travel and cancellation insurance with -5% discount
- I will organize your trip
Are you ready to embark on an unforgettable hiking journey in one of the most stunning landscapes on Earth? Patagonia’s Torres del Paine National Park in Chile is home to the iconic W Trek, a five-day adventure that takes you through the heart of this breathtaking region. In this ultimate guide, we’ll cover everything you need to know about the W Trek Patagonia map, from the detailed day-by-day itinerary to essential tips on weather, accommodations, food, safety, and more. Get ready to experience the adventure of a lifetime!
Key Takeaways
- Explore Patagonia’s wild beauty on the iconic W Trek with this comprehensive map overview
- Challenge yourself by grasping distances between key points and enjoy an unforgettable journey
- Prepare for your adventure with essential tips, trail distances, itinerary breakdowns & packing essentials!
W Trek Patagonia: A Comprehensive Map Overview

The W Trek in Patagonia is a thrilling multi-day hiking route that takes you through the mesmerizing Torres del Paine National Park, one of the most remarkable hiking destinations in South America. This 80 km (50 mi) trail offers an exhilarating blend of spectacular scenery, challenging terrains, and unforgettable experiences.
This section offers a thorough trek map overview of the W Trek, covering key points of interest and trail distances, assisting in your adventure planning.
Key Points of Interest
The W Trek is famous for its iconic granite towers, the awe-inspiring French Valley, and the majestic Grey Glacier. These breathtaking landmarks will leave an indelible impression on you as you traverse the challenging yet rewarding trails through the national park.
One of the most exhilarating highlights of the W Trek is the French Valley, where you’ll have the opportunity to marvel at both majestic mountains and tranquil lakes. Another must-see is Grey Glacier, an imposing wall of ice that will leave you speechless as you take in its sheer scale and beauty. And let’s not forget Paine Grande, the grandest peak in the park, standing tall and proud as a testament to the incredible power of nature.
Trail Distances

Familiarizing yourself with the trail distances between key points is critical in planning your daily routes along the W Trek. The first day of the W Trek, for example, covers an impressive 22 km (13.6 mi) from Hotel Las Torres to Refugio Los Cuernos.
Throughout the trek, you’ll encounter invigorating hikes like the one up to the towers on the final day, boasting an elevation gain of 900 meters (2,956 ft). Along the way, you’ll also have the opportunity to witness the breathtaking Glacier Grey.
Grasping the trail distances paves the way for better preparedness in tackling the W Trek, optimizing your unforgettable journey through Patagonia’s wild and untamed beauty.
W Trek Itinerary: Day by Day Breakdown

The best way to experience the awe-inspiring landscape of the Torres del Paine W Trek is by taking your time and enjoying it over 4 nights and 5 days. This section provides a detailed day-by-day itinerary for hiking the W Trek in Patagonia, inclusive of recommended stops and accommodations you’ll encounter on your journey.
Whether you’re a seasoned trekker or a first-time hiker, this itinerary will help you make the most of your adventure in one of the world’s most extraordinary landscapes.
Day 1: Hotel Las Torres to Refugio Los Cuernos

Your first day on the W Trek includes:
- Journey from Hotel Las Torres to Refugio Los Cuernos
- Distance of 22 km (13.6 mi)
- Takes around 6 hours
- Follow the Ascencio River to enter the Ascencio Valley
- Pass by the lookout point for the Towers at 900 meters
- Refugio Los Cuernos is aptly named after “The horns,” a pair of stunning granite peaks in the area.
To kick off your adventure, you’ll take the Bus Sur bus from Puerto Natales to Pudeto at 3 pm the day before, arriving in time for the last ferry of the day at 6 pm. The bus fee is CLP 12,000 (US$14), and the ferry fee is CLP 20,000 (US$25). Alternatively, you can opt for a thrilling walk from Laguna Amarga entrance to Hotel Las Torres, and the bus fee from Laguna Amarga to Hotel Las Torres is CLP 5,000 (US$6).
Day 2: Refugio Los Cuernos to Paine Grande

Day 2 of your W Trek adventure takes you from Refugio Los Cuernos to Paine Grande. This portion of the trek covers an impressive distance of 20 km (12.4 mi) and takes around 7 hours to complete. Along the way, you’ll be able to take in the majestic view of the Grey Glacier from several different vantage points.
On this day, you’ll also have the opportunity to explore the French Valley, one of the most breathtaking highlights of the W Trek. This lush, verdant valley offers stunning views of the surrounding mountains and lakes, making it a perfect spot to rest and soak in the beauty of Patagonia.
Day 3: Paine Grande to Grey Campsite

On the third day of the W Trek, you’ll cover the hike from Paine Grande to Grey Campsite. This segment of the trek is a thrilling 19 km (11.8 mi) journey that takes around 8 hours to complete. You’ll start your day at Paine Grande, then head to the Italiano campsite, followed by the Mirador Frances.
If the weather is good, you’ll have the chance to take a detour to Mirador Britanico, where you’ll be able to admire a stunning ring of toothy granite peaks, including the park’s second most famous landmark, the three-horned Cuernos del Paine. Afterward, you’ll finish off the day in the beautiful Francés Valley and campsite.
Day 4: Grey Campsite to Paine Grande
On the fourth day of the W Trek, you’ll hike from Grey Campsite back to Paine Grande. This leg of the journey covers 11 km (6.8 mi) and takes around 3-4 hours to complete. Along the way, you can enjoy the magnificent views of the Grey Glacier and its surrounding landscapes. Once you arrive at the Paine Grande campsite, you can rest and prepare for the next day’s adventure.
As you make your way back to Paine Grande, take the time to appreciate the stunning vistas of Los Cuernos and the majestic mountains that surround you. This day offers a more relaxed pace, allowing you to fully immerse yourself in the breathtaking beauty of Torres del Paine National Park.
Day 5: Paine Grande to Hotel Las Torres
The final day of the W Trek covers the hike from Paine Grande back to Hotel Las Torres. This leg of the journey includes a thrilling afternoon of kayaking, ice hiking, or a short hike to the hanging bridges. As you reflect on your incredible adventure through the wild and untamed beauty of Patagonia, take a moment to appreciate the unforgettable memories you’ve made along the way.
After completing your epic journey, you’ll return to Puerto Natales via bus and ferry. The bus fee from Laguna Amarga or Pudeto to Puerto Natales is US$14 (CLP 20,000/US$23 from Hotel Grey). With your W Trek adventure complete, you’ll head home with a heart full of memories and a newfound appreciation for the remarkable landscapes of Patagonia.
Essential Tips for Hiking the W Trek in Patagonia

Being well-prepared and well-informed is paramount for the best possible experience on the W Trek. This section shares essential tips for tackling the W Trek, covering aspects like:
- Accommodations
Whether you’re a seasoned trekker or a first-time hiker, these tips will help you make the most of your adventure in one of the world’s most extraordinary landscapes.
Weather and Clothing

Patagonia’s unpredictable weather is one of the factors that make the W Trek such an exhilarating adventure. The best time to do the W Trek is from November to early March, when the average temperatures range from 10°C (50°F) to 18°C (64°F). Although it usually rains and snows throughout the hiking season, March and April are the peak months for precipitation, so it’s advisable to bring waterproof gear.
Selecting clothing and footwear for the W Trek requires consideration of factors like the terrain type, weather conditions, and the trek’s length. Be sure to pack a moisture-wicking base layer, a fleece layer for insulation and warmth, and a waterproof jacket and pants to protect against rain and wind. This layering system will help you adjust your clothing quickly and efficiently as the weather changes on the trek.
Accommodation Booking

Accommodations along the W Trek include paid campsites with basic mountain hotels (refugios) and one free campsite. Booking your accommodations in advance is advised, as spaces may fill up quickly, especially during peak season. Websites like Patagonline can help you check availability and book accommodations directly.
When booking accommodations, be sure to consider factors like location, price, and available facilities. For example, Refugio Los Cuernos offers a stunning location nestled between granite peaks, while Paine Grande and Grey campsites provide breathtaking views of Los Cuernos and the Grey Glacier, respectively. By researching and booking your accommodations ahead of time, you’ll ensure a seamless and enjoyable W Trek experience.
Food and Water

Attending to food and water supplies during the W Trek is a significant aspect of your adventure. Most camping sites and refugios have shops and restaurants where you can stock up on supplies and enjoy a hot meal. However, cooking your own food can be a great way to save money and add an extra element of excitement to your trek.
To ensure you stay well-hydrated, remember to bring a reusable water bottle and a water filter or purification tablets. Drinking water can be found all around the park and is of excellent quality. By planning your meals and water supply, you’ll have the energy and stamina needed to conquer the challenging terrain and make the most of your W Trek adventure.
Safety and First Aid
Safety takes top priority when embarking on the W Trek. Here are some essential safety tips to keep in mind:
- Stay reachable and inform people back home about your plans.
- Carry a charged phone with emergency numbers.
- Consider carrying a satellite phone, a hiking guide, or a paper map for added peace of mind and navigation assistance.
It’s also a good idea to carry a small first aid kit, including items such as band-aids, pain relievers, and any personal medications you may need. By taking these safety precautions and being prepared for minor injuries or ailments, you’ll ensure a successful and enjoyable W Trek experience.
Alternative Hiking Routes in Torres del Paine National Park
If you’re looking for alternative hiking options in Torres del Paine National Park, you’re in luck! In addition to the famous W Trek, there are several other exciting trails for you to explore. This section introduces:
- The more challenging and longer O Circuit
- A variety of day hikes
- Shorter treks, perfect for those with time constraints or seeking a less strenuous park experience.
The O Circuit

The O Circuit is an incredible full loop around the Cordillera del Paine, covering a distance of approximately 136 kilometers (85 miles) and taking around 6-10 days to complete. This challenging trek includes the popular ‘W’ route and the more remote backside, offering a unique and rewarding experience for adventurous hikers.
While the W Trek is great for those looking for a shorter and somewhat easier trek, the O Circuit is perfect for those seeking a more rugged and remote experience. The O Circuit takes you through a diverse range of landscapes, including dense forests, vast plains, and towering peaks, offering a true immersion into the wild and untamed beauty of Patagonia.
Day Hikes and Shorter Treks

For those with limited time or seeking a less strenuous experience, Torres del Paine National Park offers a variety of day hikes and shorter treks, including the popular trek Torres del Paine. Some of the most popular day hikes in the park are:
- Mirador Las Torres
- Mirador Cuernos/Salto Grande
- Laguna Azul
- Salto Grande Waterfall
These trails provide stunning views of the park’s most famous landmarks and can be completed in just a few hours.
Whether you’re looking for a leisurely stroll to take in the breathtaking scenery or a more challenging day hike to push your limits, Torres del Paine has something for everyone. With its diverse range of trails and breathtaking landscapes, the park is a hiker’s paradise just waiting to be explored.
Day Trek: Mirador Las Torres
Mirador Las Torres is one of the most popular day hikes in Torres del Paine National Park, and it’s easy to see why. This trail takes you to the base of the park’s iconic granite towers – the Torres del Paine – providing a close-up view that’s truly awe-inspiring.

The trek is a challenging one, covering a distance of about 19 km (12 miles) round trip with a significant elevation gain. However, the effort is well worth it. As you ascend, you’ll pass through lush beech forests and across rushing rivers before finally reaching the turquoise lagoon at the base of the towers. The sight of the sun rising or setting on the towers is a spectacle not to be missed, making this trek a must-do for any visitor to the park.
Getting to Torres del Paine: Transportation Options

Reaching Torres del Paine National Park is easier than you might think, with several transportation options available. This section offers information on bus services and car rentals, assisting in your journey planning to the park.
Whether you prefer the convenience of public transport or the flexibility of driving, there’s an option to suit every traveler’s needs.
Bus Services
There are several bus services available for reaching Torres del Paine from nearby cities like Puerto Natales. We highly recommend either Bus-Sur or Buses Fernandez for your travel to Torres del Paine. The bus ride from Puerto Natales to Torres del Paine costs only $25 USD (return), and you can book your tickets online through websites such as:
When planning your bus journey, keep in mind that there are specific departure times from Punta Arenas to Puerto Natales, such as:
By planning your bus journey in advance, you’ll ensure a smooth and hassle-free trip to Torres del Paine National Park.
Buses Inside Torres del Paine National Park
Once inside Torres del Paine National Park, there are shuttle buses available to transport you between key points along the W Trek. These buses run at regular intervals throughout the day, providing a convenient way to navigate the park and rest your legs between hikes. Be sure to check the timetable and plan your hikes accordingly to make the most of this service. The bus service within the park is an excellent way to save energy for the trail and allows you to cover more ground in a shorter time, enhancing your overall experience of this stunning landscape.

Car Rentals

For those who prefer a more flexible and independent travel option, renting a car is a great choice. To rent a car in Patagonia, you must have a valid driver’s license from your country and be at least 21 years old. The general costs of renting a car in Patagonia can vary, but on average, you can expect to pay around $76 per day for a small car rental.
Top-rated car rental companies in Patagonia include:
- Discover Cars
By renting a car, you’ll have the freedom to explore Torres del Paine National Park at your own pace and take breaks along the way to fully appreciate the breathtaking scenery.
Packing Essentials for the W Trek
Packing the right gear is crucial for a successful and enjoyable W Trek experience. This section provides a comprehensive packing list for hikers embarking on the W Trek, encompassing clothing, camping gear, and electronics.
By ensuring you have all the essentials, you’ll be well-prepared to tackle the challenging terrain and make the most of your adventure in the wild and untamed beauty of Patagonia.
Clothing and Footwear
Choosing clothing and footwear for the W Trek requires consideration of terrain type, weather conditions, and the trek’s length. Here are some recommendations:
- Pack a moisture-wicking base layer
- Bring a fleece layer for insulation and warmth
- Don’t forget a waterproof jacket and pants to protect against rain and wind
This layering system will help you adjust your clothing quickly and efficiently as the weather changes on the trek.
The ideal footwear choices for the W Trek in Patagonia are waterproof all-leather boots with deep treads. Additionally, gaiters can be a great way to keep your feet dry and prevent water from slipping in over the top of the boots. By investing in the right clothing and footwear, you’ll ensure your comfort and safety on the W Trek, allowing you to fully enjoy the incredible landscape and adventure that awaits.
Camping Gear
Camping gear is essential for your W Trek adventure. Invest in:
- A good tent, such as the Big Agnes Battle Mountain 2 or the ALPS Mountaineering Highlands Tent
- A lightweight and compact sleeping bag suitable for cold temperatures
- A roll mat for sleeping
- A mess kit for cooking
Additionally, don’t forget to pack:
- Base layers
- Trekking pants
- Hiking socks
- A waterproof backpack cover
By packing the right camping gear, you’ll be well-prepared to tackle the challenging terrain and make the most of your W Trek adventure in the stunning landscapes of Patagonia.
Electronics and Navigation
Electronics and navigation tools can be invaluable during your W Trek adventure. A GPS device, such as the Garmin inReach Mini or handheld devices from Outdoor Gear Lab and Switchback Travel, can help you stay on track and navigate your way through the park. Additionally, smartphone GPS apps like Gaia GPS and AllTrails can also be useful for navigating your way on the trail.
Remember to bring a charged phone with emergency phone numbers, a satellite phone if available, and a head torch for early morning or late-night hikes. By packing the right electronics and navigation tools, you’ll ensure a safe and enjoyable W Trek experience, allowing you to fully explore the breathtaking landscapes of Torres del Paine National Park.
In conclusion, the W Trek in Patagonia’s Torres del Paine National Park offers an unforgettable adventure through some of the most breathtaking landscapes on Earth. By following our comprehensive guide, you’ll be well-prepared to tackle the challenging terrain, plan your accommodations and meals, and make the most of your time in this extraordinary region. So lace up your hiking boots, pack your bags, and get ready to embark on the adventure of a lifetime!
Frequently Asked Questions
How long is the w trail in patagonia.
The W Trek in Patagonia is a moderately difficult hike covering 46 miles (76km) and typically takes 4-5 days to complete. It includes mainly gentle terrain with some challenging climbs of up to 800m. Be sure to come prepared for varying weather conditions.
Where do you sleep on the W trek in Patagonia?
On the W Trek in Patagonia, you can sleep in shared dormitories or upgrade to a private alternative. There are five refuges/campsites available along the route: Grey, Paine Grande, Frances, Cuernos and Central – check out our post for all the details!
What is the hardest trek in Patagonia?
The El Chaltén Trek in Patagonia is one of the most difficult treks to undertake, featuring demanding nature and views of Cerro Solo. So be prepared for a full test and take advantage of stunning scenery in this lesser-known area!
What is the best time of year to hike the W Trek?
The best time of year to hike the W Trek is from November to early March, when temperatures are mild and the weather is more stable for optimal trekking conditions.
How long does it take to complete the W Trek?
You can conquer the W Trek in 4-5 days, depending on how fast you go and what route you take.
PAINE TREKK
Book Travel Consultation
Book a 30-minute consultation with a travel expert to optimize your planned trip. I will assist you in organizing your trekk in Torres del Paine, ensuring an unforgettable adventure.
Book a 30-minute consultation with a travel expert to optimize your planned trip. I will assist you in organizing your trek in Torres del Paine, ensuring an unforgettable adventure.
My organised trips to Patagonia
In the carousel below you can see already assembled itineraries for inspiration, click on the one you are interested in and ask me for a quote.

Compact trip through the southernmost Argentinean Patagonia: Ushuaia and El Calafate

Enjoy the 3 most relevant ecosystems in Argentina: The End of the World, The Glaciers and the Iguazu Falls.

Trip to Patagonia Argentina in 7 days touring the most beautiful landscapes of Patagonia Argentina (Peninsula Valdés & El Calafate)

The Carretera Austral by rental car is probably one of the most spectacular routes in Patagonia, designed to be travelled with plenty of time in your rental car.

Tour along Route 40 in Patagonia, starting on Route 3 on the Atlantic coast and continuing along Route 40 until reaching the Andes Mountains and El Calafate.

The Australis Cruises are Expedition Cruises that sail through the Strait of Magellan and the Beagle Channel, exploring one of the most beautiful and unspoiled regions of the world such as Patagonia and Tierra del Fuego.

The Antarctic Cruise aboard the MV USHUAIA offers you an incredible introduction to the 'White Continent' at a reasonable price.
Book your tours
Search for your hotel, related posts.

Where is Torres del Paine
Torres del Paine National Park is located in southern Chile, five hours north of Punta Arenas,

Torres del Paine how to get there
Torres del Paine National Park is remote, a characteristic that adds to its intrigue but also

Where is Puerto Natales
In the south of Chile, Puerto Natales is one of the must-see places for those who

Where is Punta Arenas
Punta Arenas is located at the southern tip of South America, just north of the Strait
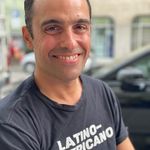
About the author
I am Matias, born in Patagonia, and a lover of my land.
For more than 20 years I help foreign travellers to organise their trip to Patagonia.
I also manage this exotic accommodation on the Atlantic coast.
- Torres del Paine
Latest posts
- Best Tango Show in Buenos
- Best Patagonia Travel Books
- Hop On Hop Off Buenos Aires
How much does a trip to Patagonia cost?
Top 15 must-see argentina locations for your 2024 trip, argentina vacation guide: explore top destinations and tours, top-rated patagonia tour companies for 2024/2025 adventures, is there a train from buenos aires to patagonia, can you fly from buenos aires to patagonia, explore the majestic ice: your ultimate perito moreno glacier tour guide, destinations, save on your trip.
- Book your excursions
- Search for cheap flights
Terms & Conditions / Privacy Policy

- Standard Domes
- Superior Domes
- Suite Domes
- Suite Dome Loft
- Yoga & Wellness
- 7 Day W Trek
- 7 Day W Trek - Brush Variant
- 5 Day W Trek
- Wildlife Safari
- Epic Patagonia
- Puma Tracking
- 9 Day Paine Circuit
- Patagonia Wonders
- Green Ethos
- Social Commitment
- Cultural Preservation
- Torres del Paine

The 5 Best Trekking Circuits in Patagonia
From the rugged peaks of Reserva Cerro Castillo (Aysen Region, Chile) to the giant glaciers of Los Glaciares National Park (Argentina), planning a trekking trip to Patagonia can quickly become a dilemma. There's just too much to see, the distances are long, and you need time, the one thing most visitors don't have. However, every trekking circuit has its particularities making a big difference when it comes to helping you make a decision.
1. Cerro Castillo Circuit

Location: Reserva Cerro Castillo, Aysen Region (Coyhaique Region), Chile
Distance & time: 51km/32mi | 3 to 4 days
Difficulty: Demanding
Cerro Castillo is without a doubt amongst the most beautiful mountain ranges in the Americas, yet its beauty is still under undervalued, making this trail a great alternative to more crowded trails like Torres del Paine National Park. The trek starts about 80 km/50 mi away from Coyhaique, in Chile’s incredible Aysen region (nearest airport is Balmaceda). The best way to start this trek is to head to “Las Horquetas”, 30 kilometers before reaching Villa Cerro Castillo leaving from Coyhaique. From there it is a 4-day epic trek through remote snowy valleys, lush green forests and incredible blue lagoons.
Take into account that climate here may be extreme especially in Autumn and Winter months. It often snows and precipitations may make the experience more adventurous, especially on the trek’s second day (Rio Turbio campsite to Laguna Cerro Castillo) as you hike at 1300m.a.s.l (about 4265ft) through an exposed valley. For that reason, we recommend to hike during Summer months (Nov. to February). There are lots of ups and downs making this trek pretty challenging Also, there is absolutely no infrastructure along the circuit (only campsites), so only do this trek if you’ve got some hiking experience and love to camp.

Why we love it:
- The diversity of landscapes
- The beauty of Mt. Cerro Castillo (2675mts/8776ft)
- The quietness on the trails
- The proximity to the “Carretera Austral” (Patagonia’s most epic road)
- The epicness of the campsites’ location
- A true feeling of adventure
Take into account that:
- Weather may be wet
- Autumn, Winter and early Spring may be snowy
- There are no refuges, only campsites
- Previous trekking experience is strongly advised

Location: Torres del Paine National Park, Magallanes Region, Chile
Distance & time: 51km/32mi | 4 to 6 days
Difficulty: Moderate
Torres del Paine National Park is also known as “Patagonia’s Crown Jewel” and it is easy to understand why. With its incredible fauna, dramatic granite peaks and giant ice fields, this 242 000 ha vast National Park is home of some of the beautiful trails on Earth. The W Trek is the most popular hiking circuit in Patagonia and it is easy to understand why.
Take a look at the shape of the circuit on a trekking map and you’ll understand the name of this worldwide famous circuit. There are different starting points (Grey Glacier, Paine Grande refuge or the towers’ area) but whichever you choose, you will see the same highlights. Grey Glacier is part of the Southern Patagonian Ice Fields and the W Trek is the best way to have an overview of how giant it is. Keep hiking and you’ll discover the stunning Frenchsman Valley, where you’ll see the park’s highest peak (Paine Grande), avalanches, incredible granite peaks (Los Cuernos, the Shark’s Fin and more) and some of Patagonia’s prettiest lakes (Pehoe Lake, Nordenskjold Lake). You can’t miss then Towers’ Base Lookout hike and an insane viewpoint of the 3 granite towers that gave their name to the park.
Trails here are well indicated and every day you have different sleeping options, with cozy refuges (Los Cuernos, Paine Grande) and large campsites. You can even spend a few nights in some incredible hotel like Ecocamp Patagonia ... Watch a video here .

- Some of Patagonia’s most beautiful viewpoints
- Incredible diversity of landscapes
- Trails are well indicated
- Cozy refuges, hotels and campsites
- You can hike the W Trek all year round, even in Winter!
- The region can be very windy especially in Summer
- Trails may be crowded especially in Peak Season (December to February)
- You need to book refuges and campsites with months of anticipation
3. El Chaltén

Location : El Chaltén, Los Glaciares National Park, Argentina
Distance & Time : 50 km/30mi | 2 to 4 days
Difficulty : Moderate
OK, this is not really a proper “trekking circuit” as you can go back to El Chalten – the nearby village – every night. However you can also camp in the forest and explore the highlights of the area – Cerro Torre and Mt. Fitzroy – in a couple of days and eventually add a few days to discover the surrounding trails. El Chaltén is Argentina’s hiking capital and its mountain range includes some of the world’s most famous peaks. Cerro Torre (3102m.a.s.l/10200ft) and Mt. Fitzroy (3405m.a.s.l/11200ft) are a fascination for climbers around the world, Cerro Torre being considered for a long time an “impossible mountain” to climb.
Good news is that hikes are nothing technical. The hike to “Laguna Los Tres” to reach Mt. Fitzroy’s viewpoint is steep for about an hour and a half, yet views are completely rewarding. You can start hiking from El Chalten without paying any entrance fee and trails are very well marked and indicated with signs. Just like Torres del Paine National Park, the region can be very windy (especially from November to February) but believe me, this unstable weather makes the experience even more unforgettable.
If you’re looking for a more extreme trekking experience, other options are the “Huemul Circuit” and “Loma del Pliegue Tumbao” that both offer real mountaineering experiences. Check out our Argentine programs here .

- Some of Patagonia’s most iconic peaks
- Trails are well-marked
- Viewpoints are incredibly rewarding
- The possibility to go back to El Chaltén every night
- No National Park entrance fee
4. Los Dientes de Navarino

Location : Navarino Island, Magallanes Region, Chile
Distance & Time : about 37 km/22mi | 4 to 5 days
Difficulty : Demanding
This is by far the wildest trekking circuit in Patagonia. “Los Dientes de Navarino” (the teeth of Navarino) is near the legendary Cape Horn and not far from Ushaia, the southernmost city on Earth. The starting point is Puerto Williams, the southernmost village on Earth known by sailors as a stopping-off place before heading to Cape Horn through the Beagle Channel. Climate here is one of the harshest on the planet with regular strong windgusts and low temperatures especially from April to October. That mix of mountain and oceanic weather can make this circuit particularly demanding and you will be happy to have either a good map or a GPS not to lose track of the trail in case of snowfall.
You won’t walk for more than 10 km / 6 mi a day yet this trek is truly intense in scale. Leaving Puerto Williams, you will hiking up Cerro Bandera at 550m.a.s.l and head to “Laguna del Salto” where you can spend the first night. On the next days, you will walk across a series of remote valleys with beautiful viewpoints of the dramatic surrounding peaks (the famous “teeth”) and will eventually see Cape Horn in the distance, the end of the American continent.
This 6-Day trek by Cascada Expediciones was awarded “Best Transformational Travel Experience” in the Pure Awards 2017 and it truly deserves it. You will get the sensation to travel back in time with desolated landscapes and no human infrastructures. Careful though: this means you may have to camp in muddy cold places and hike against the wind. Isn’t it what we’re all looking for? Check out this video : " Hiking Los Dientes de Navarino in 2 Minutes ."

- True wilderness
- The less crowded trails in Patagonia
- The southernmost trail on Earth
- Incredible viewpoints of the Beagle Channel and Cape Horn (if clear weather)
- Climate can be very harsh with low temperatures and strong windgusts
- Only for experienced hikers
- Hiking with a guide is strongly advised
5. Torres del Paine Circuit

Location: Torres del Paine National Park, Magallanes Region, Chile
Distance & Time: about 138 km/83 mi | 7 days
Difficulty: demanding
This is certainly the most complete trekking experience in Patagonia. OK, Torres del Paine National Park is famous for its diverse wildlife and otherworldly landscapes, yet the Circuit is the most epic way to realize how giant and impressive this park truly is. Starting point is the Seron woods; and the regular way to depart the circuit is to hike 32 kilometers on the first day to reach the Dickson campsite, behind the Paine mountain range. This is the wildest area of this national park and also the most remote, which means logistics are complex and the feeling of nature immersion is authentic.
Hiking through Los Perros forest and reaching the famous John Gardner Pass is an incredible experience, with insane views of the Southern Patagonian Ice Fields and changing weather that can turn your hiking experience into an odyssey. As you reach the trails of the W Trek, you will see how different this is from the less-known trails of the circuit. More crowded, less wild. Yet landscapes like the Frenchsman Valley, Grey Glacier and the towers are pretty unbelievable and this coupled with the other side of the mountains makes for an incredible hiking experience.t
The Torres del Paine Circuit is considered by many as Patagonia’s best trekking circuit, yet it is a pretty long hike only recommended for experienced hikers. The circuit is closed in Winter (May to September) but you should be prepared for all kinds of weathers. Click here if you want the best Torres del Paine Circuit experience while staying in the world’s first geodesic dome hotel !

- Overall stunning trekking experience
- Quiet trails in the backside of the Torres del Paine Mountain range
- Incredible views of the Southern Patagonian Ice Fields
- Otherworldly mountains everywhere
- Comfortable overnight options
- You can experience 4 seasons in a day and very strong wind gusts
- You should Book accommodation with months of anticipation
Ready to embark on your outdoor adventure? Check out our trekking programs here! Or reach out to us directly. Our EcoCamp Patagonia contact information can be found here.
Written by EcoCamp Team
The EcoCamp Patagonia team wants to provide you with the most complete and updated information so you can prepare yourself for a trip of a lifetime in the southern tip of South America!
Subscribe to our newsletter
- Related posts -
September in patagonia and in ecocamp, tracking pumas in a puma's paradise : torres del paine national park, the best easy excursions in torres del paine national park.

The Patagonia Way
Insider's guide: When to visit Patagonia

- Sustainability
- Photo Gallery
- Privacy Policy
- Work with us

Everything you need to know about trekking in Patagonia

Patagonia. The word rolls off your tongue and has you dreaming of faraway lands filled with dramatic landscapes. It’s fair to say that the reality doesn’t disappoint.
Chile and Argentina share the vast South American region. It boasts glaciers, mountains, waterfalls, and an array of unique flora and fauna. The beauty is sensational, the landscapes breathtaking, and it really is a paradise for hikers. Not that any number of adjectives really do the beauty justice…
Beware, though. Patagonia can be as treacherous as it is stunning. You need to be prepared in order to truly enjoy its wonders – the weather is ever-changing, and trekking conditions can be tough. So, we’ve put together a little guide to ensure you make the most of it: hiking tips, safety tips, advice from Intrepid leaders, and more…
Treks in Argentina and Chile
Both El Chaltén, Argentina’s trekking capital, and Torres del Paine National Park, Chile, offer a multitude of both moderate and difficult hikes.

Dientes de Navarino, Chile
Here’s a selection of the most notable hikes in Chilean and Argentinian Patagonia:
Hikes in Chilean Patagonia
Torres del Paine National Park is an obvious place to start in Chile. The region is known for icebergs, mountains, grasslands, and rare wildlife such as llama-like guanacos. There’s also day treks for all abilities.
The ‘W Trek’ is the most iconic and well-known hiking route in Torres del Paine, so-called because of its trail system which navigates up and down the mountain valleys. It takes around four days to do its dramatic beauty justice as there’s simply so many scenic spots and look-out points to explore. (You can do the 4 Day W-Trek in Torres del Paine on this Intrepid tour !)
For those who are intent on a true adventure outside of Torres del Paine, a (lengthy) hike to Cabo Froward is a good option. In reaching the most southerly point on the continent you pass swamps, cliffs, pebble beaches, and other rugged scenery, and even have the joy of experiencing river crossings!

Trekking in Torres del Paine National Park
READ MORE: 4 CAN’T MISS DESTINATIONS IN CHILE (THAT AREN’T IN PATAGONIA!)
The most popular trek in this area is locally known as “Base Las Torres” (The Tower’s Base). If you visit with Intrepid , your leader will recommend when to take this hike, depending on weather conditions.
Another epic hike is towards “Refugio Los Cuernos” (The Horns’ Lodge). This trek is long, but it has amazing views of “Los Cuernos del Paine” (known as “The Horns” because of its granite peaks in the shape of forms).
Both of these treks are moderate to difficult, and take between five and eight hours to finish. Though the trails are clearly-marked, weather is less defined, and is likely to be cold, wet or windy.
Hikes in Argentinian Patagonia
The frontier town of El Chalten, north of Glacier National Park, has a laid-back atmosphere filled with people from all over. The two most popular day treks here, Laguna de los Tres and Laguna Torre, are moderate to difficult.
Expect six to nine hours of walking on fairly easy terrain. Although wind and rain might be problematic, the well-maintained and clearly-marked paths won’t be. And the sights are truly out of this world… to experience them check out this 15-day trip to Patagonia .

Fitz Roy, which straddles the border between Argentina and Chile
Hike recommendation from Fernando Rodriguez, Intrepid’s Ops Manager in South America:
I love the Laguna de los Tres day trek. It starts with a gentle walk uphill that leads to a wonderful view of El Chalten town. The trail then meanders gently up and down, passing by loads of native flora and Calafate trees. Once you reach Laguna Las Tres lake it’s usually lunchtime, and you can sit right next to the lake and enjoy the view of the magnificent Mount Fitz Roy.
Ushuaia is also the gateway to Parque Nacional Tierra del Fuego, Argentina’s only coastal park.

Ushuaia on a beautiful, clear day
In Ushuaia it’s a good idea to check out the array of museums on offer, sample some Fuegian delicacies, and explore the Beagle Channel. This majestic waterway just south of the city is stunning, and boasts plentiful marine wildlife and small islands. Even better, if you visit with Intrepid , a boat trip through it is included!
RELATED READING: WHAT IT’S LIKE VISITING USHUAIA, THE WORLD’S SOUTHERNMOST CITY
Patagonia trekking r ule 1: b e prepared
Hiking in Patagonia is a rewarding activity but, as is clear, is not one to be taken lightly. Get ready to enjoy the beautiful scenery, to marvel at glaciers, but also to push your limits on the region’s stunning hiking trails.

Torres del Paine National Park
How to prepare for a trip to Patagonia
It’s worth undertaking regular exercise in the months before you travel, particularly if you are not in the habit of doing so. Doing mountain walks or even just climbing long staircases with a pack is useful preparation. As is walking, jogging, swimming or riding a bike.
Walking boots need to be comfortable, lightweight and have a good grip. Waterproofing them is also recommended, but the most important thing is to ensure they’re worn-in enough. Better to spend time wearing in a pair than buying new ones!
What to pack on a trip to Patagonia
Whenever you end up deciding to go, Patagonia is famous for its constantly changing weather. You can experience rain, sun, cold, snow, wind, hail and heat in the same day, sometimes in a matter of hours. Trekking there then doesn’t mean you need the latest gear but it is about using it wisely.

In terms of clothing, think layers. Hike in shorts or pants and a short-sleeve shirt, but have the following at the ready in your day pack: a long-sleeve shirt, fleece, rain jacket, hat, gloves and scarf. Wrap them in plastic bags tucked inside your pack then take them on and off according to the weather.
Clothing tips from Fernando, Intrepid’s Ops Manager in South America:
The gas is almost free in Patagonia so the hotel rooms and restaurants can be a bit overheated. So, don’t bring thick woolly pajamas! But do ensure you bring waterproof clothes, hiking boots with ankle support, and a towel for showers (for when you camp in Torres del Paine).
Blowing from the glaciers, the wind can be particularly fierce and freezing; so, hiking poles are handy in order to keep your balance. They’re worth having with you at all times, even if you don’t usually hike with them. And seeing as glaciers were mentioned, the natural wonder that is the Perito Moreno Glacier simply must be noted.

Perito Moreno Glacier, one of the highlights of Argentinian Patagonia.
One of the few glaciers that’s advancing rather than melting, it’s one spectacular sight, and a must-see. If you visit it with Intrepid , you can embark on a mini-trek on the glacier that includes a short cruise to the glacier base.
RELATED READING: WHAT IT’S REALLY LIKE ON AN INTREPID TRIP TO PATAGONIA
Just the same as when you travel to other places, it’s worth bringing a neck wallet or money belt. It’s great for the safe-keeping of your passport, air tickets, cash and other valuable items. And other must-pack items are fairly obvious, but include: a torch (with batteries), an electrical adapter, sun protection, and insect repellent.
Patagonia trekking r ule 2: be sensible
Common sense is important in Patagonia, like it is anywhere else. Respect the rules, only camp and cook in designated protected areas, alert park rangers if you see anything amiss, start hiking early, know your strengths and limits, and always help a fellow hiker in need. Simple actions make for a better hike.

Cabo Froward, the southernmost point of mainland South America
In terms of camping and lodging facilities, it’s best to have fairly low expectations. The region is remote and though campsites have everything you need, they’re pretty basic. Torres del Paine National Park and Parque Patagonia are two examples of parks with lodges and campsites.
The facilities on Patagonia’s trails obviously vary, but as a general rule, toilets tend to be in camping areas and close to trails (though not directly on them).
Patagonia trekking rule 3: b e green
The first thing you need to know about hiking in Patagonia is that water from the rivers is drinkable; fresh and clean from the glaciers, so grab your fill every time you cross one. But if you’re worried, feel free to bring water purification tablets like Micropur, which is available from camping stores or pharmacies.
It’s great to pack food with little or no packaging: it’ll lighten your pack and mean you have less trash to carry back with you. Some people like using cloth bags for carrying snacks (they’re light and sustainable!).

El Chaltén, Argentina
The sale of bottled water contributes to an enormous environmental problem around the world. So, it’s a good idea to bring a water bottle with a 1.5 litre capacity (or two smaller bottles) and then use it the entire trip.
Food tip from Fernando, Intrepid’s Ops Manager in South America:
A perk of traveling with Intrepid is the traditional food you’ll be introduced to. Prepare yourself for delicious cordero patagonico (wood-fire roasted lamb) and congrio (king crab). Also, if you go camping with Intrepid you’ll have breakfast, lunch and dinner provided – so, no hassle!
And last but not least, ensure that your treks leave no trace. Follow the trails at all times and ensure the only things you take with you are memories and pictures.
In other words, there’s no doubt that trekking in Patagonia will be forever engraved in your heart and mind – enjoy the experience to the fullest but make it one that nature won’t remember.
Ready to explore the wild and spectacular region of Patagonia? Check out our range of small group adventures.
(Image credits from top to bottom: iStock, Julie Klene x2, Intrepid Travel, iStock, Julie Klene x2, Intrepid Travel, Julie Klene x2)
Feeling inspired?

Julie Klene
Formerly a sign language interpreter in France, Julie is now working as a bartender on an island in Mexico. She embraces the zero waste lifestyle and is a passionate traveler, a hiker, a scuba diver, and a yoga fan. Her blog, lespetitspasdejuls.wordpress.com (written in French, English and Spanish), is a compilation of her adventures.
You might also like
All aboard the rail renaissance: 7 reasons to..., explore these 7 tea rituals from around the..., why travellers are choosing the galapagos off-season, tips and hacks for train travel in europe, why train travel is the one experience you..., everything you need to know about a night..., mind your manners: dining etiquette around the world, 5 places to escape the crowds in italy..., is australia safe everything you need to know, 10 fun facts you might not know about..., 12 facts you probably don’t know about guatemala.
- Best Hikes In The World
- Appalachian Trail
- European Hikes
- Nepal Hikes
- Patagonia Hikes
- See All Hikes
- Mount Kenya
- Mount Kilimanjaro
- Mount Toubkal
- See All Mountains
- South Africa
- New Zealand
- Switzerland
- United Kingdom
- Packing Lists
Fitz Roy Trek Guide: Everything You Need to Know

Argentina , Hikes , Patagonia , South & Central America

One of the most well-known mountains in South America is Mount Fitz Roy. This mountain is an emblem of Patagonia and I was thrilled to check hiking Fitz Roy off my bucket list. It should be on everyone’s list for backpacking Patagonia .
At 3,375 m, the jagged peaks create one of the most dramatic landscapes on earth. Every year, the famous Fitz Roy draws huge crowds of trekkers to its slopes.
Even though its a bit of a climb, the trail is manageable enough for novices. It is still attractive for seasoned trekkers. In this guide you will find everything you need to know about hiking Fitz Roy.
Fitz Roy Trek - Know Before You Go
Where is mount fitz roy.
Also known as Cerro Chalten, Mount Fitz Roy is located on the border between Argentina and Chile. It is near the village of con the Southern Patagonian Ice Field. El Chaltén is a tiny village on the edge of Los Glaciares National Park.

View of El Chalten From The Fitz Roy Trail
Regional Map
The Fitz Roy trek is situated in the Los Glaciares National Park near the southern tip of South America. The park itself is located 112 km north of Puerto Natales and 312 km north of Punta Arenas.

Map courtesy of Elchalten.com
How To Get To El Chaltén
The closest airport to El Chaltén is El Calafate. There are several direct flights each day from Buenos Airies to El Calafate. Aerolineas Argentina offers reasonable rates on this route starting from $350 return.
If you are making a stop in El Calafate, it is worth visiting the famous Perito Moreno Glacier.

Perito Moreno Glacier, a day trip from El Calafate
From El Calafate, the cheapest way to get to El Chaltén is by bus. The ride is about 2.5 hours and costs around $35- $45. If you have the budget for it, you can rent a car and drive yourself to El Chalten.

This is the cool welcome sign you see on arrival in El Chalten. Picture by Liam Quinn .
Accommodation in El Chaltén
El Chaltén is a charming little village but can get busy over Patagonia’s peak trekking season (November-March). At this time, you will find it difficult to get a hostel room.
There are plenty of campsites which cost $10-$20 dollars per night. I rolled into town without any pre-bookings and managed to find a spot to pitch my tent.
Fair warning, campsites in El Chalten are fairly packed. If you are looking for something more peaceful, I recommend staying at one of the sites on the road to Laguna Del Desierto. This will only really work if you have your own vehicle as these sites are a few kilometers from town.
Food And Restaurants In El Chaltén
There are a few grocery stores in El Chaltén where you will be able to buy snacks and supplies. I found Supermercado El Chalten had the widest range, good fresh produce, and the best prices.
Grocery prices in El Chaltén are high compared to the rest of Argentina. If you are on a tight budget, it would be better to stock up at the supermarket in El Calafate.
El Chalten is a tourist mecca and you will find plenty of restaurants to choose from.
There are also some great bars and craft breweries to enjoy a cold beer after a long day of trekking. La Cervaceria was my favorite for their selection of craft beers and is also a good spot to meet fellow travellers.
Mount Fitz Roy Hike
When you hear about the Fitz Roy trek, people are usually talking about the trail that takes you to the Fitz Roy viewpoint. You hike to the base of the mountain where you get an epic view.

Fitz Roy Viewpoint as the trail ends
Here we go into more detail about your options for trekking Fitz Roy.
Have People Climbed Fitz Roy To The Top?
The mountain was first climbed by French alpinists Lionel Terray and Guido Magnone in 1952. It remains to this day, one of the most difficult ascents on the planet.
Only exceptionally skilled mountaineers climb the peaks to the top. This is not really an option for everyday tourists.
How Long Is The Fitz Roy Hike?
You have two options for hiking Fitz Roy. You can either do the trail as a leisurely 3-4 day trek or as a full day hike.
The trek is considered an easy multi-day hike and only a basic level of fitness is required. The trails are well-defined and there are ranger stations dotted along the path. All this means that the Fitz Roy is an ideal option for inexperienced trekkers.
Fitz Roy Hike Elevation
The total elevation gain on the Fitz Roy hike is 864m or 2835ft. There is no altitude sickness risks as the elevation of the trek stays fairly regular throughout.
Hiking Fitz Roy- Your Options
Fitz roy day hike.
It is completely possible to hike Fitz Roy in a single day. This and other Patagonian treks can be done unguided.
The trail from El Chalten to the lookout point and back is 21km/ 13 miles (10.5km/ 6.5 miles each way).
I’d suggest leaving between 6 and 7 am to avoid the crowds and get back before the hottest part of the day.
The trail begins at the edge of town, at the end of San Martin Street. There’s a big parking lot with a sign that says ‘Sendero el Fitz Roy’. From here you wind your way upslope. You get some good views of the town from the top.
The trail passes by Laguna Capri which is also a campsite. This is a good spot for a snack or a swim. That’s if you can brave the cold water!

Laguna Capri
After Laguna Capri, the trail flattens out and it is an easy walk. After a few more kilometers, you will reach a forest and the Poincenot campground.
Shortly after passing the campsite, you get to the base of the final slope. You will know you are at this final ascent because there are signs warning that you need to be in good physical condition to complete this climb.
The final ascent is only 800m or so but it is no joke . You will be trekking almost straight up on a gravel path. There is also very little shade along this stretch which makes it even more challenging. When the Fitz Roy trail is busy, a queue forms all the way up and down.
Hang in there!

Almost at the top of a very gravelly ascent
Once you reach the top, you will know the effort was worth it. As you come over the top of the slope, sparkling blue Laguna De Los Tres.
There is a trail that continues to the left of Los Tres, upslope to a hidden laguna which is the main lookout point. Not everybody, including myself at the time knows about the continued pathway. It’s well worth it if you can summon the extra energy.
After spending some time at the top, you return to El Chalten the same way.
Hiking Fitz Roy (3-4 Day Option)
The Fitz Roy trek is generally around 30km in length and takes 1-3 days to complete depending on how much walking you wish to do each day.
If you book a 3-4 day Fitz Roy Trek tour or choose to do an extended version yourself, this is what each day will look like:
Day 1: Spend the night in El Chalten
You will likely spend the first night in a hostel or campground in El Chalten. Buy any last-minute supplies and get a good night's sleep before your trek.
Day 2: El Chalten - Laguno de Los Tres
Today is the beginning of your hike as you trek to Laguna Los Tres all the while getting stunning views of Mount Fitz Roy.
The trail begins by winding its way to Laguna Capri where you pass the lake’s northern corner.
From there you follow the path uphill to Blanco River, passing Poicenot – the mountaineering camp. From the camp, it’s a short, steep trail up to one of the park’s most famous locations, Laguna de Los Tres.

Its a rewarding feeling reaching Laguna de Los Tres
The famed turquoise-blue lagoon sits idyllically below the granite spires of Fitz Roy and makes for a photographer's dream! You have lunch here then head back down the trail to Poicenot where you camp overnight.
Day 3: Cerro Fitzroy, Laguna de los Tres
Day three is not too long so feel free to set off a bit later. Begin by hiking along the Fitzroy trail up to Rio Blanco.
Here is the climbers’ base camp where mountaineers begin their epic climb.
From this vantage point, you’ll be as close to Mount Fitz Roy as you can get without climbing it. You’ll be able to stare straight up at the towering spires that rise over 1500 meters above the surrounding glaciers.
After having lunch at the base camp you then descend back down to Poincenot Camp where you stay overnight once again.
Day 4: Cerro Torre to El Chaltén
Take a nice breakfast before exploring the trail around Laguna Capri as you head to Lagoons Madre within the stunning Hija Valley.

Laguna Madre
After having a long lunch, take the trail down to the Fitzroy River Valley where join the Cerro Torre Trail.
Once on the trail, you trek to Laguna Torre which sits below the famous Cerro Torre group. This looks like something out of a postcard!
Finally, head back to El Chaltén where your trek ends.
Recommended Route Map

The best map we have found for the Fitz Roy Trek is the Monte Fitz Roy & Cerro Torre: Trekking-Mountaineering and Lago Del Desierto: Trekking – Travel Map .
The map provides a compressive satellite relief, contour lines, shelters, timed trails, camping and inns.
How to Prepare for Fitz Roy Trek
When is the best time to trek fitz roy.
The Fitz Roy Trek can be hiked all year round, however, certain seasons offer different things depending on what you are after. Below we have summarised each.
Whilst the landscape is one of rugged beauty, the weather is just as rugged with high winds and frequent storms. Make sure you bring the necessary gear to deal with this.
Fitz Roy In Spring – September to November
This is a great time of year to visit the park if you want warm, clear weather but without the crowds. Although not quite as warm as the summer months, the skies are often clear and you’ll get stunning views across the park. This is also the best season to see flowering flora in the region and witness the breeding season of wildlife.

A Breeding pair of Ashy Headed Geese on the Fitz Roy Trail
Fitz Roy In Summer – December to March
This is the high season. Although the trails are at their capacity now, the weather is also at its warmest and you’ll enjoy mostly clear days on your trek. If you’re the active type, then summer is also the period when you can horse ride, kayak, and mountain bike in the area.
Fitz Roy In Fall – March to June
Our favorite season. The landscape comes alive with color and the trails start to empty out as days become colder. The wind is often ferocious, but the beautiful views are worth it!
Fitz Roy In Winter – June to August
Although the majority of refugios are closed during this period, this season has the benefit of being the quietest. There will be very few other visitors and you’ll have many of the trails to yourself. This is the coldest period be prepared for very chilly nights and high winds.
How much does the Fitz Roy hike cost?
The cost of a Fitz Roy Trek varies depending on when you book flights, when you trek (out of season tends to be a little cheaper), and whether to trek with a local or western trekking agency or independently.
You should budget for the following key expenses:
- Visa, Vaccinations, Insurance etc:~$300-$500
- Equipment (buying and hiring):~$500-$800 – camping gear can be rented at the park entrance for $200.
- Return flights to El Calafate: ~$350-500
- Tour Agency: ~$500 for a cheap local agency to ~$2,000 for a pricey Western trekking agency. You could do an independent trek for less than $200 as many of the campsites are free. You will need to book early though. This price includes food, park entrance, and camping. Food can be purchased from refugios throughout the park, however, it is very expensive.
- Tips: ~$10-20
- Misc (additional food, unplanned travel/hotels etc): $50
Total cost for a Fitz roy trek (including all of the above): $2,000 – $4,000
Are permits required for the Fitz Roy Trek?
No, permits are not required to enter Los Glaciares National Park.

The sign to Los Glaciares National Park as you enter El Chalten
How difficult is Fitz Roy Hike?
The Fitz Roy Trek is not considered to be a difficult trek. The trail length is relatively short and the elevation remains fairly steady.
The trek is the ideal starting point for inexperienced trekkers and only a basic level of fitness is required to complete it. Saying that there is the occasional steep section and if you do the multi-day Fitz Roy trek then each day you will be walking for a good 3-4 hours.
Is altitude sickness a risk on the Fitz Roy Trek?
There is almost no risk of altitude sickness on the Fitz Roy Trek. The trail doesn't comes close to the altitude needed to bring on altitude sickness.
See our detailed article on altitude sickness for more details.
What gear do I need for the Fitz Roy Trek? (Fitz Roy packing list)
Trekking the Fitzroy trail requires a certain amount of essential pieces of trekking clothing and equipment. The Fitzroy Trek is often completed as a multi-day trek that travels through a number of landscapes.
Many pieces of equipment can be rented in El Chalten, but we recommend bringing the most important pieces of gear with you, this includes:
- Hiking shoes. I love a good/ multi-functional set of trail runners. Salomon Speedcross are always a solid bet. I'd suggest going up half a size for wider feet.
- Its worth investing in a good small backpack for day hikes. 20L capacity like this from This Osprey one are perfect for fitting snacks, a waterbottle and an extra jacket. If you are carrying around more equipment, you may want a 40/50l backpack .
- A Sleeping bag that withstands at least -9 degrees Celcius. The TETON Sports Leef is a good buy. Alternatively, rent a bag but bring your own Sleeping Bag Liner
- Trekking poles- A basic, affordable pair like these are more than good enough.
- A waterproof hiking tent (If you plan on camping). At 2.5kg, This one from Forceatt isn't too heavy to carry
To help you plan and prepare for your trek we have written a detailed hiking gear list .
What kind of insurance do I need for the Fitz Roy trek?
Trekking insurance is always a must. Although unlikely, accidents do happen and can cost a lot of money. You should consider the cost of rescue from remote destinations. It is also a great idea to take out travel insurance for other related risks of travel such as loss of baggage, stolen gear, delays, and damaged equipment. See World Nomads for a quote.
Recommended Guidebook

The one guide book that stands above all others is Los Glaciares National Park Travel & Trekking Guide: Fitz Roy, Cerro Torre, Patagonian Ice Cap, Patagonia, Calafate, Chalten by Colin Henderson.
Other guide books available include Fodor’s Chile: with Easter Island & Patagonia (Travel Guide), and Backpacking in Chile: Travel Guide & Trekking Guide for Independent Travelers .
More guides to hiking Patagonia and hiking in South America .
- Patagonia W trek
- Torres del Paine O trek
- Best season to hike in Patagonia
- Hikes in Chile
- Hikes in Argentina
About the author
Alison Macallister
With a degree in Nature Conservation and experience working with wildlife including the Big 5, Alison used to work as a guide for a 5-star safari reserve in South Africa. Today she is a full time traveller and editor for Mountain IQ. She has travelled and hiked extensively in South America, including many solo hikes in Patagonia, the Cusco region of Peru, Ecuador and Chile.
Leave a Reply
Your email address will not be published. Required fields are marked
I did the Fitz Roy day hike as described above in March 2006. I went alone, and didn't see a single other person the entire hike, which was a little daunting when you consider that as you leave El Chalten there were signs warning of pumas/mountain lions and what to do if one approaches you. That said, i didn't encounter any. I took 4 litres of drinking water, and had used 3/4 of it by the time i reached the campsite Campamento Poincenot, but luckily the water upstream was potable (there was a sign indicating as such). There was no evidence of any campers staying when i passed through, it was totally empty. As mentioned in the article, the final ascent to the glacial lake was tough going, but it was just as bad coming down. My legs were a little shaky by this time, since i hadn't really prepared for this hike in advance, and by the time i got back to El Chalten i was worn out ! In retrospect i was probably unprepared. i didn't have a map or compass, no serious wet weather gear, or even a first aid kit. I was wearing shorts, t-shirt with a fleece in case it cooled down. I was lucky with the weather, it was bright and sunny with odd small shower over other parts of the valley but they didn't get me wet. Tbh, at the time I didn't even know i was following a 'named' route – i just set off from the town and just tried to keep going in the right general direction to reach the glacial lake. It was definitely a lot further than i had been anticipating. All in all, though, it was a great trek and if i ever find myself down there again, i'd repeat the hike. Doubt i'd have it all to myself again though !
Thanks for sharing that Rob, what an amazing experience to have that area to yourself! I was there last year and I think those days are over…still. a stunning trek.
We work with local guides to offer great value adventures at unbeatable prices
How to Hike the ‘O’ Circuit in Torres del Paine, Patagonia

Where : Torres del Paine National Park Distance : 76 miles | 123 km Days to Complete : 6-11 Difficulty : Strenuous Best Time to Hike : December-March Typical Weather : High wind, rain
Permit : Proof of reservations required Park Fee: 21,000 CLP/$31 US Hiker Traffic : Moderate-Heavy Resupply Options : Only on ‘W’ side Huts/Cabins/Hotels : Yes Cell Service : Spotty
I’d heard rave reviews about the stunning beauty of Torres del Paine’s ‘O’ Circuit, but I wasn’t prepared for it to take me to a transcendent new world.
Towering granite spires, sprawling glaciers, breathtaking mountain passes, intense and ever-changing weather — I experienced it all on every step of my six-day journey. Trekking Patagonia’s ‘O’ Circuit had exposed me to a completely different type of outdoor experience than I’d ever known.
Chile’s proudest national reserve – located in the far reaches of the Patagonian wilderness – is a mecca for outdoor enthusiasts worldwide. A quarter-million visitors travel to Torres del Paine every year, and now I know why.
Within Torres del Paine exist the captivating ‘O’ and ‘W’ Circuits, two multi-day hiking trails that bring trekkers face to face with some of the most jaw-dropping landscapes our world has to offer.
You can complete the ‘O’ Circuit safely and affordably during the 2023-2024 season. If I can pull it off without a guide, then so can you. Let me tell you exactly how I did it.
Torres del Paine ‘O’ Circuit
What is the ‘O’ Circuit?
- Booking Reservations on the ‘O’ Circuit
- Recommended ‘O’ Circuit Itineraries
Pre and Post Trek Accommodation
Essential gear for the ‘o’ circuit.
- Getting to Torres del Paine N.P.
- Preparing for the ‘O’ Circuit
- Pehoé Terminal to Camp Italiano
- Camp Italiano to Camp Las Torres
- Camp Las Torres to Camp Serón
- Camp Serón to Camp Dickson
- Camp Dickson to Camp Paso
- Camp Paso to Pehoé Boat Terminal
- Final Thoughts: The ‘O’ Circuit

In short, the ‘O’ Circuit is a 126-kilometer loop around the scenic Cordillera del Paine mountains within Patagonia’s Torres del Paine National Park. The trail includes the famous ‘W’ Circuit (67 km), and wraps around the backside of the spectacular mountain range, eventually connecting to make a loop. I’ve included a map below to show you the routes for both treks.
The trail is full of challenges: steep inclines, long intervals, and notoriously erratic weather. To solo hike the ‘O’ Circuit requires a substantial amount of planning and preparation.
Most people choose to complete the trek in 7 to 10 days. Some hike it quicker, some take longer. I decided to hike the loop in 6 days, which is the fastest itinerary I would recommend.
There are three trailheads to choose from to begin the ‘O’ Trek: Grey (accessible by boat), Paine Grande (accessible by boat), and Las Torres (accessible by car or bus).
You MUST hike backside of the circuit (the ‘O’ portion) counter-clockwise. The hiker traffic on the backside of the mountain is drastically less than the front side, which is why it was my favorite stretch of the trek.
Booking Reservations for the ‘O’ Circuit Trek
The ‘W’ and ‘O’ Circuits are Patagonia’s most famous treks but only allow for limited traffic. Don’t risk getting turned away — make all your reservations months in advance. Procrastination might result in a booked up calendar.
BOOK YOUR RESERVATIONS BEFORE ANYTHING ELSE!

How to Make Camping/Lodging Reservations
There are three different websites from which you can book campsites and refugios (cabins with beds) online. Study the trail map, distances, and elevation changes carefully to plan your itinerary. You’ll need to visit two or three websites to book your entire trip.
Most campsites will turn you away if you show up without a reservation, and rangers won’t even let you onto the ‘O’ side of the trek without proof of camping/lodging bookings. Get creative with your itinerary if specific sites are full and entertain all options as you plan your trip.
All ‘O’ Circuit reservations can be made on the following websites:
Italiano Closed for 2024 season.
Paso Price : FREE camping! Amenities : Bathrooms, water. Not available : Electricity, showers, food, gear, supplies.
Torres Closed for 2024 season.
Dickson Price : Campsites starting at $9 US per night. Dorm bed starting at $37 US per night . Amenities : Water, bathrooms, showers, electricity, gear rental, re-supply shop, restaurant.
Los Perros Price : Campsites starting at $9 US per night. Refugios starting at $37 US per night . Amenities : Water, bathrooms, showers, electricity, gear rental, resupply shop, restaurant.
Grey Price : Campsites starting at $9 US per night. Dorm beds starting at $37 US per night . Amenities : Water, bathrooms, showers, electricity, gear rental, resupply shop, restaurant.
Paine Grande Price : Campsites starting at $11 US per night. Dorm beds starting at $57 US per night . Amenities : Water, bathrooms, showers, electricity, gear rental, resupply shop, restaurant.
Las Torres Central and Norte Price : Campsites starting at $11 US per night. Refugios starting at $116 US per night . Amenities : Water, bathrooms, showers, electricity, gear rental, re-supply shop, restaurant.
Chileno Price : Campsites starting at $11 US per night. Refugios starting at $116 US per night . Amenities : Water, bathrooms, showers, electricity, gear rental, resupply shop, restaurant.
Serón Price : Campsites starting at $11 US per night. Refugios starting at $116 US per night . Amenities : Water, bathrooms, showers, electricity, gear rental, resupply shop, restaurant.
Los Cuernos Price : Campsites starting at $11 US per night. Refugios starting at $116 US per night . Amenities : Water, bathrooms, showers, electricity, gear rental, resupply shop, restaurant.
Frances Price : Campsites starting at $11 US per night. Refugios starting at $116 US per night . Amenities : Water, bathrooms, showers, gear rental, restaurant. Not available : Electricity, resupply shop.
Note: Above prices are for High Season (November-March.) Mid Season (September, October, April) is slightly cheaper. All reservations can be upgraded to ‘Half board and lodging’ (about $50 US extra) or ‘Full board and lodging’ (about $70 US additional.)
There are plentiful options to take guided tours where reservations, food, and gear are all provided. While I prefer to trek solo, join a private tour if reservations are full, you’re an inexperienced trekker, or don’t want to bother with carrying gear.
Recommended Torres del Paine’ O’ Circuit Itineraries

I completed the ‘O’ Circuit – plus 17 additional kilometers (10.6 miles) – over six days and five nights. Based on my experience, I’ve written a detailed six-day guide. Keep in mind, however, that most trekkers choose to spend 8-10 days hiking the ‘O’ Circuit.
Because of this, I’ve provided a list of recommended itineraries for six, seven, eight, nine, and ten-day trips of the ‘O’ Circuit. Pick an itinerary that suits you and start planning accordingly.
Six-Day Itinerary
- Day One : Camp Las Torres to Serón (Hike Mirador Las Torres) – 32 km/19.9 miles
- Day Two : Serón to Dickson – 18 km/11.2 miles
- Day Three : Dickson to Paso – 19.8 km/12.3 miles
- Day Four : Paso to Paine Grande – 18 km/11.1 miles
- Day Five : Paine Grande to Frances (Hike Mirador Britanico) – 20.3 km/ 12.7 miles
- Day Six : Frances to Camp Las Torres – 14.6 km/9.1 miles
Distance Per Day : 20.4 km/12.7 miles
Seven-Day Itinerary
- Day One : Camp Las Torres to Serón – 13 km/8.1 miles
- Day Five : Paine Grande to Frances (Hike Mirador Britanico) – 20.3 km/ 12.7 miles
- Day Seven : Stay at Camp Las Torres (Hike Mirador Las Torres) – 19 km/11.8 miles
Distance Per Day : 17.5 km/10.9 miles
Eight-Day Itinerary
- Day Three : Dickson to Los Perros – 11.8 km/7.3 miles
- Day Four : Los Perros to Grey – 15 km/9.3 miles
- Day Five : Grey to Frances – 20.5 km/12.7 miles
- Day Six : Camp at Frances (Hike Mirador Britanico) 14.8 km/9.2 miles
- Day Seven : Frances to Camp Las Torres – 14.6 km/9.1 miles
- Day Eight : Stay at Camp Las Torres (Hike Mirador Las Torres) – 19 km/11.8 miles
Distance Per Day : 15.3 km/9.5 miles
Nine-Day Itinerary
- Day Five : Grey to Paine Grande – 11 km/6.8 miles
- Day Six : Paine Grande to Frances – 9 .5 km/5.9 miles
- Day Seven : Frances to Los Cuernos (Hike Mirador Britanico) – 17.8 km/11.1 miles
- Day Eight : Los Cuernos to Chileno – 16.6 km/10.3 miles
- Day Nine : Chileno to Camp Las Torres (Hike Mirador Las Torres) – 14 km/8.7 miles
Distance Per Day : 13.7 km/8.5 miles
If you choose to attempt the trek in six days as I did, know that your average day will include a considerable average distance (20.5 km/12.7 miles) and elevation gain (823 meters/2700 feet). If your body isn’t ready for these distances and elevation gains, do not attempt to complete the trek in six days.

After you have your ‘O’ Circuit reservations squared away, don’t forget to book accommodations for the days leading up to (and after) the trek. The best hotels and hostels fill up quickly in the high season, so book early to get your top choices for lodging.
I highly recommend staying in Puerto Natales, Chile during the days leading up to your trek. I made the mistake of starting in El Calafate, Argentina, and my ensuing bus trip to Torres del Paine took nearly six hours. It is possible to make the trip from El Calafate, however, so book your lodging there if it makes sense logistically.
Here are a few highly-rated hotels and hostels in Puerto Natales and El Calafate:
Puerto Natales Accommodation
Maromava patagonia, hotel vendaval, hotel simple patagonia, el calafate accommodation, folk hostel, america del sur hostel, cabañas de nené.
Accommodation is available for every budget in Puerto Natales and El Calafate . Don’t procrastinate when you are booking your lodging, however, or you may miss out on the hotel or hostel that best suits you.
Torres del Paine, like most of Patagonia, is known for its notoriously windy and rainy weather patterns. Conditions along the ‘O’ Circuit can get downright intense, so you’d better show up prepared.
Click here for my current list of ultralight backpacking gear. I brought a very similar setup on the ‘O’ Circuit, which stood up impeccably to Patagonia’s harsh wind and rain. The base weight of my pack is 8.8 pounds (4.5 kg).
While every piece of gear you bring along is important, some pieces of gear are simply more important than others. These are those pieces of gear:
Lightweight & Comfortable Backpack
The Backpack I Used : Osprey Exos 48 Trekking the ‘O’ Circuit’s 76 miles of harsh terrain would be a brutal experience with an uncomfortable backpack, so make sure to bring along a pack that fits well and doesn’t hold you back. Don’t risk cheapening your once-in-a-lifetime trip with an uncomfortable bag weighing you down.

Sturdy Four-Season Tent
The Tent I Pitched: Zpacks Triplex As I mentioned earlier, the weather in Torres del Paine can become nasty in the blink of an eye. Wind gusts nearing 100 mph (160 kph) are common on the ‘O’ Circuit, so bring along a backpacking tent that can stand up to them. A failing tent means a wrecked trek. I know from experience .

Burly Waterproof Hiking Boots
The Boots I Wore: Salomon Quest 4D 3 GTX Rain, mud, scree, steep ascents/descents, loose rocks, stream crossings – you’ll see it all along the ‘O’ Circuit. Bring a pair of rugged, waterproof boots that will hold their own against unpredictable conditions along the trail. The last thing you need is waterlogged feet or, worse, a rolled ankle.

Head-to-Toe Rain Protection
The Jacket I Recommend: Outdoor Research Helium II The Pants I Wore: Outdoor Research Helium Did I mention that it rains a lot in Torres del Paine? Be prepared to cover your body from head to toe in rain gear at a moment’s notice. Bring a rain cover for your backpack, also, to keep the rest of your gear dry. Windy rain will probably come at you from every direction at some point or another.

Trusty Pair of Trekking Poles
The Poles I Used: Cascade Mountain Tech I met a backpacker who was having knee issues along the ‘O’ Circuit, and the pain eventually derailed her trip. Trekking poles give you four points of contact on the trail and take considerable pressure off your knees. Seventy-six miles in Patagonia is a long haul, so give your knees some support.
Keep your backpack as light as possible. Resist the temptation to pack excessively and only carry what you need. The less weight on your back, the better. Reference my backpacking gear list for a good idea of what you should (and shouldn’t) bring.
Gear Rental Options in El Calafate and Puerto Natales
Puerto Natales and El Calafate have several mountaineering and trekking stores that will rent out the gear you need for your hike. Backpacks, tents, sleeping bags – it should all be easy to find at these shops.
Here’s a helpful post for renting gear in Puerto Natales .
And here’s one for renting gear in El Calafate .
Of course, gear rental is expensive, so I always economize by bringing my own equipment. Researching and buying a lightweight setup ahead of time is an excellent investment in budget travel.
Getting to Torres del Paine National Park
Torres del Paine National Park hugs Chile-Argentina border in the Patagonia region of South America
The ‘O’ Circuit is tucked away deep in Patagonia, far from any major cities or hubs. Luckily, getting there is relatively easy and affordable. Direct flights from Santiago and Buenos Aires will get you to Puerto Natales or El Calafate – backpacking towns that are within a few hour’s drive of Torres del Paine.
From Puerto Natales, Chile

Puerto Natales is the most convenient launching point for those preparing to visit Torres del Paine. Affordable three-hour direct flights are available from Santiago.
From Puerto Natales, Torres del Paine is just a three-hour bus ride. Two daily buses depart from the main terminal – one at 7:15 a.m. and one at 11:30 a.m. I recommend using BusBud.com to buy tickets in advance.
From El Calafate, Argentina
If you are trying to reach Torres del Paine via Buenos Aires, flying into El Calafate is the fastest and most affordable option. Direct, three-hour flights depart daily from Jorge Newberry Airport.
Bus tickets from El Calafate aren’t available through commercial companies like BusBud.com or BusSur.com, because the trip requires a border crossing.
You can, however, purchase tickets through certain hotels and hostels, but they are rather expensive due to the border crossing. I paid $90 US (62,700 CLP) for mine through America del Sur Hostel .
Book your ticket a few days in advance to ensure you get the bus you want.
The trip to Torres del Paine takes at least five and a half hours from El Calafate – four hours of driving time and about an hour and a half at the border for passport control/customs. It took me almost seven hours to get from my hostel to the trailhead.
Plan to stay in Puerto Natales before your trek, if at all possible. You’ll save yourself money, time, and border-crossing headaches.
Hitchhiking
Many ‘O’ Circuit trekkers choose to hitchhike into Torres del Paine National Park from Puerto Natales or El Calafate – I saw dozens lining the road along the way.
Hitching a ride in Patagonia is extremely popular, so be prepared to compete with other travelers for potential rides. Find a suitable spot to post up, stick out your thumb, and cross your fingers.
Preparing for Patagonia’s ‘O’ Circuit

Preparation requires more than merely booking campsites and finding your way to Torres del Paine; this trek took much more time and effort than any other backpacking trip I’d ever experienced. It’s worth it, of course, so prepare early and often.
My Total Cost of Trekking the ‘O’ Circuit
A common misconception is that hiking the ‘O’ or ‘W’ Circuit is an expensive endeavor. While it certainly can be (some tours cost upwards of $4,000 US!), it is possible to pull it off affordably if you plan correctly.
Here are my approximate expenses (minus airfare) for the whole trek. I always try to be a frugal traveler and found it easy to complete this trek at a reasonable cost.
- Hostel in El Calafate : $22 US
- Tour bus to Torres del Paine : $90 US
- Park Fee : $31 US
- Campsite reservations : $48 US
- Catamaran : $26 US
- Packed food for six days : $78 US
- Restaurants/re-supply : N/A
- Hitchhiking to Punta Arenas : Free
My total expenses for the ‘O’ Circuit : $295 US
There are no ATMs in Torres del Paine National Park . Bring enough cash to pay the park entrance fee and buy any food, lodging, supplies, or transportation (catamaran, bus) within the park. Some shops accept credit cards, but the majority of businesses only accept cash.

Weather in Torres del Paine
A calm day in Torres del Paine is a rare occurrence.
I found out quickly that weather from all four seasons is fair game on the ‘O’ Circuit during peak season, much like the majority of Patagonia. Be prepared for intense rainfall, brisk temperatures (0-13°C/32-55°F), and powerful winds that can reach up to 110 mph (180 kph).
Keep an eye on the conditions as your trek draws closer and prepare accordingly. WindGuru has, by far, the most detailed and accurate forecasts available for Torres del Paine, I highly recommend saving the upcoming week’s weather information before starting your trek.
Free Offline Trail Maps with Maps.me

Maps.me is a handy offline navigation app that has trail maps from hikes all over the world. I highly recommend downloading this app ahead of your trek. Sure, the trail is very popular and well-marked, but downloading offline maps provides an extra layer of security on top of a physical map.
The entire ‘O’ Circuit trail is available on the app and easy to follow, so download it ahead of time. Drop a few waypoints before you start the trek, so you know where specific destinations and landmarks will be. You won’t need cell service to use the maps.
Water Along the ‘O’ Circuit

The ‘O’ Circuit boasts plenty of clean drinking water along, almost all of which can be consumed safely without any pre-treatment.
I brought my water filter along in case I needed it, but never ended up using it. The water along the ‘O’ Circuit is glacier-cold, clean, and fresh – a testament to the purity of Patagonia.
Food: To Pack or Not to Pack?
There are plenty of grocery and backpacking stores to purchase food in Puerto Natales and El Calafate. I chose to fly all my favorite backpacking food out from the US so that I could plan out every meal ahead of time. On a given day on the trail, I’ll consume some combination of the following:
- Instant Espresso
- Energy bars
- Dehydrated fruit
- Prepackaged dehydrated meal
I packed all six days’ worth of food, but doing so isn’t necessary, as there are many restaurants and resupply stations along the trail. The food inside Torres del Paine is not cheap, so saving weight will end up costing you more money.
I typically ration myself around 3,000 calories a day. Plus, I always bring an extra day’s worth of food in case of an emergency. There are few things worse than running out of food in the middle of the wilderness.
Here’s a post I’ve written on how to meal plan and pack food for backpacking trips .
IMPORTANT : If you are crossing into Chile from Argentina, you’ll have to go through customs and border control, and they won’t allow you to bring any meat products, eggs, cheese, fresh fruit, or vegetables into Chile. A customs officer confiscated a block of cheese and a stick of sausage from my bag at the border.
Physical and Mental Preparation

Hiking 123 brutal kilometers (76 miles) in the harsh Torres del Paine wilderness is a formidable test of both body and mind. To prepare myself, I hiked, camped, and exercised regularly during the months leading up to the trek. By the end of the ‘O’ Circuit, I was absolutely beat, but still intact. I’m glad I prepared my body.
If you’re concerned that you may not be ready for the harsh terrain and distances ahead, start training now. Knees can act up, backs can give out, and gear can fail you if you’re not adequately trained — both physically and mentally — for the rough conditions of Torres del Paine.
Just a week before embarking on the ‘O’ Circuit, I trekked the Huemul Circuit in Argentina to get my body prepared. I highly recommend this trek.
I’ve gone on challenging treks with minimal preparation, and they don’t always end up going so well .
Here are the hiking distances between each stop along the way:

Leave No Trace
Always pack out everything you pack in!
The ‘O’ Circuit is an extremely clean and beautiful trail. Let’s all work together to keep it that way for the rest of the world to enjoy. There are no excuses for leaving waste behind.
If you feel like going the extra mile, fill a small adventure bag to help keep the trails clean.
Visit LNT.org for more information on keeping nature clean and unpolluted.
Now that I’ve covered all the preparation logistics you need, let’s switch over to my six-day trekking experience of the ‘O’ Circuit. This is where the fun begins.
Day One: Pehoé Boat Terminal to Camp Italiano
Distance : 18.5 km/11.5 miles Elevation gain : 869 meters/2850 feet Highlights : Lake Pehoé catamaran ride, Mirador Britanico

Ah, day one. The day the boots finally hit the trail. Months of preparation and anticipation are about to pay off. Reservations, weather forecasts, gear, food, training – it’s all in play now. It’s time to take the first step.
Much of Day One will be spent tangled up in getting to the trailhead. It’s a bit tedious jumping through all the hoops, but also completely worth it in the end. The views and scenery are magnificent right off the bat, setting the tone for the rest of the trail.
Take a Bus to Torres del Paine
I made the mistake of starting my adventure in El Calafate, Argentina. As I mentioned earlier, beginning in Puerto Natales, Chile is the smart way to go. You’ll save yourself a significant amount of money and time and won’t have to deal with a border crossing on the first day of your hike. Because I started the trek in El Calafate, I arrived at the trailhead much later than anticipated and had to adjust my itinerary.
My bus (which ended up being a tour bus) didn’t end up leaving town until nearly two hours past its scheduled time. And since it was a tour bus, it made regular stops along the way to Torres del Paine. I was at my wit’s end by the time I got off the bus. Such is travel.
Argentina/Chile Border Crossing
Part of the reason the ride into Torres del Paine took so long, was a very long stop at the customs and border control office on the way into the park. In all, it took nearly an hour and a half for our bus full of chatty tourists to get cleared through customs.
Checking in at the Administration Office
Whether you are arriving in Torres del Paine from Puerto Natales or El Calafate, it’s required to stop at the administration office on the way into the park.
The mandatory fee of $31 US (21,000 CLP) must be paid in cash! Don’t forget to bring enough money – I nearly screwed this one up.
If you’re hiking the ‘O’ or the ‘W’ Circuit, you must register at the park ranger station within the administration office before you start. The park rangers will need to see your reservations for every single night you plan on staying in the park. Be sure to have them at the ready, either on your phone or printed out. They’ll give you a map and a detailed list of the rules of the park .

Catamaran Across Lake Pehoé
If you want to start the ‘O’ Circuit at Paine Grande as I did, you’ll need to take a boat across Lake Pehoé. There are affordable shuttles for $4 US (3000 CLP) that will run from the administration office to the catamaran dock. Luckily, my tour bus dropped me off at the pier, so I didn’t have to worry about transferring to a shuttle.
The catamaran only departs five times a day, so be sure to check the schedule to find a time that works for you. There’s no need to book tickets in advance. The tickets are cash only.
Lake Pehoé Catamaran Information
To start the trek at Paine Grande, you must take a catamaran across Lake Pehoé to reach the campground/refugio area. There are no buses that drop off at Paine Grande.
Note: The information below is for December 1st through February 28th. Boats will run less frequently outside of these dates.
Departure Times (Pehoé → Paine Grande) : 9:00, 11:00, 14:00, 16:15, 18:00 Return Times (Paine Grande → Pehoé) : 9:35, 11:35, 14:35, 17:00, 18:35 Duration : 25 minutes Price : 18,000 CLP ($26 US) one way/28,000 CLP ($40 US) round trip (cash only)
The boat ride across Lake Pehoé offers stunning views of Patagonia’s famous ‘Blue Towers.’ I was blessed with a sunny and clear boat ride, so the mountains were unobstructed by clouds. Have your camera ready, as the photos ops are endless.
Setting Up at Camp Italiano
Once you arrive at the Paine Grande campgrounds, it’s (finally) time to start hiking. Because the backside of the ‘O’ Circuit must be traversed counter-clockwise, your only option will be to begin hiking east along the trail, which will be easy to find.
Camp Italiano is a comfortable 7.5-kilometer (4.7-mile) hike from Paine Grande. Once you arrive, check in with the park ranger and set up camp. Italiano is a free CONAF site with basic amenities, so don’t expect to find anything beyond a tent site, a bathroom, and water.
Put together a daypack with some water and snacks and get ready to see the first of two miradores (lookouts) of the Torres del Paine.

Mirador Britanico
Mirador Britanico is the first of two magnificent lookouts on the front side of the trek. Getting to the lookout point requires a steep 5.4-kilometer (3.4-mile) ascent up the Frances Valley.
On the way up the valley, you’ll pass the stunning Frances Glacier, where it’s possible to hear the booming and crackling of slabs of ice breaking free and sliding down the face of the mountain.
The entire hike up the valley is stunning, and the breathtaking lookouts to the massive peaks are appropriate rewards for the tiring uphill march it takes to arrive.
You’ll descend on the same trail, which will serve as an early test for your knees. Take your time and use trekking poles if you brought them.
Note: Because of my late start, I was forced to hike to Mirador Britanico at the beginning of Day Two. This made for two long and brutal days in a row. Try to avoid that.
Day Two: Camp Italiano to Camp Las Torres
Distance : 16.6 km/10.3 miles Elevation gain : 396 meters/1300 feet Highlights : Frances Glacier, Lake Nordenskjöld

In terms of distance and elevation gain, Day Two will be one of the quicker days of the trek. For much of the day, gorgeous Lake Nordenskjöld will be on your right and the imposing Mount Almirante Nieto on your left. Because of its sheer beauty, Day Two was one of my favorite stretches of the trail.
All the logistics — hostels, buses, boats, reservations, border crossings, and packing — are finally behind you. Now you can spend the rest of the ‘O’ Circuit focusing on the stunning beauty, physical challenges, and the erratic weather of Torres del Paine.

Hiking Along Lake Nordenskjöld
It’s a joy to hike along Lake Nordenskjöld. There aren’t any more severe inclines, so it’s a comfortable, non-technical experience. Plus, the trail stays close to the shoreline of this pristine body of water.
The weather for most of Day Two was close to perfect. I experienced zero rain and only light winds on the path to Camp Las Torres. That’s when it hit me — the ‘O’ Circuit was a once-in-a-lifetime trek that was already exceeding my incredibly high expectations.

Setting Up at Camp Las Torres
As I passed Lake Nordenskjöld and made my way to Camp Las Torres, the wind started to pick up. The ‘O’ Circuit’s notorious Patagonian gusts flexed their muscles and pushed me around, so I put my head down and forged onward to find a place to pitch my tent.
Camp Las Torres is divided into two sections: Central and Norte. Check in at the ranger’s station to see which side to find a site on. Las Torres is luxurious with its hot showers, resupply stations, a restaurant, electricity, and gear rentals, especially when compared to Camp Italiano. It’s a great place to freshen up and recharge your morale.
Trekking Tip: Camping in High Winds
Even if the weather is calm when you arrive at camp, do your best to find a site that’s protected from the wind. Look for spots that are protected by bushes, rocks, buildings, etc. Don’t camp underneath trees, where you and your tent are susceptible to falling branches. Ask the park rangers about the forecast and plan accordingly. Torres del Paine’s winds are known for wrecking tents and ruining trips.
When I searched for a suitable site to set up camp, the wind kept howling. After a lot of head-scratching, I finally found a campsite that was shielded from the wind on three of four sides. Perfect . It was a tight squeeze to fit my tent in, but I was happy to have found the spot. Wind gusts that night reached nearly 100 km/h (60 mph).
I put in my earplugs, snuggled into my sleeping bag, and went to sleep early that night. I was about to face the most brutal day of the circuit in the morning.
Day Three: Camp Las Torres to Camp Serón
Distance : 32 km/19.9 miles Elevation gain/loss : 1356 meters/4450 feet Highlights : Mirador Las Torres, Paine River

If you want to squeeze the ‘O’ Circuit into six days as I did, count on some very long and tiring stretches. Today will be the longest and most exhausting of the bunch.
Day Three is an extreme challenge both mentally and physically, but the rewards along the trail are plentiful. You’ll soak in the most famous view of the trek, Mirador Las Torres, an unbelievable vista of the jagged granite peaks that photos just don’t do justice.
Note: If you want to make Day Three less daunting, spend the second night at Camp Chileno – this will cut 5 kilometers (3.1 miles) and considerable elevation gain off the start of your sharp incline.
A Brutal Morning
The rigors of Day Three will require an early start – preferably three or more hours before the sun comes up. The goal of most trekkers is to witness the sunrise cast light onto the sheer towers of rock. Apparently, this is quite the sight to behold, but I wouldn’t know. I slept through my alarm.
I chose to leave my tent wholly set up for my hike to the towers to save weight on the trail. Doing so was risky, but ultimately everything was intact when I got back.
The hike up to the towers is 9.4 kilometers (5.8 miles) of calf-burning ascent, which challenged me more than any other section of the trek. The further I climbed, the windier it got. By the time I reached the towers, the wind was whipping small gravel into the air and stopping me dead in my tracks. It was a real test of mental endurance but proved worthwhile in the end.

Mirador Las Torres
Here’s the ‘O’ Circuit’s vivid Torres del Paine postcard moment. Towers of granite shoot straight into the sky, cutting into the clouds. An ice-cold lake below collects the runoff from Glacier Las Torres. It’s a truly majestic view that makes you forgive the cold, windy, and draining ascent that brought you there.
All too briefly, I soaked up the view of the mirador until the wild weather (and my depleted snack supply) forced me back down the trail to Las Torres Camp. I was thankful for my trekking poles – they took the pressure off my knees for the duration of the long descent.

Torres del Paine’s Backside: Where the ‘W’ becomes the ‘O’
The crowds thin out considerably between Las Torres and Serón. You no longer have to share the way with ‘W’ Circuit hikers, so the trail opens up, and a sense of solitude sinks in. I encountered more horses than humans along my walk to Serón.
The scenery quickly changes once you start the backside of the trek. The trail is calm, flat, dry, and winding – a welcome break from the first half of the day. The broad River Paine snakes its way through the open valley, guiding the path towards the next patch of earth to set up camp and recharge.
Setting up at Camp Serón
By the time I got to Serón, the wind had picked up yet again. The forecast called for more powerful wind gusts of 100+ km/h (60 mph) throughout the night. Because of my late start, I arrived to find a packed campground.
I set up shop in one of the last spots available, secured my tent, and braced for another intense and windy evening. After a hot shower, I dozed off quickly and slept like a baby through a night of fiercely buffeting winds.
Day Four: Camp Serón to Camp Dickson
Distance : 18 km/11.2 miles Elevation gain/loss : 472 meters/1550 feet Highlights : Backside views of the towers, Camp Dickson

The hike from Serón to Dickson is far less challenging in terms of distance and elevation gain than the day before, but the weather will ultimately dictate the pace on this leg of the trip. I didn’t get so lucky with the rain and wind on this stretch.
Preparing for Harsh Weather
After I packed up camp, I asked the staff at Serón about the forecast. They told me to expect steady rain and wind throughout the day. I moved my rain pants and jacket to the exterior of my pack for easy access and started towards Dickson. The staff’s forecast would prove all too accurate.
Check the forecast whenever you have the chance . I’m glad I did.

A Harsh Slog Over the Pass
Fairly quickly after Serón, you will encounter a short but exposed pass that is notorious for its high winds. The elevation gain is mild compared to other portions of the ‘O’ Circuit, but the infamous Torres del Paine weather can make this section quite formidable.
Heavy rain coupled with furious wind made for brutal conditions as I trudged through the most challenging weather of my entire trek. Beads of water stung my face like needles as the powerful Patagonian gales whipped and cut in every direction.
Then, in an instant, the wind and rain stopped, and a vivid double rainbow opened up over the trail. My frustration turned to amazement – a common occurrence on this trail.
After the pass, the trail flattens out on the descent to Dickson. You’ll need to check in at the Coirón ranger station and present your passport and camping reservations. There you will find covered picnic tables, making it a great place to stop for lunch.

Setting Up Camp at Dickson
The wind settled down after the pass, but the heavy rain persisted until I reached Dickson. I arrived at camp depleted and soaking wet, itching to set up my tent and retreat to my dry zone.
There’s a large, open shelter at Dickson to hang out clothes and, in general, escape the elements. I was among dozens of campers taking advantage of this dry oasis.
The refugios are also great places to dry out and recharge. I thoroughly enjoyed flipping through the guestbook and reading the vivid ‘O’ Circuit memories left behind from Torres del Paine trekkers of years past.
The sites at Dickson are fairly spread out, with some very scenic spots available for the taking. Once you set up camp, walk to Lake Dickson and soak up the magnificent views before night settles in.
Day Five: Camp Dickson to Camp Paso
Distance : 19.8 km/12.3 miles Elevation gain/loss : 1204 meters/3950 feet Highlights : Los Perros Glacier, John Gardner Pass

The eternal Patagonian beauty of Torres del Paine continues on Day Five as you reach the high elevation point of the trek, John Gardner Pass. At 1200 meters (3900 feet) in elevation, this pass is (surprise, surprise) known for its heavy winds. Try to reach the top anytime before noon, which is typically the calmest period.
Be sure to catch the sunrise over the mountains behind Camp Dickson before moving on towards Paso. It was one of the highlights of my trip.
From Dickson to Paso, I had a perfect mix of stunning scenery, solitude, and superb weather. It was my favorite leg of the trek.

Get an Early Start
Most trekkers are slow to leave Dickson. The most common plan of attack is to make the manageable 11.8-kilometer (7.3-mile) hike to Los Perros campground and stop for the day, saving John Gardner Pass for the next morning. Because of this, the early birds often have a quiet and uncrowded trail ahead of them.
I got such an early start and didn’t see another human for the first three hours. Rise with the sun, and have Torres del Paine all to yourself.
Checking in at Los Perros
It’s mandatory to check in at the Los Perros ranger station, even if you don’t plan on spending the night. Park rangers need to take down your information and give you the green light before you can proceed. On dangerously windy days, rangers will not allow trekkers to attempt the daunting mountain pass.

John Gardner Pass
Luckily, I experienced none of the awful wind that I had read so much about. The weather was perfect, and I was treated to spectacular views of the valley below as I slowly climbed in elevation. Glacial streams and cascading mini-waterfalls were everywhere as I approached the pass.
Once you reach the top, you’ll get your first view of Glacier Grey. A glimpse of this sprawling glacier is a sign of good things to come.
In my notes, I wrote that hiking John Gardner Pass “was like living in a dream.” This stretch of trail will always be one of my favorite lifetime hiking memories. I’m so grateful the weather cooperated that day.
The descent from John Gardner Pass is just as steep as the walk up, so prepare your knees for another tough test. Descend slowly, use trekking poles if you have them, and do not rush this stretch of trail.
Setting up Camp at Paso
The facilities at Paso reminded me a lot of Camp Italiano. Both campgrounds are free (thank you, CONAF) and offer bare-bones amenities. Tent sites, toilets, and water – that’s pretty much the extent of it at Camp Paso.
Paso sits at a higher elevation than any other campground on the ‘O’ Circuit. Be prepared for significantly colder weather and a higher probability of wind and rain. For me, night five was chilly and restless; sleep was hard to come by.
Day Six: Camp Paso to Pehoé Boat Terminal
Distance : 18 km/11.1 miles Optional hike back to ranger station : 17 km (additional)/10.6 miles (additional) Elevation gain/loss : 640 meters/2100 feet Highlights : Grey Glacier, Lake Grey

It’s time to put a bow on Torres del Paine’s ‘O’ Circuit. This final day on the trail offers tremendous views of the massive Grey Glacier and the impressive length of Lake Grey. This last stretch of trail is breathtaking and relatively mild in terms of elevation gain – a perfect end to a most memorable trek.
It’s also possible to hike an additional 17 kilometers (10.6 miles) to turn your experience into the ‘Q’ Circuit. This very flat stretch of trail runs from Paine Grande back to the administration office, cutting out the need to take the catamaran back across Lake Pehoé.
Exhaustion, sadness, excitement, joy, frustration – I ran through the gamut of emotions on Day Six. What an utterly bittersweet day.

Grey Glacier
Day Six brings spectacular views of the imposing Grey Glacier, which is but a slice of the vast South Patagonian Ice Field that spans more than 12,200 square kilometers (4,700 square miles).
I recommend stopping at every possible lookout to soak up the enormous and humbling vistas. Along the way, you’ll cross three suspension bridges that dip with each step and sway with every gust of wind. Trust the bridge engineers and enjoy the ride.
You’ll soon reach Camp Grey, a great place to drop your pack, grab a quick lunch, and give your body a break. There’s a short trail to a lookout above the shoreline, a great spot to snap a few more photos.
Completing the ‘O’ Circuit in Torres del Paine
As you leave Camp Grey, you’ll climb one last incline, a modest 400 meter (1300 foot) gain in elevation. This stretch of trail is part of the ‘W’ Circuit, so it will be a bit more crowded than the backside of your trek.
Once you top out in elevation, you’ll slowly descend back near sea level as you return to Paine Grande and the Pehoé catamaran dock. Once there, you’ll have completed the ‘O’ Circuit! It’s time to take off your pack and grab a beer at the nearby restaurant. You’ve earned it.
Check the schedule and hop on the next Pehoé catamaran back to the administration office. From there, find a bus or hitchhike towards your next destination. Check the catamaran departures schedule in the Day One section of this post.

The ‘Q’ Trek: The Long Way Back
Not quite ready to say goodbye to Torres del Paine and the unrelenting beauty of the ‘O’ Circuit? Extend your adventure by skipping the catamaran and walking your way back, as I chose to do. By doing this, you’re turning the ‘O’ Circuit trek into the ‘Q’ Circuit, and soaking in more of Patagonia’s splendor.
The trail back to the administration office was nearly empty for the entire 17-kilometer (10.6-mile) haul – I only saw three other people the whole time. It was also very flat and straight, a huge relief since I was walking my longest day yet on the circuit.
The return hike along Lake Pehoé is spectacular. I turned around regularly to soak in the last precious views of Torres del Paine. Few people choose to hike this extension, but I highly recommend it to anyone who still has fuel left in their tank. It’s the cherry on top of a life-changing trek.

Hitchhiking to Puerto Natales
The bonus ‘Q’ Trek will eventually take you to a paved road that leads back to the administration office. From there, catch a bus or post up at an intersection and hitchhike like I did.
I stuck my thumb out and had a ride within 10 minutes. A Chilean man in his late 50s picked me up, and we chatted the entire way back to Puerto Natales while the Patagonian sun crept lower. I couldn’t believe it – I’d completed the famous ‘O’ Circuit in six exhausting and awe-inspiring days! When I got dropped off on the edge of town, I limped to my hotel, sprawled onto a real bed, smiled exhaustedly at the ceiling, and drifted off to a night of deep sleep.
Torres del Paine’s ‘O’ Circuit: Final Thoughts
For weeks after the ‘O’ Circuit trek, I struggled to find a way to express what I’d just experienced. Now, nearly a year later, my writing is but a faint echo of those six glorious days. Words may fail me, but travel doesn’t.
In Torres del Paine, I’d traversed alongside towering granite spires, immense glaciers, peaceful waterfalls, serene mountain lakes, and endured a torrent of unpredictable weather. It left me with a powerful sense of unique beauty that is beyond capturing.
All the anticipation and preparation I put into that trek was repaid with a flood of profoundly vivid lifetime memories. The ‘O’ Circuit left me uplifted, humbled and hungry for more.
It will do the same for you.
One day, I’ll return to Patagonia to see what other wonderment lies on the horizon. In the meantime, I’ll continue exploring the earth and searching for other special places that will expand my soul. They’re out there and, by traveling, I can find them.
Last Updated on March 19, 2024

Noel Krasomil
Affiliate Disclosure : Some of the links in this post may be affiliate links. If you click an affiliate link and make a purchase, we may receive a small commission at no extra cost to you. Affiliate links help support this website and keep it 100% ad-free.
24 Things to Know Before You Trek in Patagonia
07/13/2021 by Kristin Addis 66 Comments
For a few years running now, I’ve explored Patagonia slowly, switching between Chile and Argentina and making hiking my main activity.
It was mind-blowing. I’ve never seen so many glaciers, waterfalls, and rainbows all in one place. It’s rugged and tough landscape that tested my limits but was so easy to fall in love with at the same time.
I did several treks, some were just one day and others spanned several days or even more than a week. With the right gear and knowledge, Patagonia can be enjoyable despite the elements and without many mishaps.
Here’s what I learned about trekking and camping in Patagonia:
Table of Contents
How to Prepare for Trekking in Patagonia
1. you seriously do need hiking boots.
I’ve trekked in Nepal , China , and all over the States in running shoes and thought they were great. The biggest difference is in Patagonia the trail is often super muddy, very rocky, or totally wet. Sometimes there isn’t really even a trail and you have to go by GPS.
There were SO many times when I was really glad to have waterproof shoes that I could just trek through the mud with and not care. They were one of the most important things to bring along. Here are the ones I recommend .

2. … and thick socks
The easiest way to avoid blisters is to reduce friction. That meant wearing thick socks and tying my boots very snugly when I trekked. When I did develop blisters, it really helped to keep my shoes tight and my socks thick to keep them from getting bigger or worse, tearing.
3. Bring Compeed
Compeed is so much better than Band Aids! These blister bandages are the best I’ve found, and they stay on for several days as well. You can get them at your local pharmacy, or a similar product at REI . Bring them with you as they may not be possible to replace everywhere in Patagonia (I actually never found them when I looked for them there).
4. Bring the right clothing with you
You can experience all kinds of different weather within the span of a few hours in Patagonia. I trekked through tons of rain, very heavy winds, and even snow over the two months that I was there. It can feel quite extreme at first, but in time you do get used to it and it even becomes part of the enjoyment of Patagonia.
However, it’s only fun if you have warm, waterproof clothing. Here’s my packing list for Patagonia to help !

5. Get a tent suited for Patagonian weather
A normal tent isn’t going to be a good choice in Patagonia, where winds can reach upwards of 100km/hour. That is some serious wind and the shape of the tent, plus strength of the tent poles, both matter a lot so that nothing breaks while you’re midway through a trek.
I used an MSR tent that was resilient and super light to carry at the same time. The shape is designed for wind and the rain jacket kept us dry, except for one occasion when the rain was so heavy that everyone woke up wet (it does happen).

6. For the love of God, do NOT buy your camping gear in Argentina
In the past I’ve bought a bunch of my camping equipment in the local country before the trek. It saved me a lot of money and the trouble of carrying the equipment around. This is not true at all in Argentina. Seriously do not buy any of your gear there!
I saw a North Face bag on sale for $300 that would have been $50 back home. Absolutely everything was overpriced in every single store I checked. This is likely even more exuberant now that the country’s economy has plummeted. Just bring it from home, seriously.

7. But honestly, Chile isn’t that much better
There were a few things that I had to buy in Chile, like my sleeping bag and hiking poles. The price was closer to what I would pay back home, but I think I could have saved more by ordering stuff on REI and just bringing it with me.
8. Get lightweight cooking gear
Trekking with pots and pans is not a possibility for me. It’s just way too much weight and when you have to carry a week’s worth of food on your back, it’s already heavy so why make it worse?
I found this foldable pot that doubles as a pasta strainer and thought it was great. It’s super light and the quality is good. I used it for cooking everything I ate.
9. Hiking sticks are here to help you
Some people think hiking poles make them look dorky. I don’t care. I like the idea of protecting my knees and redistributing the weight. Plus, hiking poles saved me from face-planting into rocks more than once when wind gusts caught me by surprise.
It’s also good to have poles that aren’t super heavy, and as they get lighter, the cost usually goes up. Here’s a post to help you pick which trekking poles are best.

10. Avoid those dumb sporks
When you’re looking at stuff to buy for your trek, you’ll see these half-fork, half-spoon with a knife at the end of one of the fork blades. It looks like a great idea. You can slice your food then pick it up with the fork to eat it!
False – it’s really hard not to cut your face on the knife part. Why was it designed that way, and how did I fall for it?
11. Life will be so much better with powder, not cans
It’s hard to resist easy things like canned tuna (btw, not for me, ew) and sauces. You have to pack those cans up and back out, though. That’s a lot of extra weight for not much gain.
My milk was powdered, as was all of the sauce and soup that I used for cooking. Some people even bring entire meals made out of powder that you just add water to. When water is as easy to get as it is in Patagonia, why not get things that are light until you add water?

12. Rain-proof your stuff
Rain covers tend to blow off or just be incredibly annoying when the wind catches them, making tons of noise right in your ear.
I didn’t bring a rain cover. I lined my bag with a bin liner and put my clothes, food, and electronics all in their own plastic bags as well. The backpack could get wet – no problem, and the stuff inside stayed dry.
13. Get a hat that won’t blow away easily
Go for a hat that keeps your head warm, your face covered from the sun, and your ears warm in the wind. This hat ticks all the boxes.
I kind of felt like a dweeb wearing it but then again, my face was protected and my ears were covered. Two birds, one stone, really.

14. It’s pretty nice to have a lightweight, warm sleeping bag
It gets seriously cold when you’re sleeping next to a glacier. I got snowed on as well in Torres del Paine, so having a warm sleeping bag that was also super lightweight was a life-saver. This is a non-negotiable item, along with a good tent, in order to enjoy the camping part of trekking in Patagonia. You’ll want it to be at least comfort level of 0-degrees Celsius .
15. It’s worth it to get a thick sleeping mat
I spent around $20 on a mat that was lightweight but also pretty useless on bad ground. I encountered a lot of roots and rock and think things would have been a lot better if I’d brought a thicker mattress. They do weigh more but only slightly and that’s something I would probably have been willing to carry.
I would probably use something like this in the future.
16. Most water on the trails is clean, but when it’s not, sterilize it with this
Most of the water is glacier water in Patagonia and it’s some of the cleanest on earth. However, especially in Torres del Paine, some campgrounds have had trouble with the increase in tourism and due to some campers doing things like washing in the streams or worse, some of the water has been making people sick.
I bring a steripen along on long treks. I never want to worry about the water or be without it, so I just sterilize it with a Steripen .
PLEASE: It’s up to everyone who hikes in Patagonia to work together to keep the water safe. Too often I saw idiots jumping into the glacial lakes, swimming in streams, or washing their bowls directly in the water. This water trickles down and effectively makes campers drink your bathing or dirty dish water. That’s not cool. Take water into a clean bowl and walk at least 100 paces away before washing, same goes for using the bush toilet. Please think twice before getting that swimming selfie – it’s incredibly selfish.
17. You can eat the Calafate berries
They have thorns and are not to be confused with the little red berries also growing on the ground, but Calfate berries, as long as you know what they look like , are nice snacks to have along the trails, especially on the Huemul Circuit .

18. Here’s a useful camping food list:
Powder, carbs, nuts, oatmeal, chocolate, and fruits. Those are always in my trekking pack because they weigh the least and give me the most energy.
A day’s packing list:
- one portion oatmeal with milk powder and chocolate powder to taste
- 100 grams of dried fruit and dried nuts
- 1 small chocolate bar
- one portion pasta and powdered sauce plus slices of salami and/or cheese for dinner
For lunch, I pretty much always ate nuts and dried fruit. That way I could just keep going without having to stop. Dinners always had a treat in them of salami or a cheesy sauce (yes, a rare moment when I was willing to eat cheese) just to keep it nice and interesting. I also experimented with cous cous and powdered potatoes and think they’re both great options for hot dinners as well.

Since I was going to Patagonia with my friend Steve who has been there before and already knew that powder was the way to go, I was able to lighten my food load significantly by not bringing cans or liquid sauces. I’m so glad that we didn’t make the mistake of bringing all that weight!
Also, Steve has a pretty helpful guide specifically for Torres del Paine hiking here , with park entrance prices and campground info, that I’d suggest in conjunction with this post!
19. You’ll need this kind of cooking grill
It’s forbidden to have open fire in just about every national park in Patagonia, at least that I’m aware of.
A little camping stove that you attach to gas cans, available in the sporting goods stores in Patagonia, is best for trekking.
20. Bring a headlamp!
Because using your phone as a flashlight is going to get annoying really quickly. I like this waterproof one .

21. …and a portable charger
So that you can recharge your phone and cameras. This is the one that I use. (click here for more info on my camera gear ).
22. Don’t forget mosquito repellant
Yep, they do exist sometimes in Patagonia.
23. …and sunscreen!
Make sure to always lather up when trekking in Patagonia, or anywhere for that matter. A sunburn when trekking is the worst! I like Sun Bum best.

24. Get ready for the best trip ever
Patagonia is seriously awesome to trek through. The landscape keeps getting more and more dramatic as you go through, providing constant surprises and little challenges. It’s one of the most rugged and lovely places I’ve traveled through, and if you’re planning to do the same, get ready for one of the best trips, ever, period.
About Kristin Addis
Kristin Addis is the founder and CEO of Be My Travel Muse, a resource for female travelers all around the world since 2012. She's traveled solo to over 65 countries and has brought over 150 women on her all-female adventure tours from Botswana to the Alaskan tundra.
Leave a Reply Cancel reply
Your email address will not be published. Required fields are marked *
Save my name, email, and website in this browser for the next time I comment.
subscribe to our newsletter
This site uses Akismet to reduce spam. Learn how your comment data is processed .
07/13/2016 at 6:56 pm
I’ve been waiting for this..great post! I’m heading to Patagonia around Christmas (after I backpack Central America and the rest of South America) so wouldn’t buy a lot of things at home. Hopefully I can find some cheap gear in Peru or somewhere. Awesome tips, thanks again!
Kristin says
07/14/2016 at 1:49 am
And if you can’t in Peru, opt for buying in Chile rather than Argentina. Have fun!
Patricia says
07/15/2016 at 2:41 am
Hi Kristin, thank you so much for your post, it’s gonna be very useful on our trip to Patagonia in January. We are very excited, can’t wait for this!!!!
07/15/2016 at 7:24 am
Yay glad to have been helpful! You’re going to love it
John @ Pretravels says
07/15/2016 at 2:58 am
Great images and fantastic tips! If you’re not used with this type of terrains you might end up with the wrong gear and nothing spoils hike more than this.
07/15/2016 at 5:32 am
This is precious – perfect timing, it will help me in my preparations immensely. Thank you for this post and wonderful photos 🙂
07/16/2016 at 12:00 am
For me Patagonia seems so far away … But who knows, maybe someday! 🙂
Mishelle says
07/16/2016 at 9:38 am
Great post! I have this destination on my bucket list. Hope I go there one time.
Nicole says
08/03/2016 at 4:21 pm
I am so happy that I friend of mine ran across this article!!! I am gearing up for a 5 week trek the middle of Oct. and although I have read literally everything, it’s nice to have a first hand account!!! How easy is it to find the powered foods/dehydrated things in towns? This is hands down my biggest concern! I am an avid hiker and love to do ziplock cooking but I for the life of me can not find any info on actual food purchases while I am there!!! Thank you so much!!!
08/03/2016 at 4:28 pm
You won’t easily find those whole dehydrated meals that some people bring. I don’t find that they taste all that great and I prefer just having real food like pasta with a powdered sauce. I had no problems getting powdered milk, dried fruit, powdered chocolate milk (essential), and soups. I went into more detail on my trekking food in this article: https://www.bemytravelmuse.com/torres-del-paine-circuit/
Crystal says
09/30/2016 at 12:55 pm
I’ve heard from a few people that it’s best to rent gear outside of TDP rather than buying at home – honestly not sure I’ll use it again (outside hiking boots). Do you know anyone who has used rented gear – tents, sleeping bag, mats, stove – and if they found it adequate for the conditions?
Marijke says
10/11/2016 at 5:58 am
Hi Kristin, Thanks for the useful post. I’ll be backpacking through South-America from March until June and Patagonia is definitely on my list! What was your itineray in & how did you travelled to Patagonia? thanks! Marijke
10/13/2016 at 11:54 am
This should help: https://www.bemytravelmuse.com/patagonia-itinerary/
You can also check out these two guides with interactive maps. I started in the north and moved south, switching regularly between Chile and Argentina https://www.bemytravelmuse.com/argentina-guide/ and https://www.bemytravelmuse.com/chile-guide/
Georgia Tucker says
11/01/2016 at 9:54 am
Hi, this is really helpful. Roughly how much did you spend? How much were camp sites per night for a 2 man tent roughly?
11/01/2016 at 2:25 pm
Budget anywhere from $5-$20, as it can really vary depending on the campsite’s location and popularity
Genevieve says
01/08/2017 at 10:02 pm
Hi Kristin this is really beautiful!! How did you guys keep up with the good path when Steve say there was no trail? And how did you get the gps on the phone if there is no good SIM card? Thank you! this looks incredible! Genevieve
01/09/2017 at 12:15 pm
We downloaded maps.me for offline maps and plotted the points ahead of time. That’s how we figured out the trail 🙂
kimberly says
01/10/2017 at 6:50 am
hello Kristin, thank you so much for this info.. I see in one pic you are wearing a tank top.. what time of year was this.. I’m going back and forth on clothing for some pieces.. we will be going from santiago , hiking through panes del torres , end of february into early march for 2 weeks. Ive got a couple questions … did you get rocks in your shoes.. did you need small gators, did you wear darn tough socks? and were they to the calve but not over? which boots did you go with, were they gortex? did you need shake and warms, did you bring extra hike shoe what did you wear in the refugio? we won’t be camping some males have a different vision of what to bring.. i need a womens perspective.. what type of sport bra did you feel worked what type of long johns did you wear.. and what did you wear on your feet in the refugio if you stayed in any..
01/10/2017 at 9:08 am
Hey Kimberly – I was there February to late March. I suggest layers (more here about what to pack: https://www.bemytravelmuse.com/womens-patagonia-packing-list/ ) – No but I had boots on that were well-sealed and waterproof so that kept them out. They’re made for trekking in those conditions – Sorry, what are small gators? ¯\_(ツ)_/¯ – Yes wear thick socks and mine were mid-calf – Boots are linked in the packing list – It’s not cold enough to need hand warmers – No just brought one pair – You can wear what you wear hiking in the refugio. It’ll be cold! – you can bring flip flops for the refugio and wear them with socks. Give your feet a break from the hiking boots. Sports bra-wise just wear what you’d wear to the gym!
04/25/2018 at 6:57 am
Gators are actually gaiters and are best described as: “Adjustable elastic band for convenient and firm bundling, front opening Velcro design for easier putting on and taking off, firm hook fasten to shoelace and durable strap to keep the gaiters from coming loose FUNCTION: To protect your boots and trousers from rain, water and mud. Pair there gaiters with hiking boots or ski boots to keep rocks, dirt and snow from getting into your footwear OCCASION :This gaiters good for skiing, backpacking, hiking, camping, fishing, and other outdoor adventures” So essentially when wearing boots these are fabric covers that further protect any water, dirt or snow to get into your boots. They look a little like shin protection when you play hockey or other similar sports.
Aria Srinivasan says
01/15/2017 at 1:10 pm
I’m only going for a week to Patagonia.. would you still recommend the hiking boots?
01/15/2017 at 4:15 pm
If you want to hike, they’d be incredibly helpful. It’s super rocky and often wet terrain.
Taylor says
02/07/2017 at 7:38 am
Where can I find your “dorky” hat; I’ve been searching everywhere! It seems so practical!
02/08/2017 at 11:03 pm
I can’t find it either! I bought it in a rural area of China years ago.
Connie says
02/13/2017 at 5:17 am
Hi! Sorry to ask something trip-specific, but I’m having trouble finding this anywhere. I’m going to do the W trek next week and was originally planning on checking my backpack with the tent.
But I’m paranoid about it getting lost with 3 transfers, so I figure if I bring everything except the stakes, I can take everything as a carry-on. But are there places to purchase decent stakes in Puerto Natales upon arrival? I see there are a lot of places to rent equipment, but I wasn’t sure if I would be able to only purchase stakes.
Thanks in advance!
02/13/2017 at 7:22 am
Hey Connie, to be honest I have no idea. I’d email erratic rock and ask what they suggest!
03/07/2017 at 2:38 am
Hiya, we booked our tickets to arrive in Chile in January, thinking this would give us plenty of time to book campsites for Torres Del Paine but they all seem to be booked up already?! A year ahead? Does this mean we can’t visit the park..? Any advice so welcome, this is quite shocking… 🙁
Joanna says
04/04/2017 at 4:37 pm
I love your blog!! I was wondering about the photos you take..how do you take the photos of yourself since you’re a solo traveler?
04/05/2017 at 12:22 am
Selfies! I’ve written about how here: https://www.bemytravelmuse.com/how-to-take-travel-selfies/
vikram says
04/05/2017 at 4:14 am
rofl at the comment on snickers ! but these are pretty awesome tips. How much Spanish would i need to know though ? also i love climbing, so any recommendations on decent bouldering not too far off the hiking trails ? any pointers would be like manna from the heavens .. all the best for your future adventures
04/05/2017 at 4:52 am
My Spanish is no bueno. I only know what I picked up growing up in California, which is restaurant Spanish. It would really help to know some as you won’t encounter a lot of locals in Patagonia who speak English, but I survived.
I did some bouldering in Bariloche in the north of Patagonia: https://www.bemytravelmuse.com/things-to-do-in-bariloche/
Jyotsna says
08/20/2017 at 9:58 pm
Amazing post! The hat you mentioned which serves as a beanie as well as a sun protector looks great, where did you get that from? Searched all over but could not find it.
08/21/2017 at 12:52 am
China like soooo long ago but putting a beanie over a baseball cap works similarly well
Teresa says
09/07/2017 at 10:34 am
I’ve just started planning a trip to Patagonia for around a month, what are your thoughts on doing a month long trekking trip solo as a female? Some say go for it and some say its a big no no. I’m aware common sense goes a long way if you’re travelling solo but is it something you’d recommend on a trekking tip in Patagonia? Love the blog by the way – so much seriously helpful info!
09/07/2017 at 2:08 pm
I think you’ll meet lots of people. You’ll meet people in town who will want to go with you, you’ll meet people on the trail, and you’ll meet locals too. I love solo traveling so that’s my feelings towards it!
09/19/2017 at 4:30 pm
Looks so exciting! I am planning a trip for March 2018. I love your “dorky hat,” the white one that is a headband with a visor. What brand is it? I want one!!!!
09/20/2017 at 3:53 am
So many people have asked and I wish I could find one online! I bought it in a tiny town in China. However now I put a thin neckwarmer over my rainbow had and it works similarly well 🙂
09/28/2017 at 6:13 pm
Thank you so much for posting! I’m hoping to plan my trip to Patagonia for a departure in the next 6 months – I’m very active and an avid hiker, but will be likely going solo. Do you have a guide you’d recommend? Thank you,
09/29/2017 at 5:19 am
I didn’t use any guides, but for most of these hikes you can find people to hike with in town, or even along the trail.
P. Sanchez says
11/07/2017 at 5:19 am
I recently came across your article on trekking in Patagonia. I enjoyed reading your guide and found it quite helpful, up to where you condemned people and called them idiots for wanting to swim in the lakes/rivers. Discarding dirty/soapy water into a river is one thing (I’m a marine biologist/coastal ecologist so I understand and respect nature), but jumping in for a swim? No, I would not jump into a 2 metre wide stream for a swim at a campsite where people will be collecting water further down, but no amount of dirty stares and silent (or even verbal) judgement will stop me from having a swim in a lake/larger river. Maybe you should consider editing that part out of your guide. It’s definitely on my mind to take a swim there, and the only thing that would stop me is if CONAF or a carabinero told me its forbidden to do so (haven’t found anything of the sort). If someone is a germophobe, then that’s on them to decide if they want to drink the water with or without disinfecting it, but don’t ruin other peoples experience just because you don’t agree with their idea of fun.
There’s a saying that goes “dilution is the solution to pollution”, and I can guarantee you dirtier things have been in your mouth (with or without you being aware of it) than a mouthful of water collected from a lake where someone has bathed in.
11/07/2017 at 6:13 am
Thanks for weighing in. The water in Patagonia is the cleanest on earth. That glacial water is 10k years old and when you jump in right at the source, it makes everyone also at that lake need to drink that water too. I just didn’t think it was cool to wash off 8-days of sweat into water people are drinking. It was also freezing cold and a hypothermia risk, so I wasn’t tempted.
If everyone takes the attitude that it’s going to get diluted, then nobody can drink the water without filtering it first. It already happened in Torres del Paine at one of the more popular trails, and it’s the water coming right down very close to the source. Sad.
It’s just about respecting what we have so that everyone can enjoy it. When we all take the attitude of one little thing that I do will not affect the rest, or it’ll just get diluted, it adds up, and this is why we can’t have nice things.
It’s important to let people know, who may not have realized, the importance of treating the water as sacred and clean. This post has potentially informed people who might not have known what is OK and what isn’t when camping. My writing addresses keeping all of the water clean and respecting it everywhere without splitting hairs about where is OK and where isn’t, and also it’s my site, so I’ll write what I want 🙂
04/25/2018 at 7:12 am
“Dilution is a solution to pollution” is an illusion, this is a mistaken notion on all counts, please don’t use that :). A drinkable water body can be tainted by pollution hundreds of miles away. If it is a pristine area, the only considerate thing to do is leave it that way. There are SO many places in the world where you can dive in and have a blast, under waterfalls, in deep blue pools etc. There are SO few places that are pristine. As a scientist who works in the environmental field, I think it is awesome that Kristin provides these guides that challenge yourself when traveling while using common sense, preparation, and consideration of the places you visit. Preparation is the key. You never know what you might encounter so at least be prepared for the expected so you have that down to concentrate on anything else and enjoy yourself to the fullest. Being a good guest in the countries your visit is paramount in so many ways. I think it is great that Kristin mentions safety including sunscreen, repellent (if there’s water, there’s mosquitoes), proper footwear/gear and so on. I trust her more than most and when traveling will bring these guides with me to make sure I enjoy myself, am safe, and respect the places I go. Before her I wouldn’t visit many places in the world out of fear of exploiting them. She taught me you can enjoy the world and if you visit a place, you give back (to the locals) as much as you take. Thanks BTW for this post, it is very thorough with great advice and every link works even 2 years later.
11/08/2017 at 11:24 pm
Ok a few things I agree with. I personally wouldn’t wash my 8-days clothes directly in the water, but I wouldn’t lose my shit if I saw someone else doing it (unless they were adding products to it). As for 10k year old water and hypothermia… I think we’re picturing different lakes. The water at Torres del Paine doesn’t seem like it has good drainage (at least in front of Los Cuernos) so I can see how contaminants might build up there with bad flow (especially with the increasing number of visitors). As for the hyporthermia, so long as you have dry clothes to warm you up once you get out (and it isn’t too windy) it isn’t really that dangerous. Just don’t stay in too long…
Sure, the mentality of “it’s only me, it wont make a difference” is usually wrong and common among people that justify littering, since it adds up, but in the scenario I’m picturing, the lakes/rivers will have good water flow and and oil/skin/fecal matter that comes off your body will just wash away and be broken down. Lotion, insect repellant etc. wont, so yes, one should rinse before jumping in. We CAN have nice things if we are smart about it. It isn’t necessarily about splitting hairs, but being informed and unbiased. Let people know that if they absolutely must jump in, to take these precautions (rinse before as you would before jumping into a swimming pool, do not stay in too long, do not jump in if the stream is small and people nearby e.g. at camping grounds use it for drinking water). That being said, I appreciate tourists respecting the land, and it goes without saying; if I see a sign saying “no swimming” I will listen to it. Especially if it is by CONAF.
11/09/2017 at 2:10 am
Where are you supposed to rinse off the lotion and insect repellant? There aren’t showers nearby, or signs, or a bunch of rangers. Except for the really popular hikes, these are not like the national parks in North America. This is usually raw, unadulterated nature 🙂
I think once you get there you might understand where I’m coming from. I’m done arguing about this now 🙂
11/29/2017 at 5:22 pm
You just got me super excited planning my trip to Patagonia! So many useful info on here!!!
Thanks for sharing!
Melissa says
12/05/2017 at 8:19 pm
Hey Kristin! Thanks for the tips. I was curious if I need hiking pants for the trip (hiking the W in December) but saw that you wore tights which I prefer. How thick should they be – any suggestions where I could get some hard wearing ones? Thanks!
12/06/2017 at 12:57 am
I like LuLulemon. I always wear leggings when I hike. I just like them better! If you’re cold wear two – just make sure they’re roomy or you’ll constantly have to be pulling them up. I’ve had that happen before, it’s annoying!
Jennifer Duke says
12/07/2017 at 11:22 am
Thanks for the tips. I’m going on a Patagonia tour and there are some hikes planned. I sincerely thought my regular tennis shoes would cut it. Glad I read this first. Also, even though I’m not camping, I might pack some of those suggested food items to keep with me so I don’t separate from my group. Great article!
12/07/2017 at 2:09 pm
I would get boots! And yes snacks are always good to have along 🙂
01/05/2018 at 4:53 am
Thanks for this great post! What would you recommend for a coat/jacket and gloves? Going in March to the Chile side for a few days, but not camping.
01/05/2018 at 8:11 pm
I’ve got a packing list here, should help 🙂 https://www.bemytravelmuse.com/womens-patagonia-packing-list/
Sabrina says
06/02/2018 at 12:57 am
Where did you get that hat? Seems warm and functional and at the same time looks nice!
06/02/2018 at 1:46 am
China in a tiny little town. I have tried in vain to find it online since you’re about the 40th person to ask on here but haven’t been successful 🙁
Brianna says
08/14/2018 at 2:51 pm
Band-Aid Hydro Seal Blister are amazing!!! They don’t sell Compeed in the US anymore 🙁
08/16/2018 at 9:24 pm
Bummer! Not even on amazon?
Rob Pinckard says
03/11/2019 at 8:48 am
Great article. I’ve found that your comment about boots is spot-on; heavy packs need heavy boots. Running shoes or even mocassins are incredibly comfortable at camp, at the end of the day, and on a long trip, I’ll make room for them in my pack. But on an extended back country route of rocks and mud, water and ice? High quality, well designed boots are like a sports car in an urban environment. I’m older school than you, but wouldn’t backpack without moleskin for blisters…especially if the boots you’re wearing have less than several trips of wear on them. Carry a small pair of scissors to custom fit the bandage to the site, and the moleskin will remain in place for several days. I’ve found nothing, over the years, that works nearly as well.
03/13/2019 at 11:48 am
I love compeed personally but my goal Is just not to get blisters!
08/21/2018 at 3:43 am
Hi Kristen.
Great post, super helpful!
I’m in the start of planning my trip for the O. Firstly booking the campsites but do I need to pre book a permit to gain entry to the park? So if I was starting say on the 10th and finishing on the 18th would I pre book this permit for this amount of time? Just a little concerned with fitting the camp sites within selected dates and then wondering if I need the permit to cover the trip?
08/21/2018 at 9:43 pm
You will need a permit for the park but I think you can apply for that in person.
Pauline says
01/09/2019 at 4:51 pm
Hi Kristin! I’m very grateful for your guide as I’ve never done any multi day hike, especially not in the kind of harsh weather that can be encountered in Patagonia! With what kind of backpack did you travel (especially for the treks at e.g. Torres del Paine)? Is a 50L enough or will I need to upgrade to a bigger one? Thank you in advance! Pauline
01/09/2019 at 5:04 pm
I had a 75L and used every inch of it for the O. You could make a 50 work for more like a 5-day or shorter, though!
02/15/2019 at 5:54 am
Thanks for the nice detailed guide. I have a couple of questions, because I am planing in the beginning of 2020 to travel around the world with just a carry on. Since Patagonia is my 1st stop, is there an outfit that I can rent the camping gear? Also do you book your accommodation in advance? Thanks
02/16/2019 at 2:55 pm
Yes you can rent and for Torres del Paine yes book ahead, the other hikes don’t have campsites in the same sense. I just showed up personally.
02/04/2024 at 6:18 pm
Thanks for the article. I’m 60 and will be hiking with my 29 year old son in 9 months (Nov 2024). I’m in good health and have reasonable endurance and good balance. He is in exceptional physical condition. How strenuous and challenging is trekking in Patagonia? I’m starting to up my exercise for strength, endurance, and balance but I certainly don’t want to be surprised! Thanks, Mary
Kristin Addis says
02/10/2024 at 3:38 am
really depends on the trail you choose! But it can be steep and weather unpredictable.
Deals of the Week Mediterranean Magic Up to 50% OFF

Patagonia Trekking Companies & Trekking Season
Patagonia is a sparsely populated region of the world where travellers flock in impressive numbers to experience Mother Nature at her finest. Located along South America ’s southernmost tip, Patagonia touches both Chile and Argentina , each with their own trails and treks worth exploring. Discover essential information including the best trekking operators and companies for your next adventure.
6195 reviews on
Top 10 trekking companies in Patagonia with reviews
- I ntrepid Travel , 4 tours with 46 reviews
- OneSeed Expeditions , 2 tours with 3 reviews
- G Adventures , 3 tours with 33 reviews
- Exodus Travels , 2 tours with 47 reviews
- Peregrine Adventures , 1 tour
- PhotoFly Travel Club , 1 tour
- Say Hueque & Chile Journeys , 2 tours with 3 reviews
- Destino Montana , 1 tour with 2 reviews
- Much Better Adventures , 2 tours
- World Expeditions , 4 tours with 8 reviews
Patagonia trekking seasons
Due to the enormous size of Patagonia, it can be a bit difficult to choose one perfect time to visit, after all the area is more than one million square kilometres and two countries large. Essentially, the best time for trekking in Patagonia depends entirely on what you want to do as well as your tolerance for extreme weather conditions. If you’re mostly interested in trekking arguably, the most famous natural attraction in the entire region, Torres del Paine National Park , you’ll want to time your visit for the summer season. In Patagonia, summer lasts from November through March and this is when challenging hikes are made easier with warmer temperatures and longer days where every extra hour of daylight is welcomed. During the summer, travellers can expect the temperatures to peak at 22°C (72°F) and fall to about 5°C (41°F) in the evening. Important to note is that many of the trails in Patagonia, including their huts and lodges, are closed during the winter months due to the harsh weather conditions. Winter in Patagonia lasts between June through September.
Patagonia hut to hut hiking
Hut to hut hiking is an excellent way to explore the untamed beauty of Patagonia without sacrificing every last comfort. You can do this type of hike on your own or with a guide, but if you’re at all unsure or inexperienced we strongly recommend booking a tour and taking on the region with an expert at your side. Typically spaced kilometres apart, the huts have shared sleeping quarters and are sometimes equipped with kitchens to ensure you can prepare a hearty meal after a long day of trekking. Some may even have restaurants where you can enjoy food and beverages. Hut to hut hiking is an excellent way to enjoy a challenging trek because you’re able to leave behind the tent, sleeping bag and cooking supplies. Below you can find a few of our favourite hut-to-hut hiking experiences in Patagonia . Torres del Paine W Trek - 5 days This circuit will take travellers to the very heart of the wild Torres del Paine National Park in Chile. You’ll be zigzagging across the Cordillera del Paine where you can expect to see magnificent glaciers, sparkling blue and green lakes and thick forests. Your mountain huts will be in the midst of some truly impressive scenery. Patagonia Lodge-Based - 6 days Providing another in-depth opportunity to explore Torres del Paine, the Patagonia Lodge-Based tour by Wildland Trekking will also take you past turquoise lakes, mountain rivers, beech tree forests and more. This tour expertly combines activities like kayaking, boat-touring with lakeside treks and more. Paine & Fitz Roy Trek - 15 days This ambitious tour itinerary takes you through grasslands, glaciers, peaceful lakes and other Patagonian highlights. You’ll start your tour with day walks in Los Glaciares National Park , staying in comfortable lodges and trekking to the base of Cerro Fitz Roy and Cerro Torre before exploring the best of Torres del Paine.

Bariloche hiking tours
San Carlos de Bariloche, or simply Bariloche for short, is the gateway to quite a few of the area’s most famous peaks. Hiking alongside a professional guide is the best way to unlock the mysteries, quirks and hidden highlights of this trekking paradise. The following tours travel through Bariloche and can last more than 30 days in duration. Patagonia Expedition: Andean Crossing - 9 days This tour by Intrepid Travel begins in Bariloche and takes you through destinations like Pampa Linda, Rio Blanco Valley, La Junta, the Esperanza River and Puerto Varas. Highlights & Gems of Patagonia - 14 days This Intrepid Travel tour begins in Santiago and ends in Argentina’s lively and colourful capital, Buenos Aires. You’ll spend two days exploring in and around Bariloche with other stops that include Pucon, El Calafate, El Chalten and Perito Moreno Glacier. Backroads of Patagonia - 23 days Travel overland on tour with Dragoman and spend multiple days in Torres del Paine National Park, El Calafate and more. Not only will you enjoy a more rural exploration of Patagonia but you’ll also enjoy two days in Bariloche. Buenos Aires to Santiago - 31 days Enjoy a month of exploring Patagonia’s corners on an overland tour with Oasis Overland. Beginning in Buenos Aires and ending in Santiago, you can enjoy incredible wildlife viewing opportunities throughout. You’ll also have the chance to complete the W Trek in Torres del Paine National Park and also see the largest glacier in the world in Los Glaciares National Park! Argentina Patagonian Air-Expedition - 14 days Take two weeks to explore unique highlights of Patagonia, with boat tours, internal flights and ample opportunities to spot diverse wildlife as well as flora and fauna you can’t find anywhere else. On this tour, you can enjoy a combination of days spent hiking challenging trails to afternoons relaxing in a beautiful lakeside town.

Discover Patagonia
- Best Patagonia tours
- Argentina hiking and trekking tours
- Nepal Trekking Companies
- Trekking Companies in India
- Climbing Mount Kilimanjaro
List of hiking and trekking companies in Patagonia
Discover more than 30 tour operators and trekking companies to find your next adventure quick and easy.

Hi Travel Argentina

Unu Raymi Expeditions

People Travel and Experience

OneSeed Expeditions
202 reviews

G Adventures
13,409 reviews

Say Hueque Argentina & Chile Journeys
248 reviews

DIAMIR Erlebnisreisen

Intrepid Travel
8,726 reviews

Signature Tours
399 reviews

Exodus Adventure Travels
13,251 reviews

Patagonia trekking holidays

Epic Patagonia
- Trek in Patagonia's famous Torres del Paine National Park Climb through a beautiful lenga forest to the Las Torres Towers Marvel at the impressive and mesmerising Grey Glacier

End of the Earth
- Hike in Torres del Paine National Park Cruise along the Beagle Channel Explore the southernmost city in the world Discover Perito Moreno Glacier

Patagonia Hiking
- Take on a series of challenging and spectacular treks Feel exhilarated as you raft down Class III rapids Marvel at the Perito Moreno Glacier - a river of ice Enjoy dinner and wine amongst friends in Buenos Aires

Essential Patagonia
- Trek in Patagonia's famous Torres del Paine National Park Climb through a beautiful lenga forest to the Las Torres Towers Gaze in awe at the massive and mesmerising Grey Glacier

Essencial Patagonia: El Calafate & El Chalten with Camp
- Hike along the nicest trails in El Chalten to get the most incredible views of Mount Fitz Roy and Mount Torre Camp in the national capital of trekking: El Chalten, surrounded by nature and in the company of incredible people Visit one of the natural wonders of Patagonia Argentina: the amazing Perito Moreno Glacier and its rupture process Enjoy a relaxing navigation along the Rico Lake to get even closer to one of the faces of the unique Perito Moreno Glacier

Patagonia Hiking Adventure
- Watch penguins waddle on the beaches of Magdalena Island Trek the classic W Trail of Torres del Paine National Park Marvel at the impressive glistening glacier of Perito Moreno

W-Trek in Torres del Paine Standard – Self Guided (5 Days / 4 Nights)

Patagonia: Torres Del Paine ‘W’ Trek – 5 Days
El calafate tour companies.
If you already know you want to trek in El Calafate, then it's time to consult our list of the best trekking companies.

Receptivo Aborigen Tours

Tangol Tours

Agate Travel
170 reviews

RipioTurismo

Qwerty Travel Argentina

On The Go Tours
2,104 reviews
Sign up for our newsletter
...and instantly receive access to exclusive deals and inspiring travel stories.
By submitting this form, I agree to the TourRadar T&Cs and Privacy policy .
Contact our Travel Experts

+1 844 311 8331
24/7 Support
Our team of experienced tour specialists have travelled to hundreds of countries around the globe and have decades of first-hand travel experience to share. Contact us now to have all of your tour-related questions answered!
More destinations for hiking & trekking
- Asia (2352)
- Nepal (2239)
- East Africa (831)
- Africa (764)
- Tanzania (738)
- Europe (722)
- Western Europe (612)
- South America (607)
- Latin America (534)
- Mediterranean (468)
- North America (361)
- Far East (266)
- Central Europe (225)
- Balkans (212)
- South East Asia (210)
- Indochina (195)
- Vietnam (165)
- West Africa (151)
- North Africa (143)
- Morocco (139)
- Italy (114)
- Austria (88)
- Bhutan (84)
- Australia (82)
- Middle East (73)
- Australia/Oceania (70)
- Nordic / Scandinavia (59)
- Argentina (58)
- UK and Great Britain (57)
- Albania (57)
- Greece (53)
- Eastern Europe (48)
- Canada (45)
- Uganda (44)
- Ecuador (43)
- Argentina and Chile (40)
- Austria and Germany (40)
- Germany (40)
- 5 stans (39)
- Central Asia (39)
- Portugal (38)
- France (37)
- Iceland (36)
- Turkey (35)

The Best Winter Activities in Europe
Mary Novakovich

Patagonia Travel Guide
Jehangir Irani

The Seven Hardest Hikes in the US, Ranked
Jesse Warner

Top Six Tours to Stunning Alberta
Felipe Rosen Mosquera
- Search Please fill out this field.
- Manage Your Subscription
- Give a Gift Subscription
- Newsletters
- Sweepstakes
- Nature Travel
Everything You Need to Know to Trek Patagonia's Torres del Paine
Considering how beautiful this corner of the world is, planning a backpacking adventure here is worth the effort.
:max_bytes(150000):strip_icc():format(webp)/Cassidy-Randall-2000-be9d24d06d274f75a1bb91d34e256a10.jpg "patagonia trek")
As I crested the rise of John Gardner Pass, my breath was taken away — and not just from Patagonia's famous fierce wind. Below me lay the miles-long expanse of Grey Glacier spread out like an icy sea. Its big toe trailed icebergs into Grey Lake, its head disappeared up the valley in a wash of light, and a rainbow graced its far side. I was, quite literally, struck with wonder.
It was day three of an eight-day trek on the O Circuit in Torres del Paine , the Chilean national park famous for its iconic skyline. It's also quickly becoming known for its multi-day O Circuit (and the shorter front side of the circuit called the W Trek) as a way for more adventurous tourists to see the park.
The W Trek may get all the glory for being the shorter version of the full circuit and thus easier to plan and access — but with campsites set in storybook-beautiful locations, cozy refugios where you can buy a bottle of wine and a three-course meal, and a double dose of drool-worthy scenery, hiking the full O Circuit is far and away worth the extra effort to plan.
To make your trip planning easy, here's everything you need to know. The biggest tip: Start planning now for a trip from December to March to ensure you get the reservations you want. Alternatively, aim for the quieter shoulder months of November or April, when the weather is still good and the park is relatively empty.
How to Book Camping and Lodging Reservations Online
At first glance, it may be intimidating for the average traveler to plan a trek around the circuit. In response to the increasing popularity of the area, the park now requires advance reservations for all campsites and refugios, the backcountry lodges along the trail, and limits the number of people in each. Two separate companies, Vertice and Las Torres Patagonia , as well as CONAF (the Chilean version of a national park service), run the various campsites, and each has its own booking system.
You can also go through a service like Booking Patagonia or Torres Hike to book campsites. These third-party booking platforms will charge you a small fee to make your reservations for you, but you won't have to navigate three different websites (and deal with translating them from Spanish with assistance from Google).
How to Get There
Fly into Punta Arenas and take a bus to Puerto Natales, the gateway to Torres del Paine. There's a tiny airport in Puerto Natales that's worth the extra cost to fly into if your flights line up. This charming port village has several small hotels to choose from.
Potential Itinerary for an O Circuit Trek
The O Circuit is completed counterclockwise, beginning at the Laguna Amarga entrance on the east side of the park. From Puerto Natales, you can take a bus to Laguna Amarga, and once you've paid your entrance fee, take another bus to the Central sector, where there's a campsite , refugio , and nearby Hotel Las Torres .
Estimates of how long the trail is range from 68 to 85 miles. In any case, it takes the average hiker eight days.
Day 1: Central/Hotel Las Torres to Seron
Distance: About eight miles
While this is probably the least scenic stretch of the circuit, the easy walking is a great way to ease into this multi-day trek, especially if you're getting a later start due to traveling from Puerto Natales. The Seron campsite is surrounded by the rolling hills and wildflower fields that border the Paine River. There's a small restaurant, Wi-Fi, and bathrooms with hot showers.
Book Seron campsites through Las Torres .
Day 2: Seron to Dickson
Distance: About 11 miles
Hike up a small pass where you get the first glimpse of the glacial lakes and impressive peaks Patagonia is known for. Even the back side of the famous towers make an appearance from behind the jagged ridgeline at one point.
Refugio Dickson is one of the smallest refugios on the circuit. It and the campsite are stunningly situated on Dickson Lake, which is bounded by a spired glacier at the far end of the water that lights up pink with the sunrise.
Book Dickson accommodations through Vertice .
Day 3: Dickson to Los Perros
Distance: About seven miles
If it's cold, windy, or rainy, it's a good idea to spend a mellow morning at Dickson before setting out for Los Perros ("The Dogs"). The Perros Glacier is unique and worth spending some time taking in from the lookout around the corner from the moraine if the weather's good. The campsite is well-protected in the trees, with a large cooking shelter and a small store for snacks and beer.
Book Los Perros accommodations through Vertice .
Day 4: Los Perros to Paso and Grey
Distance: About five miles to Paso, plus another four miles to Grey
This section of trail takes hikers over John Gardner Pass, ducking in and out of the trees before leaving the trees behind altogether for the dramatic alpine. Cresting the pass offers the first view of Glacier Grey, one of the most amazing sights on the entire circuit.
The downhill section of this stretch is a leg-burner, descending into the forest to the campsite at Paso. This site is lackluster, but a good option for those who might need to break up a long day. Otherwise, it's worth pushing on to Grey for ridgetop walking with views of icebergs and a series of long swing bridges over gorges. Refugio Grey and the campsite have gorgeous views of the snow-covered ridgeline.
This is the last stop on the back side of the circuit. There's an option to take a boat across Grey Lake to Hotel Lago Grey, near the southern park entrance, making Grey a good starting or stopping point.
Book Paso accommodations through CONAF for Paso and Vertice for Grey.
Day 5: Grey to Paine Grande
This is the start of the W Trek, as well as the first stretch of the circuit accessible to day hikers, so be prepared for a busier trail. Most of the path winds along a ridge above Grey Lake with intermittent views back to the glacier.
Paine Refugio is the biggest on the circuit, boasting a full cafeteria, bar, and warming rooms with wood-fired stoves. Its picture windows look out at the massif of the Cuernos (Horns) del Paine, making it the perfect place to post up for a well-deserved hot drink. The campsite is a vast grassy field with the same killer view. There's also a boat option here across Pehoe Lake to exit the circuit, or for hikers to start the W Trek.
Book Paine Grande accommodations through Vertice .
Day 6: Paine Grande to Camp Italiano, Plus Britanico Lookout
Distance: About five miles to Camp Italiano, plus another three miles one way to the Britanico lookout
It's a quick and easy hike to Camp Italiano. From here, drop heavy packs and then day-hike up the French Valley for some of the most incredible scenery of the entire trek along the base of the Cuernos, the French Glacier, the Shark Fin, and other dramatic alpine features.
There's no refugio at Camp Italiano, which is a basic site nestled into the trees. The French campsite a half hour further down the trail is also a good option, or hike another three miles to Los Cuernos.
Book Camp Italiano accommodations through CONAF , or book a French campsite or refugio through Las Torres. Accommodations at Los Cuernos are also booked through the Las Torres website and include cabins , a refugio , and campsites .
Day 7: Camp Italiano to Chileno
Distance: About 10 miles
This mellow-but-long section runs along the base of the massif, making for some incredible views above. The Central campsite and refugio are nestled against a hillside with a view of the massif. The Chileno campsite and refugio are further up the trail, allowing for a shorter hike the next day to the base of the Torres — called Mirador ("lookout") Las Torres. However, Chileno is passed through by everyone hiking around the base of the Torres, so it may not be the quietest option.
Book Central or Chileno accommodations through Las Torres.
Day 8: Chileno to the Base of the Torres and Welcome Center
Distance: About 13 miles
This is the jewel in the crown of the park: the famous towers that Torres del Paine is named for, rising from a deep blue glacial lake. That also makes it the most popular section of the trek, so be prepared for streams of people or wake up early to catch the view with a bit of solitude — although local guides will tell you that the towers usually emerge from the clouds in the early to late afternoon.
Treat Yourself
For the tail end of your trip, consider treating yourself to a night or two at EcoCamp Patagonia . This sustainable hotel composed of geodesic domes is located in the heart of Torres del Paine right off the circuit, making it feel like you're still in the heart of the wild — especially in its serene courtyard where you can relax and watch the sunset over the Torres. With yoga, massage, three-course meals, and a lively bar, EcoCamp is a glorious way to end your hike. EcoCamp also offers guided day trips to most of the popular sections along the W Trek, so this is a great option if you want to experience the hikes in Torres del Paine but don't want to backpack.
Consider a Tour Company
If you want to trek in Torres del Paine but would rather not juggle reservations and planning, consider booking through Cascada Expediciones . Many tour companies are popping up as the O Circuit and the W Trek gain in popularity, but not all are created equal in terms of delivery and professionalism. Cascada has been on the scene since 1991 and helps tourists book multi-day and day hikes in Torres del Paine, as well as other adventures around Patagonia, complete with reputable guides.
Related Articles

Hut to Hut Hiking Patagonia
Our patagonia hiking tours.

Patagonia W Trek Tour

Bariloche Hut to Hut Trek

Highlights of Patagonia

Patagonia Luxury Tour

Torres Del Paine O Circuit

Why go hiking with us?
Discover the unparalleled experience of tours in Patagonia with us, your trusted guide to the most majestic landscapes on Earth .
Our trips are journeys through the heart of Patagonia, designed to immerse you in the stunning natural beauty and unique cultures of this remote region. Here’s why you should choose us for your next adventure:
- Expert Local Guides : Our team comprises seasoned professionals who are deeply knowledgeable about Patagonia’s terrain, flora, and fauna. They ensure a safe, enriching experience, revealing hidden gems beyond the well-trodden paths.
- Customizable Itineraries : Whether you’re drawn to the challenge of Patagonia hut to hut hiking or prefer leisurely walks through breathtaking landscapes, we offer tours tailored to your preferences and abilities.
- Sustainable Travel : We are committed to preserving the pristine environment of Patagonia. Our tours are designed with sustainability in mind, minimizing impact and supporting local communities.
- 24/7 Support & Comprehensive Resources : Set off on your journey with confidence, knowing you have our round-the-clock support. We provide detailed GPX tracks for precise navigation and comprehensive handouts filled with valuable information, tips, and insights to enhance your trekking experience.
Our dedication to your safety and enjoyment ensures a worry-free adventure in the majestic landscapes of Patagonia.
Where to go trekking in Patagonia?
Patagonia offers a myriad of landscapes, each with its unique charm and challenges. Here are four must-visit locations for an unforgettable trekking experience:
1. Torres Del Paine National Park
Iconic granite towers piercing the sky, azure lakes, and vast ice fields make this park a highlight of southern Patagonia . The W Trek and the O Circuit offer immersive experiences of this stunning terrain.

2. Los Glaciares National Park
Home to the awe-inspiring Perito Moreno Glacier , this park offers treks that weave through ancient ice fields, serene forests, and rugged mountain terrain, with breathtaking views at every turn.

3. Bariloche
Situated in the Argentine Lake District , Bariloche’s hut to hut trek is a blend of snow-capped mountains, crystal-clear lakes, and lush forests. It’s a paradise for trekkers seeking both beauty and tranquility.

4. Patagonia National Park
A conservation project turned national park, this area features diverse ecosystems, from steppe to glaciated peaks. Trails here offer a closer look at Patagonia’s efforts to restore and protect its natural heritage.

When to hike in Patagonia?
The best time to experience Patagonia is during the Southern Hemisphere’s summer months, from November to early March . During this period, the weather is most favorable , with warmer temperatures, longer daylight hours, and the least precipitation, providing ideal conditions for exploring the great outdoors.
Spring (September to November) and autumn (March to May) also offer unique landscapes, with vibrant wildflowers or autumnal hues, respectively, though weather conditions can be more variable. To make the most of your trekking experience, consider aligning your visit with these optimal seasons , ensuring a memorable journey through Patagonia’s breathtaking landscapes.
HASSLE-FREE
Book with confidence, tried & tested adventures, unbeatable support, things to know.
The prime season for hut-to-hut hiking in Patagonia is during the Southern Hemisphere’s warmer months, generally from October to April. This period offers milder temperatures, longer daylight hours, and reduced precipitation, making it the ideal time for exploring Patagonia’s trails and enjoying its breathtaking landscapes.
We’ve rated our tours on a difficulty scale from 1 to 5 — with 1 being the easiest and 5 the most difficult.
The difficulty level of a tour tells you how fit you need to be and how much hiking is involved. Most of our tours are appropriate for people who are regularly active and can hike for about five to seven hours per day.
Technical difficulty means how skilled you need to be to hike on the path. Level 1 means the trail is smooth and wide (like a gravel road), while 5 means the surface is uneven and exposed, and you have to use your hands to help yourself move forward. In practice, that means that the higher the level, the more surefooted and skilled in scrambling you need to be.
It is best to book your tour early because most accommodations along the trail fill up quickly. That way, you can ensure that you have a place to stay.
Patagonian routes feature lots of wild and remote sections where you cannot just stop. In case of injury, it’s best to call the local emergency services. Ensure you have a means of communication, even in areas with limited service, to contact emergency services or local support for assistance.
For trails of medium to high difficulty, you might need to complete an online registration form before embarking on your journey. It’s important to visit the official website of the national parks to determine if your chosen trail requires this step. After completing your trek, ensure you confirm your safe return to prevent the initiation of an unnecessary search and rescue operation. Keep in mind that not all mountain shelters will initiate searches for hikers who fail to arrive as scheduled.
Most refugios in Patagonia offer the possibility of showering for free. Please note that some of them though don’t have hot water or it is limited! That’s why it’s wise to bring wet wipes with you for the days you don’t feel like showering with cold water.
Cell reception in Patagonia is generally not available within the national parks, making it a true off-grid experience. However, most of the refugios, offer Wi-Fi, albeit for a fee. The costs for Wi-Fi in these refugios can vary, but it’s typically around $8 USD for 1 hour, with options extending up to 10 hours for $15 USD. It’s important to note that while the Wi-Fi is available, it might be turned off during the night and might not support heavy data usage like streaming videos.
If you encounter bad weather while trekking in Patagonia, it’s crucial to be prepared for rapidly changing conditions, as the region is known for its unpredictable weather, including sudden rain, snow, and strong winds, even in summer. It’s advisable to have waterproof gear, layered clothing to manage cold temperatures, and windproof items to handle the gusts that are common in the area.
In Patagonia’s backcountry, where amenities are limited, and you’re required to carry your supplies, having extra food and warm gear can make a significant difference if you need to hunker down and wait out a storm. Remember, safety should always be your top priority, and turning back or altering your route is a better choice than risking injury or getting lost in bad weather.
Vegetarian meals are usually available in most accommodations. Vegan options are harder to be found in huts, but we’re happy to let you know about them in advance so you can plan accordingly.

- Terms of Service
- Cookie Policy
- Sustainability
- Climate Emergency
This website uses cookies.

Cookie Settings
Choose which cookies you want to allow. You can change these settings at any time.
These cookies are essential for the website to function and cannot be switched off.
We use these cookies to analyze how our visitors use the website and monitor site performance.
These cookies are used to personalize ads and content based on your interests.
You are using an outdated browser. Please upgrade your browser or activate Google Chrome Frame to improve your experience.

- Trip Styles
- Destinations

- Trip Destinations
- Patagonia Hiking Tours
- Patagonia National Park
Wild Patagonia Explorer
Coyhaique, chile, trip highlights.
- Remote Patagonia Wilderness
- Stunning Mountain Scenery
- Wildlife, Glaciers, Waterfalls & Wildflowers
- Cultural Immersion
- Glacial-fed Alpine Lakes
- Broad, Wild River Valleys
- Unique Lodging & Camping
- Horse-Supported Trekking

Description
Our Wild Patagonia Explorer Trek is a dream expedition for any adventurous world traveler. We have combined unique lodging, remote horse-supported trekking, cultural immersion, fantastic hiking and more in one grand adventure. We explore Chile’s newly created Patagonia National Park and the mountains surrounding it to create the trip of a lifetime. From dazzling glacially fed lakes to high mountain plateaus to expansive grasslands, this expedition will immerse participants in the beauty and solitude of the remote Aysén region of Patagonia. The wild landscapes, adventurous trails, charming locals, scenic transportation routes and unique local history are what make this region so fascinating to explore.
Our guests will learn about the rich and complex backstory of Patagonia National Park’s conservation, as well as the amazing history of the Aysén Region. We will delve into Patagonia’s natural and human history and gain a richer understanding of the uniqueness and importance of this landscape. This is a great opportunity to explore the true wilderness of Patagonia without any crowds – join us!
$5400 Per Person
$300/$480 single supplement.
This trip has hotel/lodge stays for 4 nights of the trip. The $300 single supplement applies to 2 of these nights (Days 1 and 9). The $480 single supplement includes 2 additional nights but has limited availability (Days 2 and 6). Both single supplements also include a private tent in each of the camping accommodations for 5 nights of the trip.
DIFFICULTY LEVEL 4
Scale of 1-5. 1 is least difficult; 5 is most difficult
Hiking Distances:
Up to 13 mi
Backpack Weight:
Significantly Rugged
Max Daily Elev. ↑↓:
Up to 3200 ft
Heights Exposure:
Please Note: Terrain, Elevation Gain and Heights Exposure ratings reflect the section or day of the trip with the maximum difficulty of each. Much of the trip is at easier levels. See the trip itinerary for more detailed information.
PHYSICAL DEMANDS OF THIS TRIP
- Hiking uphill or downhill with a 15-25 lb backpack for 8-10 hours
- Maintaining balance and footing on variable, uneven terrain
- River and creek crossings
- Potential for harsh, rainy/snowy and extremely windy weather conditions.
SOLITUDE LEVEL 5
1 least solitude, 5 most solitude
We rate this Patagonia hike a solitude 5. You can expect to see just a couple other groups of hikers for the duration of the trip. The horse-supported section (Days 2 through 5) have the most solitude, with Days 6 and 7 having a higher chance of seeing other groups.
- Minimum Guests
We require a minimum of 4 guests to confirm this trip. If a trip date is not confirmed yet, you can register and will be notified when the trip is officially confirmed. We recommend not making final travel arrangements until your trip meets the minimum number of guests and is confirmed.
In most cases, if a trip does not reach the minimum number of guests, you may choose to transfer to another trip date or another trip, or be refunded your payments in full. We make the final determination for these trips 65-60 days before the departure date.
Private Trips

Travel in perfect company by booking a private trip exclusively for your group!
Our sliding scale for private trips is based on the final number of guests in your group. Rates are per person and do not include sales tax, national park fees or guide gratuity. The final rate is based on the actual number of guests on the trip and may adjust based on cancellations or additions.
Please Note: you can also enjoy a private trip at our normal scheduled rates by filling any empty tour to capacity. However, if group members drop from the tour those spots will automatically become available on our website for instant booking. By purchasing a private trip at the rates listed below, your trip will remain exclusive to your group regardless of cancellations.
Private Rates FOr This Trip
- 4-5 People: Rate x 1.5
- 6-10 People: Rate x 1.15
- 11-12 People: Rate x 1
- 13+ people: contact us for availability and pricing
*all rates are per person and single supplements apply
" * " indicates required fields
Learn About Our Private Trips
On this Patagonia hiking tour , we will pick you up from the Balmaceda Airport (BBA), the main airport for this remote and wild Aysén Region of Chile, and transfer you to our elegant accommodation in Coyhaique. We will have dinner and an introductory briefing in the evening. Given the dehydrating nature of flying and travelling, be sure to drink plenty of water while en route.

- Driving Duration: 6-7 hours
- Hiking Mileage: 1-2 miles
- Elevation Gain/Loss: minimal
Our expedition begins! We will meet at Patagonia House to pack our van and head south through the extremely scenic Aysén region. We’ll drive roughly 2 hours to Puerto Ibanez, transitioning from the lush temperate rain forest into the arid Patagonian steppe. During the drive we will travel along the immense glacial-blue Lago General Carrera, South America’s second largest lake. Today’s road is variable depending on the season, and when it was last graded. Needless to say we will see some bumps but we will also see some gorgeous sights like Cerro Castillo, a famous mountain in the region. The final part of the drive is 1.5 hours along the shores of the lake to a family guesthouse and ranch, where we’ll spend the first night getting oriented.
This afternoon we’ll talk through systems for horsepacking and backcountry living: setting up camp, cooking, meal prep, and backcountry hygiene. To shake off our travels, we’ll take a walk around the ranch’s beautiful landscapes; those who want to swim in the clear waters of Lago General Carrera are encouraged to do so! After a meal prepared for us at the ranch, we’ll gather to share our goals for the trip, pour over maps, and get to know each other better.
*Depending on availability and conditions we may take a ferry across the lake as part of today’s journey.

- Hiking Mileage: 5 miles (8 km)
- Elevation Gain: 2,500 feet (762 m)
- Elevation Loss: 2100 feet (640 m)
After a hefty breakfast at the ranch, we’ll pack up and head into the mountains. We meet the local families and their horses who will support our trek. After dividing and organizing food and gear for the horses to carry, we’ll set off on our adventure. We start by winding through a traditional Patagonian campo (grass plain with stunted trees) before heading higher into the mountains. The uphill makes us grateful for the horses! Our campsite is a spectacular perch overlooking the Jeinimeni Mountains, where we have the opportunity to spend time with an experienced gaucho tending sheep in the high mountains. In the evening, we’ll gather around a fire for conversation about Patagonian history and culture.

- Hiking Mileage: 8 miles (12.9 km)
- Elevation Gain: 1200 feet (366 m)
- Elevation Loss: 2400 feet (732 m)
After breakfast, we’ll begin our day climbing higher on a dramatic plateau which, on a clear day, affords sweeping views down to Lago General Carrera and across to the Northern Patagonian Ice Field. We spend most of the day hiking in the alpine zone above the tree line. The surreal landscape is full of strange colored rock formations and hanging glaciers. After a trail lunch we’ll descend to a Gaucho camp that has been used for centuries in a beautiful, lush valley. The horses meet us here to deliver our supplies, and we set up a base camp for the next two nights. In the evening, we’ll gather around a campfire to learn more about the fascinating area we are hiking in and the amazing establishment of nearby Patagonia National Park.

- Hiking Mileage: 5-10 miles (8-16.1 km) – optional
- Elevation Gain/Loss: 800-2000 feet (244-610 m)
Today is all about exploring the surrounding area on a day hike. Your guide will decide from two spectacular hiking options that will depend on the weather, and other outside factors, as to which is the best option. One option is to hike toward the toe of a nearby glacier; the other is to hike up to a high plateau for sweeping views into the park and beyond. Once back at camp, we’ll share dinner and reflections on our own wilderness experiences & travels.

- Driving Duration: 30 minutes
- Hiking Mileage: 11 miles (17.7 km)
- Elevation Gain: 100 feet (30 m)
Our final day of the horse supported trekking portion of this trip takes us through a beautiful southern beech forest and scenic glacial valleys as we make our way back toward the clear blue waters of Lago General Carrera. As we return to the land of Patagonian campos , we will meet our shuttle for a short transport back to the lakeside guesthouse and ranch where we spent the night before our trek . Here awaiting are well deserved hot showers and a celebratory dinner. Tonight’s culinary treat will be a traditional Patagonian barbeque dish, asado al palo.

- Driving Duration: 3 hours
- Hiking Mileage: 1.5 mile (2.4 km)
- Elevation Gain/Loss: 100 feet (30.4 m)
Today is our opportunity to recharge our batteries. We will enjoy a leisurely breakfast at the cabins while reveling in the accomplishment of our horse-supported hike. Afterward we’ll head to the “Yellowstone of South America” or Patagonia National Park by car. On the way we’ll stop in the town of Puerto Guadal, known as the “Perla del Lago” for its beauty. While there we’ll visit a local market, town square and see a bit of regional culture. We’ll then head to the park with potential for a day hike at the confluence of the Baker and Nef Rivers which boasts one of the most scenic areas in the region. Tonight you’ll be camping at Casa Piedra, a handsome front country campsite within Valle Chacabuco, the central corridor of Patagonia National Park.

- Hiking Mileage: 10 miles (14.4 km)
- Elevation Gain/Loss: 900 feet (274 m)
After breakfast we’ll set out on a breathtaking 10 mile loop hike, taking us into the colorful red mountains and glacially formed plateaus that make this valley so beautifully unique. Our hike starts in grasslands then follows a turquoise, glacial-fed river crashing down from the mountains above. Our hike leads us up on to the shoulders of the valley above the river, where panoramic views of the mountains explore around us. We rejoin the river 200 feet above it, where we cross a sheer box canyon on a thrilling suspension bridge. The second half of today’s loop hike follows the other side of the river, where we cross a glacial-fed tributary, and finish with a final suspension bridge and short hike back to our starting point. Today offers excellent opportunities to see Guanaco, Andean Condors and other Patagonian wildlife. This evening will see us front-country camping back at Casa Piedra.

- Drive Duration: 45 minutes to trailhead; 2 hours to Puerto Guadal
- Hiking Mileage: 12 miles (20.9 km) or 7 miles (11.2 km)
- Elevation Gain/Loss: 2500 feet (762 m) or 400 feet (122 m)
Our final day in Patagonia National park presents us with two options: A challenging 12-mile Laguna Atlas loop, one of Patagonia’s 5 best trails. This trail presents panoramic views and hiking over varied terrain. The second option is a 7-mile hike through the grasslands of the Chacabuco Valley to a suspension bridge over a river canyon. Both hikes are dramatic and offer more opportunities to soak up the stunning scenery of the Aysén Region and to potentially spot Guanacos, Andean Condors, the gorgeous, red-headed Megellanic Woodpecker and more.
After our hike we’ll drive along the turquoise waters of the Baker River, and then near the eastern border of the Northern Patagonian Ice Field. The views along this route are truly breathtaking! Tonight we will enjoy a final lodge stay outside of Puerto Guadal, where we can refresh and get organized for our flights home the following day.

Today we will do the amazingly scenic road trip from day 1 back to the north! We wake early to head up the Carretera Austral, or “Southern Highway,” often called one of the world’s greatest road trips.
Regrettably, this day marks the end of our adventure, but we leave with our hearts and minds full of special memories of one of the world’s most miraculous and stunning conservation projects. The final logistical point is that we can either drop guests at the Balmaceda airport in time for a 4pm flight or take you to Coyhaique to your preferred lodging. What a phenomenal experience it’s been!
Please Note : We always do everything in our power to follow the set itinerary, however occasionally trips are subject to itinerary changes based on a variety of circumstances, including but not limited to: lodging/campground availability, extreme weather, political or bureaucratic obstacles, earthquakes, fires, flooding and more. Normal terms and conditions apply to trips with itinerary changes.
Trip Dates & Booking
Trip dates & booking.
Click on a date to register. You can also click here to request new dates or book through customer service.
AVAILABLE TO BOOK
This trip is available and bookable online! Click on the date to register now or contact us online to book through our award-winning customer service team!
This trip has 1 or 2 spots remaining and is bookable online! Click on the date to book now or contact us online to book through customer service.
REQUEST A RESERVATION
This trip is exclusively booked through customer service due to logistics with lodging, permits, staffing, availability, or something else. Please contact us online or call us at 800-715-HIKE (4453) to request a reservation.

Don't see your dates? Call us! We may be able to add new trip dates.
Trip details, what's included.
- A detailed trip packet that takes the guesswork out of your travel, training, packing, and preparing for the trip
- Trained hiking guide(s) with years of personal wilderness and hiking experience, medical certifications, and a passion for leading people into breathtaking landscapes. See Guide Bios .
- Transportation for the duration of the tour starting with an airport pick up on Day 1 and ending on the final day at either the airport or your planned lodging in Coyhaique
- Lodging and camping accommodations
- Meals beginning with dinner on Day 1 through breakfast on Day 10
- Backcountry cooking equipment
- Use of a backpacks, dry bag, sleeping pad, tent and trekking poles
- Emergency equipment including a company-issued first-aid kit and communication device
What's Not Included
- Transportation to Balmaceda, Chile
- Trip insurance that includes medical coverage and at least $30,000 in evacuation and repatriation coverage (required in Chile)
- Sleeping bag (rated for 0-20° F)
- Clothes, rain gear, and footwear ( see recommendations )
- Lightweight, durable backcountry mug, bowl and spoon/fork
- Sunscreen, toiletries and personal items
- Water bottles and a headlamp or flashlight
- Bar bills, drink bills, extra snacks, telephone bills, Wi-Fi bills and other personal expenses (shopping/ laundry)
- All expenses due to unavoidable events e.g. flight cancellation, personal illness, strikes, etc. (we recommend trip insurance coverage for these variables)
- Guide gratuities are optional and at the discretion of each customer. A suggested guideline is to reward outstanding service with a tip of 5-10% of the total trip cost. Please tip your lead guide and they will distribute responsibly to the crew. Local currency is preferred, or USD is also appreciated.
Click here to see a printable, downloadable trip information packet with more detailed guidance about what to pack.
Meals: What to Expect
This remote Patagonia hiking tour features a combination of in-town meals and meals prepared by your guides. We’ll have dinners at carefully selected, wonderful restaurants in Coyhaique and Parque Patagonia as well as meals prepared on the trail as a group.
For optimal taste and energy, we supplement all our meals with spices, herbs, oils, cheeses, butter, sugar, and fruits and vegetables. In addition, we provide you with with an assortment of trail snacks* (nuts, dried fruit, chocolate, & cookies) to eat at your own discretion.
We can often accommodate vegan, vegetarian, kosher and non-gluten diets and make adjustments for food allergies. These and other special dietary requests may require an additional fee, and in some countries may be more difficult to accommodate than others. Non-gluten diets can be challenging in this region of Patagonia due to a lack of gluten free friendly products and restaurant meal options being available. Please inquire with us for more information.
*Common trail snack brands and items found easily in the US are not readily available in this destination. (i.e. protein bars, trail bars, beef jerky, etc.) We recommend guests that prefer these types of trail snacks to bring a few of their own choice items from home.
Gear We Provide
- Trekking poles
- Sleeping pad
- Dry bag 30-40L (for packing gear on horses)
- All group cooking gear
- First aid kit
- Emergency communication device carried by trained/certified Wildland guide
Guest Packing List
When you register for this tour you’ll receive access to a printable, downloadable trip information packet with a detailed packing list specific to this trip (click here to see it now.) All trips require a sturdy pair of hiking shoes or hiking boots, rain gear, a recommended clothing system, a headlamp or flashlight, a hydration system (water bottles and/or bladder) and other items specific to each trip.
Important required packing list item unique to this trip:
- Sleeping Bag – rated to 20° Fahrenheit or cooler
Trip Logistics
How do i register.
Reserve your spot today! In the Trip Dates & Booking section of this page, the green and red dates are bookable online by simply clicking on the date, and blue dates must be booked through our customer service team for a variety of possible reasons. To email our customer service team, you can click here to get the ball rolling. Our adventure consultants will confirm availability, and if you’re ready to register we’ll email you a link to a registration profile. You’ll have 72 hours to complete your profile (and that of any dependents) and pay the deposit.
Feel free to call us for more info – we’re here 7 days a week!
Where Do We Meet?
We will meet you at the Balmaceda Airport (BBA) upon your arrival. Please arrive before 5pm in order to make our 7 pm orientation.
Our Patagonia communications team will be in contact approximately 45 days before your trip to coordinate your rendezvous and answer any last-minute questions you have.
Click here to see a printable, downloadable trip information packet with more detailed guidance about flights, shuttles, recommended lodging and more.
Travel to Coyhaique, Chile
Booking flights.
For this trek you will fly into Balmaceda, Chile (BBA) on Day 1 and we will provide private transfer to our lodging in Coyhaique. Flights should arrive before 5 PM. All flights into Balmaceda connect through Santiago, Chile. Most major airlines fly into Santiago from many major connecting cities in the United States. It is important to leave enough time to pass through customs in Santiago.
Your flight on the final day should depart no earlier than 4 PM. Our earliest arrival at the airport will be 1:00 PM on the final day of the trip. You may choose to be dropped off at either the Balmaceda airport or at your planned lodging in Coyhaique.
Please Note : When you enter Chile, you will be issued a document called a PDI (tourism card). Please do NOT throw this away. You will need it to exit the country and nearly every lodge we stay in also asks for a copy. We recommend taking a photo of the front and back of this card, just in case.
Safety Precautions
Your safety is our top priority. Our hiking tours are led by professional hiking guides, all of whom are wilderness-certified first responders or EMT’s, each with years of guiding and wilderness experience. Guides adhere to standardized risk management protocols in case of any potential or actual incident, and all tours carry an emergency communication device and comprehensive first-aid kit. Additionally we have a “24/7” system through which guides or guests can reach Wildland support personnel at any time.
In the interest of your safety, it’s important to refer to the Center for Disease Control website for up-to-date recommendations on immunizations before your trip.
Essential Eligibility Criteria
Essential Eligibility Criteria (“EEC”) have been specifically identified to help you understand the skills and abilities necessary to participate on each Wildland trip, and they apply uniformly to all potential trip participants, irrespective of the presence or absence of any disability.
Once you identify a trip in which you may be interested, please carefully review the EEC and itinerary details. If after reviewing the EEC that apply to your desired trip, you determine you need an accommodation in order to meet the EEC, please contact us prior to registering to discuss your requested accommodation.
The EEC exist for your own safety and the safety and enjoyment of all participants. If you are unable to meet the EEC for the trip, with or without an accommodation, you are not eligible for that trip. If you register and arrive for a trip for which you do not meet the EEC, you will be disqualified from participation on the trip and will be dismissed or evacuated from the trip without a refund.
Our approach to international travel is to combine the best of two worlds: the dialed-in details, professionalism and consistency Wildland trips are known for; and the cultural immersion and intimate regional knowledge that only locals can provide. To excel with this approach, we vet and hire the best local guides, welcome them into the Wildland family and train them to meet our standard of excellence with every aspect of a trip. But along with managing logistics and safety, your guides will teach you about the area’s history and culture, and provide a level of familiarity and intimate detail only locals can.
Check out our Meet Our Team page for staff bios.
Guide Working Parameters
Guides are required to take 8 hours off each 24-hour period to sleep, recuperate, take personal/down time, etc. In addition, as part of the 8 hours off they must sleep/rest or be in their tents/rooms uninterrupted for a minimum of 5 hours each night. We ask guests to respect these requirements and to not interrupt guides’ off time and sleep time unless there is a true emergency.
Age Restrictions
Age restrictions on this trip are as follows:
- 15 and older to join scheduled tours (mixed groups)
- 5 and older to join private tours, with final approval and specific logistical requirements (such as porter or stock assist) determined on a case by case basis
Trip Insurance
Field evacuation (minimum coverage of at least $30,000), repatriation, and medical trip insurance is required on all Chile trips as a condition of partnership terms with our Chilean vendors.
If you wish to purchase trip insurance, we recommend IMG/iTravelinsured. They are one of the world’s leading providers of travel insurance.
For information on recommended IMG/iTravelinsured policies please click here .
For even greater information, or if you simply prefer communicating with a real, live person, feel free to contact our exclusive agent Michael Bennett. Michael will help you identify the best product for your needs, and there is no cost associated with his assistance. You may contact him at:
Email: [email protected] US by Phone: 877-305-9083 Direct/International by Phone: 702-448-3664
If you already have insurance or wish to purchase from anyone other than IMG/iTravelinsured, we recommend careful consultation with the provider to ensure appropriate coverage. This is because many providers have a number of policy exclusions.
Weather in Patagonia
Chile is a long, thin country extending North-South more than half the length of South America which gives it a tremendous diversity of climates. The Patagonia region of Chile, where we operate our trips, is at the far southern tip of South America, relatively far from the equator and close to the South Pole. It is a generally cool climate with potential for year round inclement weather including rain, snow, sleet, and very strong winds.
The average temperatures and precipitation in the Patagonia region are:
- Accommodations

PATAGONIA HOUSE
This is Patagonia’s newest and most exciting boutique hotel in Coyhaique, the capital of Aysén, Chile’s remote region with stunning forests, rivers, lakes, glaciers and peaks. This hotel is perfectly situated for our jumping off point into Parque Patagonia, and offers us a relaxing, scenic home for the night.

Vientos del Sur
This family owned and operated guesthouse is a perfect introduction into the local culture of the remote Aysén region of Patagonia, and a highlight for many guests. Sitting very close to the massive Lago General Carrera we know you will enjoy the beautiful setting of this unique Patagonian accommodation.

TENT CAMPING
For most of this trip our accommodations are tent camping in the backcountry. All of the campsites are in intensely scenic locations that put us right in the action to make the most of our Patagonia trek. Two are outfitted with rustic amenities such as bathrooms and solar-heated showers, but most are primitive.

Patagonia 47g
Patagonia 47g is an ecological cottage featuring solar energy and thermal noise isolation. Patagonia 47g is very environmentally friendly and right on the shores of General Carrera Lake. Individual rooms have private bathrooms and direct terrace access.
*If reservations at this location aren’t available for specific trip dates, we will ensure that a comparable lodging is booked.
Trip Reviews
Average customer ratings:.
- 5.0 (5 reviews)
- Most recent
Amazing Aysen!
This trip was fantastic from start to finish. Felix and Juanjo were amazing guides along with being terrific cooks. Their knowledge of the landscape and culture made the hiking even more meaningful. I had not expected such varied and fascinating landscapes which made the experience even more fulfilling. In addition to stunning campsites both cabin lodgings are great and the Patagonia House, including the restaurant is worth the trip on its own. Highly recommend!

Highlight of my outdoor adventures!
I chose this trip because I wanted to hike the land donated to Chile by Kris and Doug Tompkins (Conservation Patagonia) and see Patagonia National Park in its early years. From hiking gaucho trails, to crossing creeks, to hiking over varied terrains (Including bushwhacking) and seeing dinosaur bones, this trip was a highlight of my outdoor adventures! Our group was powered by able, knowledgeable guides who provided us with freshly prepared food in camp and cabanas and they provided deep knowledge of Chilean history, flora and fauna. They answered so many of my questions along the trail that at times I felt like the curious student always raising my hand. The lodging exceeded my expectations with comfortable beds, very scenic locations and hot tubs! For the first 4 hiking days, we saw no one except our gaucho horse porter and his steads. That kind of solitude is a rare occurrence today and something I welcomed. Unplugged, undistracted and immersed in the land of fire and ice. This trip has left me wanting more of the vast Chilean Patagonia landscape!
Incredible Trip!
Absolutely amazing experience! The vastness and variedness of the landscape is incredible. Wetlands, steppe, grasslands, subalpine and alpine hiking. One of the most unique treks that I have even been on. Also, there was amazing support from the Wildland team! Would travel again with them anytime!

See All Guest Reviews!
Related trips, you might also like....

Langtang Valley Service Trek
Cordillera Huayhuash Trek

Salkantay Trek Extended Package
- Similar Trips
- day by day itinerary
- logistical and travel information
- gear and clothing lists and more
Leave a Reply Cancel reply
Your email address will not be published. Required fields are marked *
First Name & Last Initial *
Save my name and email in this browser for the next time I comment.
wildland Wires
Sign up to receive our exclusive Wildland Wire emails and stay up to date with Wildland Trekking's promotions, discounts, contests, outdoor tips and tricks, trip reports and more!

Trek Patagonia
The hiking specialist, private guiding, bariloche, argentina.

Trek Patagonia is a local company specialized in tailored private hiking excursions with experienced certified guides in the area of Bariloche and the Nahuel Huapi National Park, since 2001 . Our goal is to enrich your mountain experience in the Patagonian Andes adding our professional expertise, knowledge and passion for these unique places.
Please contact us via e-mail to [email protected] and please let us know when are you planning to come, where would you stay, how many people would take part of the activity, ages, your outdoor activities background, expectations and motivations, how would you consider your level of fitness and if you can, give us an idea of: how many hours / kilometers (or miles) distance / elevation gain you would like to walk per day. We will come back with a first tailored proposal as soon as possible.
Our philosophy
Active travel is much more than a physical pursuit. Your body, mind, spirit and imagination all of a sudden come alive when there is nothing more between you and the horizon than a beautiful landscape of mountains, lakes and forests. We like to engage in every trip willing to enjoy a unique experience which involves the discovery of awesome natural highlights, local culture, and sometimes even the rediscovery of ourselves.
We have been in this continuous discovery journey for many years, sharing our passion for the mountains of the amazing Patagonia with travellers from all around the world. You might set out to see a special valley, or to get to the top of a mountain. But you´ll eventually sense that it´s the journey, not the arrival, that matters. It´s what you observe and experience as you walk or climb that matters the most. The flight of a condor, the beauty of a rocky spire … We would like to share with you those memorable moments.
Quality, service and safety standards
Trek Patagonia has the highest quality standards among the mountain guiding companies of Northern Patagonia. We specialize in designing top-notch mountain experiences that are carefully tailored to your specific needs, preferences and outdoor activities background. Families, corporate groups, couples and single travelers can request our services. We, at Trek Patagonia, are owners and also guides of our company because we like to take care of every detail regarding our client´s trips.
Our goal is to enrich your mountain experience in the Patagonian Andes adding to your trip our professional expertise, knowledge and passion for these special places . Your safety is our main concern when we plan your trip and during your time in these gorgeous mountains. All our guides went through several years of professional formation and have extensive guiding experience.
If you would like us to work on a proposal for your next trip to Patagonia, please contact us to [email protected]
Site under construction

Lonely Plan-it: how to organize a hike on Chile’s famous W Trek in 2023

Jan 14, 2023 • 8 min read

Tackling the W Trek in Chile’s Parque Nacional Torres del Paine is a challenge and a thrill © sharptoyou / Shutterstock
In this series, we take you step by step through how we planned some of the most complicated travel adventures, so you can recreate them yourself with ease. Here, writer Sarah Reid takes you through how she planned her hike on Chile’s famous W Trek.
Tracing the foothills of the snow-capped Paine Massif in southern Chile ’s famous Parque Nacional Torres del Paine , the W Trek one of the world’s most epic multi-day tramps. Named for the shape sketched by the 80km (50-mile) trail, the W Trek immerses you in some of Patagonia’s most mesmerizing scenery, with turquoise lakes, oozing glaciers, gnarled subpolar forests and wildlife spotting opportunities aplenty (you might even spot a puma).
While it’s easy to follow the well-trodden if not always well-marked trail, planning the expedition is complicated by the numerous ways to access the route and the multiple reservations required before you set out. Having recently experienced the trail in two different ways, I’ve figured out all the tricks you’ll need to plan one of the most memorable hikes of your life. Here’s what I learned.
Step 1: Time it right
Find the best mix of good weather and accommodation availability.
Hiking the W Trek hinges on the availability of the half-dozen currently operational refugios (hostels with limited dorm beds, a restaurant, hot showers and campsites) dotted along the route, which can book out months in advance during the November-to-February peak season. This is the warmest time of the year comes with the added bonus of long daylight hours – but it can also be very windy. The less-busy shoulder seasons (March to April and September to October) offer increased camping availability and more agreeable weather (potentially; this is Patagonia, after all). A guide is required for a wintertime hike (May to August, when refugios are closed). Wildlife, including pumas, can be spotted year-round.
To get to Torres del Paine, you’ll need to travel to the small, beautifully situated gateway city of Puerto Natales . You can fly here (or to nearby Punta Arenas ) from Santiago , take a four-day ferry trip from Puerto Montt or travel overland from Argentina (a 5.5-hour bus ride from El Calafate to Puerto Natales). From Puerto Natales, expect a two-hour bus ride to the eastern end of the W Trek, and a three-hour bus ride followed by a 45-minute ferry to the western end.

Step 2: Decide which direction to hike in
You can start or finish your trek with one of the hike’s most epic views.
The W Trek can be hiked from east to west or vice versa, independently or guided, and you can take as many days as you like (pending refugio availability). Hikers with a good level of fitness will find it’s an achievable four-day independent hike. Factor in an extra day to add a glacier kayaking or ice-trekking excursion departing from Refugio Grey (arrange in advance; more on this below).
The benefits of hiking east to west include frequent daily bus services from Puerto Natales (from 7am) to the trailhead. You’ll also knock off the challenging hike to Mirador las Torres , at the base of the three granite towers that give the national park its name, on the first day. Hiking in this direction also means you don’t have to worry about securing a spot on the first ferry of the day across Lago Pehoé to access the western end of the W (critical for a four-day itinerary), as ferry tickets can’t be booked in advance. The early ferry (9am) only operates from November to March.
The beauty of hiking west to east is the opportunity to spend your last night at Refugio Chileno, making it easier to catch the sunrise at Mirador Las Torres on your final day and be back in Puerto Natales by dinnertime (finishing at Paine Grande gets you back to town closer to 10pm). With Patagonia known for its strong westerlies, hiking eastward also keeps the wind at your back for most of the journey.
Step 3: Consider your booking options
Reserve your accommodation, transit and park pass in advance to simplify your life.
This is where it gets tricky. The two refugios at the trail’s western end (Paine Grande and Grey) are operated by Vertice Patagonia , which also runs glacier trekking and kayaking tours. The other four refugios (Francés, Cuernos, Chileno and Central; there’s an additional bunkhouse near Central called Torre Norte) are operated by Las Torres Patagonia . You can book preferred campsites and dorm beds (some refugios also have rooms) separately through their websites, or make reservations at camps run by both operators in a single booking via Booking Patagonia .
Meals, pre-pitched tents, sleeping bags and mats can be prebooked for additional fees, pushing the cost of a four-day hike from as little as $62 (camping costs only; wild camping is forbidden) to around $400 if you book all the extras (and it’s worth doing so if you’re not keen on carrying all your supplies, including cooking equipment). Booking bus tickets to and from Puerto Natales in advance is also recommended; Bus Sur services both ends of the trail.
An easier if more expensive option is to book an all-inclusive package. These come in all shapes and sizes, ranging from classic unguided through-hikes, to hikes along sections of the trail each day with a guide then shuttling back to an off-trail camp or lodge each night. (Note that it’s difficult to complete all legs of the W Trek as day hikes given the volume of backtracking required to the two exit points.) Local operators offering good-value unguided through-hike packages with an east-west itinerary (about $1000) include Chile Nativo and ChileTour Patagonia . Las Torres Patagonia and Vertice Patagonia also offer packages with accommodation at their own properties (a through-hike is only possible with the former). International operators including G Adventures and World Expeditions also offer through-hike packages.
You’ll also need to book a multi-day national park pass via the CONAF website ($35), which will be checked at the entrance to the park.

Step 4: Prep for the adventure
Find the perfect gear for your adventure.
With the entire trail located between 100-900m (330-2600ft) above sea level, there’s no altitude to factor in on the W Trek. But it’s the ever-changing Patagonian weather, along with the uneven, often-exposed trail, that will likely test you. Layers are key, and a waterproof jacket, rain pants and pack cover are essential year-round.
Expect to have next-to-no cellular reception throughout the journey. Wi-fi coupons are available for sale at refugios (provided the router is working) but it’s more fun to stay disconnected and mingle with fellow hikers at the bar instead; every refugio has one. Be mindful when packing that everything you carry into the national park must come out with you – the only rubbish bins at refugios are designed for toilet paper. With a limited number of power points in refugios for charging devices, packing spare batteries is a good idea.
Step 5: Nail the trail
Be adaptable to conditions to get the most out of your journey.
Days on the trail can be long on a four-day hike; set out by 8am in autumn and spring to arrive in camp well before nightfall. If you’ve booked meals, most refugios have two sittings; book the first sitting when you arrive in camp each day to ensure an early night, and early start the next morning.
On foggy days, reconsider rising early to hike to Mirador las Torres for sunrise. You might also wish to reassess the mostly uphill return hike from Mirador Francés to Mirador Británico (the middle arm of the “W”) in poor weather, though I hiked the latter in average conditions and enjoyed it, particularly as I spotted a pair of endangered huemul deer right below Mirador Británico. Consider leaving non-essentials in a dry bag at Italiano (a CONAF-run camp not currently open for overnight stays) on your way up, as you’ll pass this camp again on your way back down.
If you’re making good time between Paine Grande and Valle Francés (French Valley), consider veering off the main path to hike the lesser-tramped alternative trail around the slightly more scenic eastern side of Lago Skottsberg, which adds about 30 minutes to the trip. Turn left at the first bridge after Italiano if you’re coming from the east, and head right at the fork after the first bridge you cross if you’re coming from Paine Grande.

If I could do it all again…
I booked a last-minute four-day through-hike package on my first W Trek experience. I hiked east to west in March 2022, and camped at Central, Cuernos and Paine Grande, and this itinerary was perfect for me. I’ve since hiked sections of the trail on a guided multi-day, multi-sport tour with Chile Nativo, with superb perspectives on Torres del Paine that complemented my first experience.
If I were to do the W Trek again, I’d aim to tackle the extended version of the trail called the O Circuit, ideally in late September, as I found the weather superb and the crowds thin when I visited then. I’d cut costs by making independent bookings, and I’d book my meals again (though extra comforts are not available at all refugios on the O Circuit).
Since my feet were soaking from the second day onward, I’d also wear waterproof boots; pack fewer snacks, as the boxed lunches were sufficient; and go easier on the Carménère (Chilean red wine) at the refugio bars. Did I mention you can order pisco sours, too?
Explore related stories

Feb 8, 2023 • 4 min read
Here’s an exciting to reason to visit the Argentine side of the Patagonian region.

Feb 7, 2023 • 5 min read

Dec 6, 2022 • 10 min read

Oct 5, 2022 • 6 min read

Jul 29, 2022 • 15 min read

Jan 25, 2022 • 8 min read

Jan 7, 2022 • 9 min read

Jan 5, 2022 • 6 min read

Dec 13, 2021 • 11 min read

Dec 3, 2021 • 10 min read
COMMENTS
Patagonia isn't all about multi-day treks, as sometimes the shorter it is the sweeter it tastes. Laguna Esmeralda is an easy 9 kilometre hike to the base of a glacier known as Glaciar Del Albino. If you prefer to spend extra time taking in the stunning views, a refugios ' campsite' is available near the lake towards the end of the hike ...
Torres Del Paine O Circuit. Location: Patagonia Hiking Tours. Area: Torres del Paine Treks. Trip type: Hut to Hut Trekking Tour. Difficulty: Highlights: Circumnavigate Torres del Paine, Camps & Backcountry Lodges, Towering Granite Spires …. 7 Days. from $5400.
Patagonia Hiking & Trekking Tours. Patagonia's world-class hikes put it firmly at the top of most trekkers lists. Explore granite pinnacles of Paine and Fitz Roy, walk across the ice cap or trek up volcanoes. From the rainforests to wind-tortured steppe, day hikes to multi-day expeditions, let the scenery draw you in and take your breath away.
You can also turn this hike into the epic Patagonia National Park Trek (97 km, 5-6 days), which crosses Sector Valle Chacabuco and connects with the Paso Los Condores and the Ruta de Huemul to enter into Sector Tamango, the third part of the national park. Information about the latter here. 6. Lagunas Altas, Sector Valle Chacabuco, Patagonia ...
Glacier Grey and the Southern Patagonian Icefield are just some of the stunning glaciers spotted while hiking the O Circuit in Torres del Paine National Park, Patagonia. The O trek is a challenging hike; you're covering 136 kilometers (85 miles) across just nine days, and you're also gaining significant elevation on two of those days.
The W Trek in Patagonia is a moderately difficult hike covering 46 miles (76km) and typically takes 4-5 days to complete. It includes mainly gentle terrain with some challenging climbs of up to 800m. Be sure to come prepared for varying weather conditions.
Volcan Chaitén Crater Trail, Parque Nacional Pumalín Douglas R. Tompkins (Chile) Best all-encompassing view. 2.7 miles (4.4km) round trip, 3 hours, moderate. In 2008, the eponymous volcano in northern Patagonia staged a surprise eruption and buried half the town of Chaitén under mud and ash. This relatively steep five-hour round-trip trek ...
Patagonia is an incredibly varied trekking destination. This is a true natural wonderland where condors soar and volcanos smoke. Patagonia hiking trails offer, in my opinion, some of the best treks in South America!. In 2022 I was lucky enough to spend a few months in Patagonia hiking and exploring.
The most popular trek in Patagonia, the Torres Del Paine W Trek is fast becoming one of the most well-respected short hikes in the world due to the trail's stunning scenery. Guanaco in Torres Del Paine. Located in the amazing Torres del Paine National Park which was made a World Biosphere Reserve by UNESCO in 1978.
Some trails may be crowded in high season (Dec. to February) 4. Los Dientes de Navarino. Dientes de Navarino Trek. Location : Navarino Island, Magallanes Region, Chile. Distance & Time : about 37 km/22mi | 4 to 5 days. Difficulty : Demanding. This is by far the wildest trekking circuit in Patagonia.
The Cerro Castillo Trek is an off-the-beaten-track hiking route inside the Cerro Castillo National Reserve in Chile Patagonia. This is an amazing park located on the scenic Carretera Austral road with spectacular landscapes, mountain peaks, crystal-clear rivers, hanging glaciers, challenging passes, and dense forests.
Patagonia trekking rule 1: be prepared. Hiking in Patagonia is a rewarding activity but, as is clear, is not one to be taken lightly. Get ready to enjoy the beautiful scenery, to marvel at glaciers, but also to push your limits on the region's stunning hiking trails. Torres del Paine National Park.
One of the most well-known mountains in South America is Mount Fitz Roy. This mountain is an emblem of Patagonia and I was thrilled to check hiking Fitz Roy off my bucket list. It should be on everyone's list for backpacking Patagonia. At 3,375 m, the jagged peaks create one of the most dramatic landscapes on earth.
11 Best Hikes in Patagonia. 1. W Trek. Duration: 4-5 days, 80km/50mi. Best Time to Go: Summer. Difficulty Level: Moderate. Country: Chile. The W Trek is one of the best hikes in Patagonia. The W Trek is one of the most popular hikes in all of South America, as well as the most famous trek in Torres del Paine National Park, so it's a no ...
Trekking Patagonia's 'O' Circuit had exposed me to a completely different type of outdoor experience than I'd ever known. Chile's proudest national reserve - located in the far reaches of the Patagonian wilderness - is a mecca for outdoor enthusiasts worldwide. A quarter-million visitors travel to Torres del Paine every year, and ...
5. Get a tent suited for Patagonian weather. A normal tent isn't going to be a good choice in Patagonia, where winds can reach upwards of 100km/hour. That is some serious wind and the shape of the tent, plus strength of the tent poles, both matter a lot so that nothing breaks while you're midway through a trek.
Top 10 trekking companies in Patagonia with reviews. I ntrepid Travel, 4 tours with 46 reviews. OneSeed Expeditions, 2 tours with 3 reviews. G Adventures, 3 tours with 33 reviews. Exodus Travels, 2 tours with 47 reviews. Peregrine Adventures, 1 tour. PhotoFly Travel Club, 1 tour.
Day 2: Seron to Dickson. Distance: About 11 miles. Hike up a small pass where you get the first glimpse of the glacial lakes and impressive peaks Patagonia is known for. Even the back side of the ...
1. Torres del Paine 'W' & 'Circuit' Treks. Torres del Paine is a very popular hike in Patagonia, and with good reason. From the distinctive rock towers that give the national park its name to the stunning Glacier Grey and more, Torres Paine National park is full of jaw-droppingly beautiful scenery.
Here are four must-visit locations for an unforgettable trekking experience: 1. Torres Del Paine National Park. Iconic granite towers piercing the sky, azure lakes, and vast ice fields make this park a highlight of southern Patagonia. The W Trek and the O Circuit offer immersive experiences of this stunning terrain.
This Patagonia trek utilizes the Torres del Paine Refugios (backcountry huts). Each refugio is unique, with dorm style accommodations where guests share co-ed bunk rooms, typically 4-8 guests per room. Men's and women's restrooms/showers are down the hall. You'll have great local cuisine, served in a communal eating area with shared ...
Our Wild Patagonia Explorer Trek is a dream expedition for any adventurous world traveler. We have combined unique lodging, remote horse-supported trekking, cultural immersion, fantastic hiking and more in one grand adventure. We explore Chile's newly created Patagonia National Park and the mountains surrounding it to create the trip of a ...
Trek Patagonia is a local company specialized in tailored private hiking excursions with experienced certified guides in the area of Bariloche and the Nahuel Huapi National Park, since 2001.Our goal is to enrich your mountain experience in the Patagonian Andes adding our professional expertise, knowledge and passion for these unique places.
The two refugios at the trail's western end (Paine Grande and Grey) are operated by Vertice Patagonia, which also runs glacier trekking and kayaking tours. The other four refugios (Francés, Cuernos, Chileno and Central; there's an additional bunkhouse near Central called Torre Norte) are operated by Las Torres Patagonia.