Call of Duty: Black Ops 4 Zombies Voyage of Despair Easter eggs
How to find and unlock the Zombies Voyage of Despair map's hidden secrets

The Black Ops 4 Zombies Voyage of Despair Easter eggs see the Chaos crew right in the thick of it as the undead clamber aboard the Titanic on its infamous maiden voyage. Like all the Black Ops 4 Zombies maps – and all previous zombies modes in the franchise – there are plenty of Voyage of Despair Easter eggs to complete and they are not easy. This is our full Black Ops 4 Zombies Voyage of Despair guide which lists how to complete all the Easter eggs, find the Pack a Punch and Wonder Weapon, and much more.
- Black Ops 4 Zombies IX Easter eggs
- Black Ops 4 Zombies Blood of the Dead Easter eggs
- Black Ops 4 Blackout Character Missions - unlock all Zombies characters

Draining the water
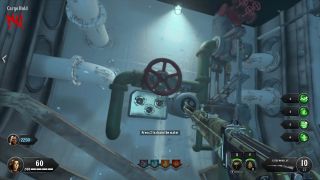
The very first thing you’ll want to do, at the same time as you go through the motions of unlocking Pack a Punch, is drain the water from the Cargo Hold and the Engine/Turbine Room. Follow the steps below in the Pack a Punch section to activate the Sentinel Artefact then, when you return to the Forecastle side and go down into the Cargo Hold, make sure you do this at the same time as the Pack a Punch pedestal.
When you reach the Cargo Hold Pack a Punch, look to your right-hand side. Against the wall should be a red handle attached to some pipes. Go up to it and interact with it to slowly drain the water from the room. By the time you come back, the water should all be gone.
When you make your way to the Turbine Room for the third Pack a Punch pedestal, swim past the pedestal to the Boiler Room. There’s an identical red handle underneath a light on the right-hand side, next to some blue pipes. Do the same thing again and the room will gradually drain all the water. Once both are complete, you no longer have to swim!
- Black Ops 4 Blackout Challenges
- Black Out 4 Dark Ops Challenges guide and how to complete them
How to unlock Pack a Punch
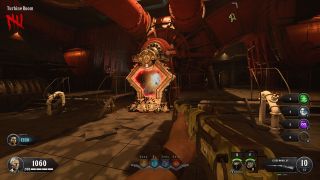
Unlocking Pack a Punch needs to be your first main aim in Voyage of Despair. It’s not particularly difficult, you just need to get from the Forecastle end of the boat to the Poop Deck. Unlock the bottom door in the Forecastle to go through the State Rooms, then keep unlocking the doors in front of you to get to the opposite end of the ship.
When you open up onto the Poop Deck, you’ll be able to see a blue light on a raised platform in the distance. That’s the Sentinel Artefact - head toward it and interact with it. When you do, an explosion will happen in the distance and you’ll see the artefact shoot a red light to the pedestal on the ground below.
This is a Pack a Punch pedestal. There’s four of them around the map. To unlock the Pack a Punch machine, you need to interact with all four, but be aware that the final pedestal you interact with is where the machine will spawn. Unlike other maps, the Pack a Punch machine on Voyage of Despair rotates between all four points but for the early rounds, the Poop Deck is actually the ideal place to have it. We’d recommend taking the fast travel from the Poop Deck back to the Forecastle then interacting with the pedestals in the following order:
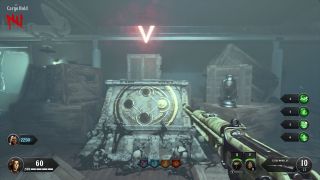
- Cargo Hold - Head to the Mail Room beneath the Forecastle and unlock the door to the Cargo Hold. Swim underwater to the very back of the Cargo Hold to find the first Pack a Punch pedestal.
- Lower Grand Staircase - The huge staircase in the middle of the ship is a great way to access each level of the boat. Head to it down the same path you travelled to reach the Poop Deck at the start, then when you reach the staircase, keep going down until you can’t go down any further. The Pack a Punch pedestal should be in front of you, shrouded in darkness.
- Turbine Room - Head to the Poop Deck again but rather than going up the stairs to the very back, there should be a doorway that leads down underneath the Poop Deck. This will take you to Provisions. Open the unlocked door just past the room full of slaughtered animals and you’ll be in the Engine Room. Jump into the water and swim down to the back of the Engine Room to find the Turbine Room, with the Pack a Punch pedestal underwater next to the red turbine.
- Poop Deck - Finally, go back up to the Poop Deck and interact with the pedestal. This will cause the Pack a Punch machine to spawn there on the Poop Deck - the most accessible location of the four. It will eventually rotate to one of the other spawn points, though approaching a pedestal it isn’t at will tell you where it is.
Obtaining the Kraken Wonder Weapon
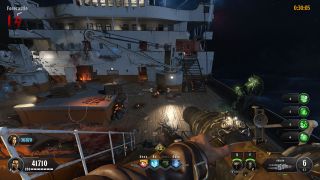
There are two ways to get the Kraken, though one is far more reliable than the other unless you’re particularly lucky.
The first method is via the Mystery Box. Of course, there’s a plethora of weapons it could give you instead so you might be there for 10 rounds wasting 950 points each time, or you could get the gun on your first try. If you’d rather obtain it for definite, you need to follow a much more complex series of steps.
First, you need to kill a Stoker by shooting its weak spots, indicated by the glowing areas. Stokers are the big fiery chaps that use shovels to fling hot coals at you, and we’ve found they don’t tend to appear until about round 10, so this method isn’t the quickest. When you kill one by shooting the weak spots, it will drop the Stoker’s Key.
Now you need to find a treasure chest on the map that can spawn in one of five locations:
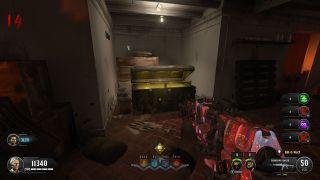
- Mail Room - The room below the Forecastle - the chest can spawn to the right of the staircase.
- Turbine Room - Take the fast travel portal from the Cargo Hold to the Boiler Room, then head into the Engine Room and back to the Turbine Room. The chest can spawn to the right of the Pack a Punch pedestal at the end of the path.
- Provisions - Head back up the stairs, the same way you unlocked the room at first to get to the Pack a Punch pedestal - the chest can spawn in the slaughter room/freezer.
- Galley - Through the Dining Hall and into the Galley, the chest may spawn in the back left corner.
- State Rooms - The final potential spawn locations is at the very back of the ground floor State Rooms, next to the door to the Millionaire Suites.
When you find the chest, you need to use the Stoker’s Key on it. You then need to feed zombies to it by killing in them nearby. It will absorb the zombie souls then, when it’s satisfied, it will vanish and teleport to one of the other four locations. Do this twice more and eventually, an item will appear in the chest.
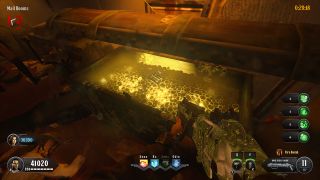
Depending on which item you got, these are the locations you need to go to:
- Binoculars - Forecastle - At the very back of the spawn area, a wooden box on the right hand side will have some binoculars on.
- Compass - Boat Deck - At the top of the Grand Staircase, take a left onto the Boat Deck and the wooden crate on the left will have a compass.
- Globe - Mid Deck - On the right-hand side of the Mid Deck, a globe will be on the wooden crate.
- Tool - Aft Decks - The Aft Decks are right next to the Poop Deck. When facing the Poop Deck, head to the left-hand side and there’s a small tool on another wooden crate.
- Telescope - Poop Deck - Finally, head to the very back of the Poop Deck to find a telescope on another crate.
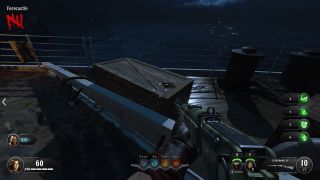
When you approach the right crate for your item, an enormous tentacle will explode out of the water and drop the Kraken Wonder Weapon on to the crate. Pretty nifty, right?
Upgrading the Kraken
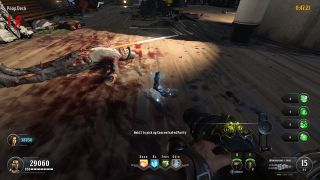
Now the Kraken Wonder Weapon can be placed into the Pack a Punch machine for a standard upgrade called the Cirein-Croin Crasher, but you can also add one of four elemental effects to the gun to turn it into one of the following: Jormungandr’s Fang, Grip of Akkorokamui, Inkanyamba’s Roar, or Breath of Leviathan.
To upgrade the Kraken or Cirein-Croin Crasher, you need to obtain four parts. Three of these parts can be found in the following areas:
- Cargo Hold - When you’re at the Pack a Punch pedestal, turn around and the part can spawn on some crates to the left-hand side.
- Cargo Hold - Or it can also spawn toward the middle of the same area, on some other luggage.
- Galley - At the back of the galley, on the table blocking off the fiery area.
- Galley - Head down the corridor to the opposite end, with some shelves. The part can also spawn on the left-most shelf, next to some rolled up pieces of paper.
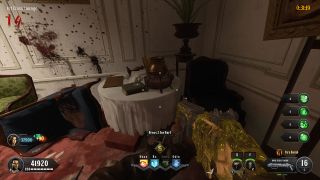
- 1st Class Lounge - Head to the A Deck part of the Grand Staircase. Go through the door on your right - next to the Mystery Box - then up the wooden plank used as a ramp. The part can spawn on the first table to your right.
- 1st Class Lounge - From the first spawn point, look round the corner to your left and it may spawn on another table in the room.
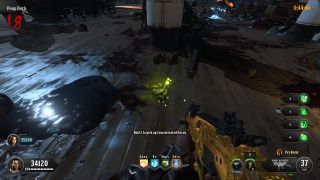
Now to get one of the four elemental upgrades, you need to kill the elemental zombies. Each time you kill one of the mutated ones, they have a chance to drop some plasma corresponding to their type - fire, ice, poison, or electric. Once you’ve got the plasma for the type of Kraken you want, head down to the Engine Room and approach the crafting table to the side of the room.
Interacting with the table with all four parts will create a Distillation Kit. It costs 6,000 points to upgrade, but you can then interact with the kit and upgrade your Kraken. You can do this multiple times, as long as you pick up the plasma each time, and it refills your Kraken with ammo. Bear in mind that later on in the main Black Ops 4 Zombies Voyage of Despair easter egg, you will need the Jormungandr’s Fang (Poison) version of the Kraken.
Building the Ballistic Shield
You don’t necessarily need to get the Ballistic Shield to complete the main Voyage of Despair easter egg, but it’s a great tool to have to help you survive, as it can block zombie hits and comes equipped with a very powerful automatic pistol. In order to craft the Ballistic Shield, you’re going to need to find three parts:
- State Rooms - On the ground floor, approach from the Forecastle and stick to the right-hand side. It can spawn on a rocking chair through some gaping holes in the walls.
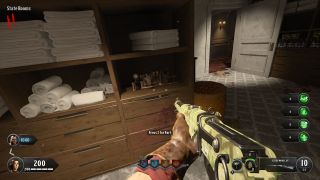
- State Rooms - Cross over to the left-hand side and go into the laundry room. The part can spawn on a shelf next to some towels.
- State Rooms - Go into the next room in front of you with another gaping hole in the wall. It may spawn on an armchair next to a single bed.
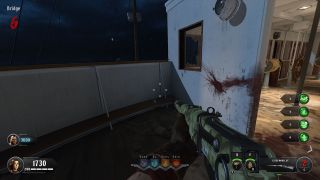
- Bridge - Go up the right-hand side stairs from the Forecastle and the first part can be on the left when you turn around, next to the smashed window looking in to the four dials and the wheel.
- Bridge - Turn around and go to the right-hand side door at the back of the bridge. A part can spawn just inside the second door, on a wooden crate on some metal beams.
- Bridge - Turn and keep going further into the Bridge. This one is impossible to miss, as it’s just sat on a handrail in the middle.
- Provisions - From the slaughter room/freezer, head toward the door to the Engine Room but look left, and the part can spawn on the other side of a stack of boxes near the door.
- Provisions - Go to the left-hand side and to the end of the hallway. The part can spawn right at the back, in front of the inaccessible area on fire.
- 3rd Class Berths - It can also spawn in the 3rd Class Berths, right above the Provisions area. Head up the stairs and like the second part, it can spawn atop a handrail through an enormous hole in the wall.
To craft the shield, you’re going to want to head out to the Poop Deck. Just down from the Pack a Punch pedestal is a crafting bench. Build it there and, voila, you have the Ballistic Shield.
Matching the clocks and the symbols
Now it’s finally time to get to the main easter egg. This is the stage you’ll need a pen and paper for, so make sure you have those - or a similar note taking apparatus - nearby.
The gist of this is that there are six clocks throughout the map, and four of them will be displaying a time that isn’t 11:40. If you see a clock that has any other time on it, you need to find the nearby symbol. When you find the clock displaying a time other than the default 11:40, take note of the time, then look for the nearby symbol and note that down. The symbols are four triangles - there will be two standing up, one with a line through and one without, along with two upside down, one with a line through and one without. If you’re taking notes on your phone, an easy way to do this is to record “TIME - UP/LINE”, “TIME - DOWN/NO LINE”, etc.
- Clock - On the right-hand side of the doorway leading to the Cargo Hold.
- Symbol - Underneath the metal stairs leading down to the Mail Room, by the Vapr wall-buy.
- Clock - Right above the steering wheel in the room behind the four dials.
- Symbol - Underneath the desk behind the steering wheel and to the left.
Upper Grand Staircase
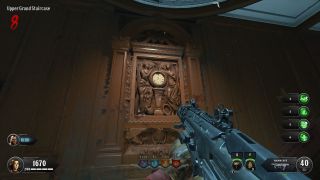
- Clock - At the top of the staircase is a clock engraved into the wall.
- Symbol - Turn around and look above a closed door to the left for the symbol.
1st Class Lounge
- Clock - Above the fireplace is a small mantelpiece clock.
- Symbol - To the left of the Mystery Box spawn, the symbol is on the wall underneath a three-piece candle holder.
- Clock - On the wall opposite the hanging corpse.
- Symbol - On the side of the cabinet to the left of the clock.
3rd Class Berths
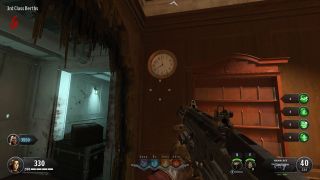
- Clock - At the foot of the stairs from the Poop Deck.
- Symbol - Turn around when looking at the clock and check underneath the stairs, behind the crates and luggage.
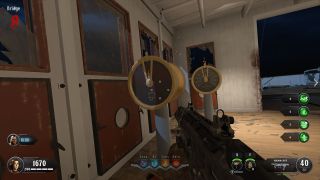
When you’ve found all four clocks and symbols, you need to go to the Bridge. At the front of the Bridge you’ll see four dials by the steering wheel. Look closely at each one, and you’ll see each of the four symbols engraved into the dials.
You need to interact with the arrow on the dials to make them point to the respective minute for each of the times. For example, if you found the UP + LINE triangle symbol by a clock that displayed the time 12:10, you need to move the arrow two notches to the right to represent the 10th minute (it moves in increments of five). Once you have correctly done that with all four times, it should lock into place.
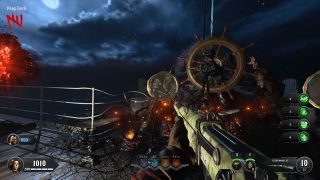
Next, head to the far end of the Poop Deck, where you interacted with the Sentinel Artefact for the first time. Next to the wheel should be two similar dials but without markings. The one on the left is for the UP + LINE symbol, while the one on the right is the DOWN + LINE symbol. You’re going to want to input the respective hours into these dials. The time starts at 12/midnight, so interact with it left to turn it down to 11, 10, 9 etc. while going right will make the time 1, 2, 3, and so on.
For the other two symbols (down + up with no lines) you need to go to the Engine Room. Go down to the lower walkways, which should no longer be flooded if you drained the water, and you’ll see four dials on the sides of a pole. When looking at all four, you want to ignore the bottom right and top left ones as they’re visibly busted. Interact with the bottom left dial for the UP symbol, and the top right done for the DOWN symbol. Treat them the same as the ones on the Poop Deck, and when they’re done, you’ve completed this stage.
Finding the outlets
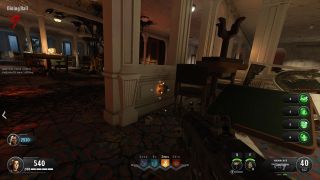
Your next job is to find four electrical outlets around the ship that will be sparking different colours. There are six spawn locations in total, so check all of these six, and four should be emitting red, green, blue, or yellow sparks.
- 3rd Class Berths - Down the first set of stairs from the Poop Deck, take a left and the outlet is on the right-hand wall.
- Aft Decks - Up the stairs from the Poop Deck and through a central zombie window.
- 1st Class Lounge - Next to the Zeus Perk Statue.
- Upper Grand Staircase - Near where the symbol spawns, to the right of the clock and along the wall.
- Dining Hall - While facing the Ra Perk Statue, turn around and walk to the right. It’s behind one of the white wooden panels segregating the room.
- State Rooms - From the Forecastle, go into the ground floor left State Rooms entrance and go left into the first room. The outlet is on the wall next to two painting.
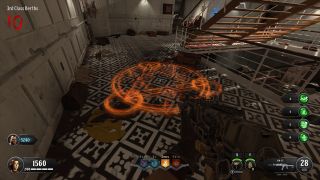
When you’ve found the four outlets sparking different colours, you need to find the respective elemental zombie for that colour and lead it there. Kill it right next to the outlet and a ritual symbol will appear on the floor. Do this for all four zombies and voila! Four ritual symbols will appear.
Now we can’t stress enough that this part needs to be done in the following order: Poison > Water > Electric > Fire. Remember which ritual symbol corresponds to each element because you need to have everyone in the game go to the Poison symbol and interact with it first. This will take you to a mini-boss fight where you simply need to survive and kill all of the incoming enemies. If you do them in the wrong order you will have to start over. When you’ve done it, you’ll be able to pick up a fake Sentinel Artefact. Do all four symbols in the above order and you’ll eventually receive the real Sentinel Artefact.
When I’ve been doing this stage of the Black Ops 4 Zombies Voyage of Despair Easter egg, it’s been slightly finicky. Sometimes the ritual symbol won’t appear on the floor for a second outlet if there’s already one ritual symbol somewhere else. For the least hassle, and to avoid running into this problem, I’d strongly recommend killing the Poison elemental, interacting with the ritual symbol, completing that wave of enemies, then moving on to the Water one, and so on.
Plugging the leaks
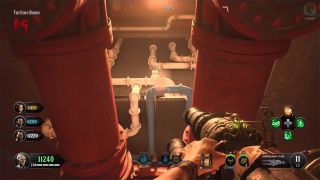
By now, you need to ensure you have the Decayed Kraken, or the upgraded version, Jormungandr’s Fang. Head down to the Turbine Room, and along the walls you’ll see leaking pipes with steam coming out. Shoot all of the burst pipes with the Poison elemental Kraken and it will fix them. You’ll know you’ve done it correctly because a kill hitmarker will show up for each one. There are nine points you need to shoot in total.
When you’ve completed all nine, the water level in the room will start to rise again (so much for draining it all earlier!). If the Pack a Punch machine was already in the room during the process, approach it and it will allow you to Pack a Punch the Sentinel Artefact. If the Pack a Punch machine isn’t in the Turbine Room, you’ll need to finish the current round, and at the end of the round the Pack a Punch machine should teleport back to the Turbine Room. Thankfully, it doesn’t cost anything to Pack a Punch the Sentinel Artefact so go ahead and do that, then make your way back outside to the Forecastle.
Finding the planet symbols
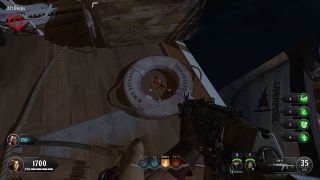
Once again, you’re looking for more symbols around the map. You may have spotted some of these markings already just through playing, but what you won’t have realised is that they each correspond to a planet. You need to find all nine symbols and interact with them in the following order. Here is where you can find all nine symbols:
- Sun - Forecastle - Right where you spawn, the Sun symbol will be at the back, on the side of the curved funnel next to the fast travel portal.
- Mercury - Mail Room - Go down the stairs to the Mail Room and the Mercury symbol is at the bottom of the second flight of stairs on your left.
- Venus - Millionaire Suites - From the Lower Grand Staircase, go into the Millionaire Suites and you’ll see the Venus symbol under the bedside table.
- Moon - Lower Grand Staircase - On a closed white door to the right of the staircase.
- Mars - Boiler Room - Approach the fast travel portal, turn around then go prone. The Mars symbol is below the floor, on the wall where the wall sticks out slightly next to a red pipe.
- Saturn - Bridge - When facing the Forecastle direction, walk past the room with the metal beams for a floor (the same room one of the Ballistic Shield parts can spawn in) and go into the next room on the right. The Saturn symbol is on the side of a cabinet next to the zombie window.
- Jupiter - Engine Room - Approach the Odin Perk Statue, turn around, and the symbol is on the floor near the stairs leading down.
- Uranus - State Rooms - Hilariously, you can find the Uranus symbol in one of the bathrooms. Opposite the MOG-12 wall-buy, go into the bathroom and the symbol is right behind a potted plant in the corner.
- Neptune - Aft Decks - Near the top of the suspended lifeboat, the Neptune symbol is inside the ring buoy marked RMS Titanic - Liverpool.
Interacting with the solar system model
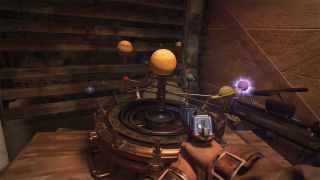
Now we need to make abundantly clear that once you start this next step, it will spawn an endless wave of zombies . Your current round will not come to an end until you either complete or fail the step. So make sure you’ve got everything you need ready, then go down to the Cargo Hold.
Look for the model of the solar system with all seven planets, the Moon, and the Sun. Interact with it, and the planets will start flashing in a random order. Make note of this order because failing this will mean you need to restart it all over again .

Head outside and look to the sky. You’ll see all of the planets, including the Sun and the enormous Moon, except for Neptune. That’s because Neptune is actually in the water, floating around and periodically appearing. You need to shoot each planet in the sky, then go to where you found the original symbol as quickly as possible. A timer starts as soon as you shoot it, so if you don’t make it in time, you have to wait another full round before you can give it another shot. Interact with each orb as soon as you can after shooting the respective planet, then your final one will always be the Sun. Before you shoot the Sun, make sure you have enough ammo and Pack a Punch weapons because you’re nearing the final boss fight.
Race against time
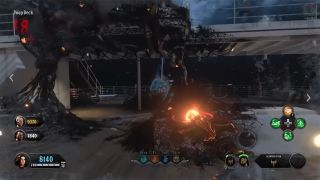
Make your way to the Forecastle and shoot the Sun from there. The orb will come and rest by the original symbol. When you have all players interact with it, the screen will flash white and a timer will begin.
Your goal is to make it to the Poop Deck as quickly as possible. The fastest route we’ve found is to take the staircase to the right - make sure you’re breaking as many of the ice blocks as quickly as possible. Once you reach the opposite end of the ship, near where you grabbed the Sentinel Artefact at the start of the game, a red symbol will appear on the floor. This is the portal to the final boss fight, so spend enough time making sure you have everything you could possibly need before you activate it. We recommend having at least one person with a Pack a Punched Hellion Salvo for the immense damage and splash radius it deals.
Eye of Odin boss fight
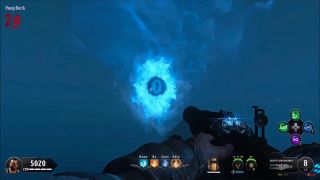
As soon as everyone interacts with the red symbol, you’ll be teleported into the water. Swim as fast as you can to the nearby tree and interact with the Sentinel Artefact found nearby to teleport back to the boat. When you get to the boat, the Eye of Odin will appear.
Don’t shoot at the Eye yet because you can’t deal any damage to it. Instead, kill all the enemies that appear; Stokers, Elemental Zombies, Blightfathers, the lot of them. When you’ve survived the first wave, you’ll be teleported to the Engine Room.
Do the same thing again in the Engine Room - shoot at all the enemies that appear, but don’t bother shooting at the Eye because it’s still invulnerable. Once again, as soon as you’ve killed all the enemies, you’ll get teleported to the State Rooms.
Now, in this third phase, only normal zombies and Stokers should spawn. The Eye of Odin will also start firing a bright blue beam at you which will freeze you if you get caught in it. The only way to escape the ice is to melee out of it. When the Eye is firing its laser, shoot it in the pupil to deal damage. This is where the Hellion Salvo comes in handy, because of how much hurt it deals.
Once you’ve dealt enough damage to the eye, you’ll be teleported out again, this time to the Promenade Starboard Deck. The Eye of Odin will be flying around the ship in the water - keep shooting it with the Hellion Salvo again to deal as much damage as possible.
The final place you’ll be teleported to is the Poop Deck, and for this phase you need someone with the Kraken. Keep shooting the eye with the Hellion Salvo at first, then, eventually, it will go to the very back of the Poop Deck and start a charging animation. In order to get it to stop charging, shoot it with the Kraken. The Ice upgraded version is more effective than the other elemental types for this, but it’s still doable without. If you fail to stop it charging, the Eye of Odin’s resulting attack will down every single player that isn’t using the Dying Wish perk. You need to stop if from unleashing its charge attack three times. Once you’ve done it the third time, the Eye of Odin will be defeated and the final cutscene will commence. Congratulations - you’ve completed the Black Ops 4 Zombies Voyage of Despair easter egg!
If you're done with Zombies after all of that, why not check out our Black Ops 4 Blackout tips ?
Sign up to the GamesRadar+ Newsletter
Weekly digests, tales from the communities you love, and more
Give me a game and I will write every "how to" I possibly can or die trying. When I'm not knee-deep in a game to write guides on, you'll find me hurtling round the track in F1, flinging balls on my phone in Pokemon Go, pretending to know what I'm doing in Football Manager, or clicking on heads in Valorant.
The best Black Ops 6 SVD build and loadout
The best Ames 85 build for Black Ops 6
2023's most slept-on RPG finally hits consoles, and at $5 million in sales it's a big win for a cute series that's quietly been ticking along for nearly 10 years
Most Popular
- 2 Astro Bot review: "Soars above and beyond to serve up a near-perfect platformer"
- 3 Warhammer 40,000: Space Marine 2 review: "Raises the bar for all Warhammer adaptations"
- 4 World of Warcraft: The War Within review – "One of the strongest WoW expansions in recent memory"
- 5 Concord review: "Plenty of characters and little personality"
- 2 Joker: Folie à Deux review – "An unconventional musical sequel that fails to hit the high notes"
- 3 Wolfs review: "George Clooney and Brad Pitt riff on their Ocean’s Eleven charisma in this fun frolic"
- 4 Starve Acre review: "Morfydd Clark and Matt Smith headline a chilling and unnerving horror movie"
- 5 Sing Sing review: "Colman Domingo’s soulful performance keeps this prison story gripping and gritty"
- 2 The Lord of the Rings: The Rings of Power season 2 review: "A bleak, oppressive ode to Middle-earth anchored by one of the year's best performances"
- 3 Slow Horses season 4 review: "Apple TV's masterful spy drama remains one of the best shows on right now"
- 4 The Umbrella Academy season 4 review: "Like any good family reunion, most frustrations can be waved away, at least in the moment"
- 5 House of the Dragon season 2 episode 8 review: "Excellent sequences can’t save a finale that’s all set-up and no conclusion"
- Call of Duty: Black Ops 4 Achievements
- Call of Duty: Black Ops 4 News
- Walkthrough *
11. Call of Duty: Black Ops 4 Zombies - Voyage of Despair Easter Egg
Voyage of despair easter egg:.
(Some pictures in this section provided by YouTube channels: Glitch, MRoflWaffles, NoahJ456, and Laggin24X).
Once again, the Easter Egg needs to be done on normal difficulty with no modifiers. The Easter Egg will not work if you are on a lower difficulty, or if you turn on modifiers.
This Easter Egg unfortunately steps up the difficulty from IX, and is also considered to be the hardest Easter Egg to complete in the game alongside Blood of the Dead. If you can finish Blood of the Dead's and Voyage of Despair's Easter Eggs, you'll be able to finish the rest of the game's Easter Eggs easily.
Throughout your game, at least one person needs the Kraken wonder weapon to finish the Easter Egg. I'd recommend multiple people get it due to its utility and power. You can get it randomly out of the box, or I've written a detailed way you can get the Kraken for free on the previous page. I'd also recommend at least one person try to get the Hellion Salvo too and fully Pack-A-Punch it before the boss fight, as it is incredibly helpful later on. I would also recommend you pick the Sceptre of Ra as your special weapon, and for perks, I'd recommend Dying Wish in the Zeus slot, Deadshot Dealer for Odin, Quick Revive as your Danu perk, Stamin-Up as your Ra perk, and for whoever's taking the rocket launcher, PHD Slider in the Odin slot instead of Deadshot. I'd also recommend one person try to have Homunculuses, as they are the new monkey bombs for Chaos maps.
The first step to start the Easter egg is to collect the Sentinel Artifact at the Poop Deck area of the ship. If you don't know where that is, go back a page and I have written out how to find it.
After that, you'll want to drain the water in the Engine Room and the Cargo Hold. Once again, see the previous page if you need a refresher.
CLOCKS/CODES
Now, here's where the Easter Egg truly begins. After activating Pack-A-Punch, around the map there are now going to be four symbols that have spawned somewhere, alongside a clock that is nearby your symbol. Here are all the clock and symbol locations. There will only be four pairs of clocks/symbols that spawned, so if you don't see the symbol in a location, ignore the clock as well. One good way to see if you have the symbol at a location is to first check the clock. If the clock shows 11:40 on it, that means the symbol did not spawn at that location, so you can ignore that clock.
The symbols look like this:

- Clock: near the door leading down to Cargo Hold on the wall

- Symbol: under the stairs leading up to the Mail Room, near the VAPR wall buy
Captains Bridge
- Clock: small room behind the four dials, above the steering wheel

- Symbol: directly opposite the steering wheel in a small room, under a desk
Grand Staircase
- Clock: top of the staircase, on the wall

- Symbol: face the clock, turn to the right and go up the small steps, turn right again and you'll see a symbol above the door

1st Class Lounge
- Clock: fireplace in the middle of the room, on the mantle

- Symbol: to the left of the mystery box, on the back wall
Galley (Kitchen)
- Clock: in the room with the hanging body on the wall. Face the body on the wall, turn 180 degrees and there is a clock on the wall to the left

- Symbol: face the body on the wall, turn 180 degrees, the symbol is on the cabinet to the left
- Clock: heading towards the turbine, at the end of the wooden stairs, the clock is on the wall to the left

- Symbol: behind some luggage next to the wooden stairs leading up
Once you have found all four symbol/clock pairings, you'll want to write down the four symbols and the times on the clocks that were nearby. So for my screenshots above, in the Grand Staircase, I would write down "triangle up, 9:05." Once you have your four pairings written down, you're going to need to start entering them in three separate places on the map. One set of dials is in the Captain's Bridge area, another is over on the Poop Deck where you grab the Sentinel Artifact, and the last two are down in the Engine Room. On each one, there should be a symbol matching the four symbols you wrote down.
We'll start with the Captain's Bridge. First look at the four dials.

Now, we have to match the times we found, but only enter the MINUTES portion on the dials. To do this we are going to look at the dials, and move the lever toward the location it would need to be to match the time. For the dials, the leftmost one is activated from the right-hand side, whereas the other three are activated from their left-hand side.

Each lever movement represents five-minute increments on a clock, so if you have 20 as your minutes, move your lever four turns to the right past north, 45 would be three turns to the left past north, etc. So, for my previous example, I said "triangle up, 9:05." To enter this, I will go to the dial with the triangle up symbol and move the lever to the right once past north. Do this for all the minute hands until they match.
Now move towards the Poop Deck. There should only be two handles to move, and you're going to do the same thing you did at the Bridge, but with the hours now. The left dial should correspond to the upward-pointing triangle with a dash through it, and the one on the right should correspond to the down-pointing triangle with a dash going through it. Once again, for these dials, think of north as 12:00. Move it left or right to match the hours, so for my Grand Staircase pairing again, the lever will get moved three to the left past north when I do these.

Finally, go down to the Engine Room and do the same thing you did to the Poop Deck dials, but this time the left-side dial corresponds to the upward-pointing triangle without a dash, and the right-side dials correspond to the downward-pointing triangle without a dash.

If done correctly, you'll hear some eerie chanting and a loud activation noise to signify completion.
ELECTRICAL OUTLETS/TIME TRIALS
Now, we move on to the next step, which is the electrical outlets step. Throughout the map, there are going to be multiple electrical outlets, with four of them randomly sparking a certain element. These elements correspond to the four special catalyst zombies that can spawn in the middle of the rounds.

In the picture above, the left plug means it correlates to an acid zombie, the second plug means it correlates to a water zombie, the third plug means it correlates to an electric zombie, and the fourth plug means it correlates to a fire zombie. You will have to go to all the plug locations below and see if your plug is sparking. Just like the clocks, there are six plugs total in the map, but only four will be sparking. Wait about 15-20 seconds to see if your plug sparks, and if it doesn't the plug is not needed. The plug locations are as follows:
- States Room, 1st on left, near gramophone and golden painting frames on floor

- Upper Grand Staircase - at the top of Grand Staircase, to the right of a green couch

- 3rd Class main stairway - near the brown suitcase on the floor

- Aft Decks - inside a barricaded room with a red valve on the ceiling

- Dining Hall - on the left-side wall, facing Ra perk

- 1st Class Lounge - On a pillar, to the left of the Zeus perk

Once you've checked all the plugs, I would once again write down what you found somewhere. So for my plugs, I would write "3rd Class, Electric," and "Aft Decks, Acid," etc. until I have all four plugs written down.
You'll have to repeat this process four separate times for each plug. You have to kill the catalysts at the plugs and then complete the arenas in this order to progress:
For the Fire zombie, do not get too close, because he will detonate himself if you get too close, and it will not count. You need to lure him near the plug, then shoot him enough to kill him from a short distance. Do not try to complete all four catalysts at once, just do one plug/arena at a time until you finish all four plugs. I would also recommend, for the water portal, do not start until you have some really strong weapons, as you are going to be stuck in a flooded version of the mail room, and the strongest boss zombies will be spawning down there.
SHOOTING THE PIPES/PACK-A-PUNCHING THE SENTINEL ARTIFACT
With those arenas completed, we now move on to the next step, which requires you to have the Kraken and the Acid upgrade for it. Once again, for a refresher, go back to the previous page where I've detailed that information. Take your Kraken with the Acid upgrade downstairs to the Turbine Room area where the Pack-A-Punch pedestal is. There are going to be blue pipes all around the room that are going to be shooting out steam from them. Shoot all these pipes with your Kraken. You'll know a pipe has been shot when the pipe shoots out water droplets with the steam. There should be nine pipes in total.

BOTH STEAM LOCATIONS BELOW NEED TO BE SHOT

THE PLANETS
Sun - Forecastle, where you first spawn on the map

Saturn - Bridge, across from the steering wheel on the side of a cabinet

Mercury - Mail Room, just down the stairs from the Forecastle on a wall

Uranus - State Rooms, hidden behind a plant in one of the bathrooms

Venus - Millionaire Suites, inside one of the bedrooms underneath a small table

Moon - Lower Grand Staircase, on a wall outside of the dining room area

Neptune - Aft Decks, near the lifeboats, in the middle of a life preserver on the ground

Jupiter - Engine Room, on a plank of wood on the ground in front of the Odin perk machine
When you go to grab this planet, you'll have to jump in the air to grab it.

Mars - Boiler Room, under the floor. You have to go prone to activate this one.

Here are all the planets labeled on the model:

(Credit goes to MrRoflWaffles for the labeling here)
All the planets are in the sky, except for Neptune, which will be in the water circling the ship on the horizon. Look for a glowing blue ball dipping in and out of the water.

To figure out which planets are which in the sky, here's what they all look like:

https://www.trueachievements.com/customimages/131872.jpg&...
When you start, your screen will flash white for a moment and you'll be back on the map, but now the map is going to be littered with ice chunks blocking your path. To finish the time trial, you'll have to use your Scepters, Krakens, and whatever else you have to break the blocks to keep moving towards the Poop Deck at the other end of the ship. Make sure you are outfitted with pretty powerful weapons and that you have a decent amount of ammo, because this step can get really chaotic really fast. If you fail the step at this point or any other point, you'll have to progress the round to try it all over again, so it's best to keep mistakes to an absolute minimum.
Here's a video detailing this one specific step a little further, since it can be a little confusing to understand at first. This step is a good one to have a bit of a visual on, so I'd watch the video first to just familiarize yourself with the step before starting it.
(Credit to Heartless Gamer for this video)
If you manage to complete this in one go, when you make it to the Poop Deck, there will be one more iceberg on the very end of the ship for you to melt, which will end the trial, and give you the portal to teleport to the boss fight of this map. Do not enter the boss fight until you have all the weapons you want, you have all your perks, your shield is at full health, and your guns are fully Pack-A-Punched, with full ammo.

The first stage takes place on the Poop Deck, and like I said, it's pretty simple. Just train the zombies around and kill whatever is coming after you. The second stage is in the Engine Room, and is the same thing as the first. This area is a bit tighter as the corridors are a lot more narrow, but it is still manageable if you use the different floors to train around. Here's a video of what my friend and I did to train around the area, you can see him on the lower floor:
Once stage two is finished, stage three is where things get tricky. You'll be teleported to the State Rooms area of the map, and this area is even more narrow than before. Not only that, but the boss will be looking down each of the two main hallways and firing a laser beam every so often. Now, to finish this stage you'll have to shoot the boss when it's firing down the hall. When he's taken enough damage the stage will end. I recommend sitting in the front area of the hallways near where the carpenter and max ammo powerups spawn in, and every so often clearing the hallways behind you, and shooting the boss whenever he shoots down the hall. Use the rocket launcher as it does a ton of damage to the boss.

Once stage three is done, you'll be teleported to the fourth stage which is at the Promenade Starboard Deck area. T his is where things can get really tough if you're not careful. This stage is now going to have all the different zombie types coming after you to kill you, but now you have to contend with the boss trying to kill you as well. To end the stage, you have to damage the eyeball enough to move on. This can get tricky as managing the zombies and the boss can be really difficult. Try to run a train around the icebergs in the area and try to get far away from the zombies when the boss is trying to shoot and is vulnerable to damage. You'll know you're doing a good amount of damage when the boss starts to crack and glow red.

Once the eyeball has been shot enough, you'll be teleported to the final stage of the fight. Now, this stage is easier than the last one since there's more maneuvering space here, but the problem is the boss has a new attack that can instantly kill you and your whole team if you're not paying attention. You can damage the eyeball when it's trying to use its laser beam attack from before, or when it is using the new attack that wipes the team. Dodge the bosses and enemies on the map until you hear a scream-like sound effect and the eyeball is shaking at the end of the ship. Your character should say something about the eye charging up.
(Clip from MrRoflWaffles' EE guide)
When this happens, try to throw a Homunculus and focus on shooting the eyeball full of as much damage as possible. I would recommend the rocket launcher like before. If done correctly, the eyeball will not kill you and will take a huge amount of damage before repeating the cycle over again. If you have Dying Wish and you fail to deal enough damage to the eyeball, it will take your Dying Wish perk and you will live, but this can only work once, so don't rely on it. When you've done the process of shooting it multiple times, eventually the boss will die, and you will have completed the Voyage of Despair easter egg, also unlocking:
In Voyage of Despair, complete the Trial
Multiple screenshots and videos in this guide come from MrRoflWaffles, NoahJ456, and Heartless Gamer on YouTube. Thanks to all of them for their amazing guides.
If you've completed this, give yourself a pat on the back because this is a long and arduous journey to go through. Now, on to the true test of your skills, Blood of the Dead.
- Ethics Policy
- Ownership Policy
- Corrections Policy

Voyage Of Despair Guide Easter Egg – Black Ops 4 Zombies
In the Black Ops 4 Voyage of Despair easter egg, you need to do the Voyage of Despair clocks and more. This Voyage of Despair guide covers everything.
In this Black Ops 4 Voyage of Despair guide, we’ll cover the Voyage of Despair clocks, the Voyage of Despair boss fight and everything else you need to know about the Black Ops 4 Voyage of Despair easter egg. There’s a number of steps you need to take to complete the Voyage of Despair guide, so let’s get right to it in our Call of Duty: Black Ops 4 Zombies Voyage of Despair easter egg guide.
Voyage of Despair Pack a Punch
The very first step you need to take is to unlock the Voyage of Despair Pack a Punch machine. We’ve already covered that in a separate guide since it has so many steps within, so check that out here.
Voyage of Despair Clocks
Once you’ve activated Pack a Punch, you now need to find six different clocks around the Titanic, four of which will have the Pack a Punch symbol displayed nearby. They can be found in these locations:

- [ Clock ] To the right of the doorway leading to the Cargo Hold.
- [ Symbol ] Underneath the stairs near the Vapr weapon purchase.
Captains Bridge

- [ Clock ] Above the steering wheel.
- [ Symbol ] Behind the steering wheel, underneath the desk.
Grand Staircase

- [ Clock ] At the top of the staircase engraved in the wall.
- [ Symbol ] Head right from the clock, and you’ll find the symbol above a doorway.
1st Class Lounge
- [ Clock ] On top of the fireplace in the middle.
- [ Symbol ] To the left of the mystery box on the wall.
3rd Class Lounge
- [ Clock ] At the bottom of the stairs from the Turbine Room, look left, and the clock is on the wall.
- [ Symbol ] Behind the luggage next to the base of the stairs.
- [ Clock] Opposite the hanging corpse.
- [ Symbol ] On the cabinets to the left of the clock.
You’ll know there is a symbol near the clock when the displayed time isn’t 11:40. Four of the clocks will display different times, which means the symbol should be there.
Voyage of Despair Turntable Dials

When you’ve found all four clocks and symbols, head to the Bridge. There are four turntable dials each with an elemental symbol in them, one for every symbol you’ve found by the clocks.
You need to match all four turntable dials with the correct time displayed on the clock by the symbol you found. You can adjust the time shown by controlling the minute hand in the Captain’s Bridge, while the hour hands are controlled in the Engine Room/Poop Deck.
Voyage of Despair Elemental Catalysts
When all of the dials have been completed (you’ll know when because you’ll hear a noise and you won’t be able to adjust them anymore), four electrical outlets on the ship will begin to spark. Again, there are six possible locations:
- First State Room on the left
- Third Class Staircase
- Left pillar on the Zeus Statue
- Top of the Grand Staircase
- Barricade on the Aft Decks Window
Four of these outlets will be sparking a different color. You need to kill an Elemental Catalyst that corresponds to its color, next to the outlet. Kill a Fire Catalyst by the red sparking outlet, Water Catalyst by blue, Electric Catalyst by yellow and Acid Catalyst by green.
At each outlet, when you kill the correct catalyst, a ritual symbol will appear on the floor. All players in the game need to stand on top of the symbol and interact with it. Everyone will be teleported into a trial where you just have to survive, killing the waves of zombies. Once you’ve survived, your screen will go grey, and you can pick up a fake Sentinel Artifact – the same thing you interacted with to get Pack a Punch. Do this four times – once at each outlet – and you’ll be given a real Sentinel Artifact.
Voyage of Despair Upgrading the Kraken
For this next step, you need to have already unlocked the Kraken. Follow our guide here for more information on how to do that.
When you have the Kraken wonder weapon, you need to upgrade it. You can do this by collecting four parts that can each be found in one of two locations:
Kraken Chamber
- [ 1st Class Lounge ] On a table near the inside window.
- [ 1st Class Lounge ] On a different table by the inside corner of the lounge.
Kraken Barrel
- [ Cargo Hold ] Along the wall past the fancy car.
- [ Cargo Hold ] Behind the main stairs, on top of a crate.
Kraken Tubing
- [ Galley ] On a brown shelf by the brick wall.
- [ Galley ] On a table inside the fiery room.
Kraken Special Part
This one’s a little different. You need to kill an Elemental Zombie, and it should drop the Special Part.
Once you’ve got all the necessary parts, head to the Engine Room. You’ll find a Crafting Table which will allow you to upgrade the Kraken wonder weapon.
Voyage of Despair Leaking Pipes
With the Acid version of the upgraded Kraken (Jormungandr’s Fang), head to the Boiler Room. You need to shoot all of the leaking pipes – nine different leaks from seven blue pipes. This will put the fire out.
Voyage of Despair Pack a Punch Sentinel Artifact
Once the fires are out, put the real Sentinel Artifact into the Pack a Punch machine.
Voyage of Despair Planets
Now you need to interact with nine planet symbols. “But there are only eight planets now!” we hear you say. That’s because Earth and Pluto haven’t been included – instead, there’s the Sun and the Moon.
- Mercury – Mail Room : Look beneath the Forecastle to find the Mercury symbol.
- Venus – Millionaire Suites : Beneath the desk in the same room as the suitcases on the bed.
- Mars – Boiler Room: Beneath the furnace.
- Saturn – Bridge : In one of the rooms on the side of some cupboards.
- Jupiter – Engine Room : Up the first set of stairs, near a cardboard box on the floor.
- Neptune – Outer Aft Decks : Inside a lifesaver ring buoy.
- Uranus – State Room : Inside the room with a yellow basket in front of the door, Uranus is behind a pot.
- Moon – Lower Grand Staircase : On one of the white doors.
- Sun – Forecastle : On the deck in the middle, stand and face two large steel beams. You’ll see the moon behind them.
Voyage of Despair Solar System Model
Head to the Cargo Hold and interact with the Solar System Model. WARNING: Doing this will start an INFINITE ROUND. Zombies will NOT stop spawning until you have completed this next step of the Voyage of Despair easter egg!
When you’ve interacted with the Solar System, the planets will start flashing in a specific order. Take note of the order they flash in because this is akin to a memory game. You need to shoot the planets in the order they flash.
As you shoot each planet, a blue orb will spawn and float back to the original location of its symbol. You have 30 seconds to grab the orb – do this for every single planet but when you get to the Sun, stop.
Take your time to upgrade all your weapons and equipment. You’ll need lots of ammo for this next step.
When you shoot the Sun, have all players follow the orb to the spawn room and interact with it. Your screen will turn white, and a timer will start.
You need to reach the other end of the ship as quickly as possible. It sounds simple, but large blocks of ice will appear and block paths. The most efficient way to break them is with the upgraded version of the Kraken, and the fastest path we’ve found is up the rightmost staircase. When you get to the opposite end of the Poop Deck, break the final ice block, and you’ll be taken out of the trial. A red symbol will be on the floor which will teleport you to the final boss fight.
Voyage of Despair Boss Fight
Of course, before you interact with the symbol, make sure you have everything you’ll need. Try and get a Max Ammo power-up, upgrade your weapons as much as possible, etc. When everyone is ready, interact with the symbol.
You’ll spawn underwater. Swim to a nearby tree and interact with the Sentinel Artifact to get teleported back to the boat. A giant iceberg will appear alongside an enormous blue eye. Shoot at the eye, and you’ll eventually be teleported to the stairs behind you.
Now you just need to survive. All sorts of enemies will come at you including Catalysts, Axe Men and Blightfathers. When you’ve survived, you’ll be teleported again.
Now you’re in the Engine Room. Once again, survive the waves and waves of zombies until you’re teleported again. Don’t shoot the eye this time because it’s invincible.
Stage Three
To the State Rooms this time. Even more zombies than before will come at you, and you need to deal damage to the huge eye at the same time. It can also attack you though, by shooting an enormous laser beam. Be extra careful because the beam deals serious damage and you can only damage the eye while it’s firing the beam. When you’ve dealt enough damage to the eye, you’ll be teleported again.
Now you’re on a different side of the ship. Follow the same thing you did in Stage Three – deal damage to the eye and survive zombies.
This is the final stage – not much is different except this time, you can damage the eye while it is crying and not firing the laser beam. Also, being hit by the beam is a one-hit-kill so avoid it as best as you can.
When you’ve completed this stage and defeated the eye, the final cutscene will begin, and you’ve completed the Voyage of Despair easter egg.
Want help with any of the other Zombies maps or with Black Ops 4 in general? Check out our Black Ops 4 guide hub .

- Skip to main content
- Skip to header right navigation
- Skip to site footer

Video Game News, Lists & Guides

Black Ops 4 Zombies: Voyage of Despair – How To Complete The Main Easter Egg | ‘Abandon Ship’ Guide
Turn dials, blast Catalyst zombies, and complete trials — here’s how to “Abandon Ship” and complete the Main Easter Egg Quest on “Voyage of Despair”.

Earn the Abandon Ship achievement / trophy and complete the main Easter egg quest on “Voyage of Despair” — here’s how to do all the secret steps in this Titanic-themed Black Ops 4: Zombies map. On every Zombies map, there’s a huge, optional quest that’s very, very tricky to complete. Usually it requires the entire Zombies community to join together to figure out every complex puzzle.
And “Voyage of Despair” is pretty complex. After unlocking the Pack-a-Punch, you’ll need to locate clocks that have changed times. Using the clocks as your guide, you’ll need to input minutes / hours into special dials. There’s more too — later, you’ll have to lead special elemental zombies to power outlets. Blasting an elemental zombie near the proper outlet summons a ritual symbol. And it just keeps going.

Table of Contents – Black Ops 4: Zombies Guides
- Black Ops 4 Zombies: Blood Of The Dead – How To Turn On Power
- Black Ops 4 Zombies: Blood Of The Dead – How To Pack-A-Punch | Upgrade Guide
- Black Ops 4 Zombies: Blood Of The Dead – Main Easter Egg Guide | ‘Most Escape Alive’
- Black Ops 4 Zombies: Blood Of The Dead – How To Get Acidgat & Magmagat Wonder Weapons
- Black Ops 4 Zombies: Blood Of The Dead – How To Get Hell’s Retriever | Wonder Weapon Guide
- Black Ops 4 Zombies: Blood Of The Dead – How To Get Hell’s Redeemer | Upgrade Retriever Guide
- Black Ops 4 Zombies: Blood Of The Dead – How To Get The Gold Spork | 1-Hit Kill Melee Weapon
- Black Ops 4 Zombies: How To Build The Zombie Shield | All Maps [Blood, IX & More]
- Black Ops 4 Zombies: How To Unlock Every Secret Song Easter Egg [Blood, IX & More]
- Black Ops 4 Zombies: Where To Find Every Jumpscare Easter Egg [Blood & Classified]
- Black Ops 4 Zombies: Voyage Of Despair – Elemental Kraken Wonder Weapon Guide
- Black Ops 4 Zombies: Voyage Of Despair – Main Easter Egg Completion Guide | ‘Abandon Ship’
- Black Ops 4 Zombies: IX – How To Pack-A-Punch | Upgrade Guide
- Black Ops 4 Zombies: IX – How To Get The Death of Orion | Wonder Weapon Guide
- Black Ops 4 Zombies: IX – How To Complete The Main Easter Egg | ‘Venerated Warrior’ Guide
- Black Ops 4 Zombies: Classified – How To Pack-A-Punch | Upgrade Guide
- Black Ops 4 Zombies: Classified – How To Unlock The “Shockwave” Easter Egg Song
- Black Ops 4 Zombies: Classified – How To Get The Winter’s Howl | Wonder Weapon Guide
Voyage of Despair – Main Easter Egg Guide
[ Work-in-Progress : The community is working on solutions right now! Check back soon for more steps. ]
Before starting the Main Easter Egg quest, you’ll need to activate the Sentinel Artifact and unlock the Pack-a-Punch machine . Check the ‘Voyage of Despair’ Pack-a-Punch guide above for details.
Step #1: Align The Dials
After using the Pack-a-Punch once, the 4 clocks will change across the ship. PaP symbols will appear near the clocks that have changed. Your goal for this step is:
- Find the 4 Clocks that have changed .
- Find the Symbol near each clock.
- Find the Dials , and move the Dials to match the corresponding Clocks .
For the first step, you’ll need to actually locate all the clocks. The clocks spawn in random locations. Check the following locations to find the clocks, and learn what symbol corresponds to that clock.
- Symbol : Under a desk on the opposite wall from the clock.
- Symbol : Above a door, up the right steps from the clock.
- Symbol : Look behind luggage, near the stairs leading up.
- Symbol : Left of the Mystery Box spawn.
- Symbol: Under the stairs in the Mailroom.
- Symbol : On the cabinets, left of the clock.
Once you’ve found the four random clocks and symbols , it’s time to input the codes on Dials . The Dials are located in the Captain’s Bridge (control the minutes) and the Engine Room / Poop Deck (control the hours) — the Captain’s Bridge dials can be altered to match the minute hands , and the Engine Room / Poop Deck dials can be altered to match the hour hands .
The minute-hand dials can be adjusted in 5-minute increments . The hour-hand dials can be adjusted by the hour .
Match the symbols to the dials (the same symbol will appear on both) — the dials will make a sound when aligned correctly and lock into place.
Step #2: Charge The Outlets
After successfully locking-in all the dials, electrical outlets will begin to spark in four random locations . The outlets will spark in one of four different colors — you need to lead an Elemental Special Zombie to the outlet and kill it. The Elemental Special Zombie must match the elemental color of the outlet sparks .
- Grand Staircase (Top)
- 3rd Class Berths
- State Rooms
- More locations. I’ll list more here as they’re discovered.
After charging the outlets with the correct elemental power, a ritual symbol will appear on the ground nearby.
Step #3: Complete The Ritual Trial
All four players need to stand on a Ritual symbol that appeared in the previous step. When all four players are standing on one of the symbols, the symbol will glow . Hold [ Interact ] at the same time to teleport into the trial.
- Defeat enemies until the area is clear, and you can collect a fake Sentinel Artifact .
Complete all four rituals (Fire, Acid, Ice, Lightning) to collect the true Sentinel Artifact .
Step #4: Solve The Solar System Puzzle
Complete all four rituals, then travel to the Boiler Room . For this step, you’ll need the Acid Ammo for the Kraken . Kill an acid special zombie to swap out acid ammo on the Kraken.
- Shoot leaking pipes around the Boiler Room with the Acid Kraken until the room floods. The fires will go out.
After that, you’ll be able to place the true Sentinel Artifact into the Pack-a-Punch .
Travel to the Cargo Hold and locate the solar system puzzle . [ Interact ] with the solar system model, and the planets will flash in a specific order . This is the order you need to shoot the symbols around the map — each symbol corresponds to a planet .
Find the symbols and shoot them in the order shown by the solar system model . After shooting the symbols, collect the nearby orbs that spawn .
- Determine the planet order with the solar system puzzle, then shoot the planet-symbols in order. Shoot one symbol, collect the nearby orb, then shoot the next symbol in sequence. The last symbol is for the Sun.
Interact with the final Sun Essence in the Forecastle / Spawn — when all players [Interact] at the same time, you’ll enter the final trial.
Step #5: The Sun Trial
From the Forecastle , you must fight your way to the Poop Deck . Hordes of zombies will spawn, and ice has blocked the doors. Shoot the ice to break through. Fight all the way to the original Sentinel Artifact spawn . Break the ice and a portal will appear.
Step #6: The Final Boss
Interact with the portal that appears after completing the Sun Trial. All players must [ Interact ] with the portal at the same time.
[ Work-in-Progress : Check back soon for more locations and details! ]
More Call of Duty: Black Ops 4 guides on Gameranx:
- Black Ops 4: 16 Things You Should Know About Blackout Mode | Beta Beginner’s Guide
- Black Ops 4: Blackout Is Full Of Zombies Mode Secrets & Easter Eggs
- Black Ops 4: Blackout – The Secret Song Returns In Asylum | Easter Egg Guide
- Black Ops 4: Blackout – Check Out All 14 Areas & What They’re Based On | Map Guide
- Black Ops 4: Blackout – 10 Insane Tips & Tricks You Probably Didn’t Know About
- Black Ops 4: Blackout – The Best Weapons To Use In Any Situation | Greatest Guns Guide
About Kevin Thielenhaus
- Black Ops 4
- Black Ops 3
- Resident Evil 2
- Mortal Kombat

Voyage of Despair - All Easter Egg Steps
About the easter egg, all easter egg steps, 1. collect the sentinel artifact, 2. activate the sentinel artifact, 3. activate pack-a-punch pedestals.
- Cargo Hold (Water)
- Lower Grand Staircase (Air)
- Boiler Room (Fire)
- Poop Deck (Earth)
4. Get the Kraken and understand upgrades
5. drain the flooded water, 6. match the bridge dials to the clocks.
- Clock: on the wall, near the door leading down to Cargo Hold
- Symbol: under the stairs leading up to the Mail Room, near the Vapr wall buy
- Clock: small room behind the four dials, above the steering wheel
- Symbol: directly opposite the steering wheel, under a desk
- Clock: top of the staircase, on the wall
- Symbol: face the clock, turn to the right and go up the small steps, turn right again and you'll see a symbol above the door
- Clock: fire place in middle of room
- Symbol: to the left of the mystery box, on the wall
- Clock: in the room with the hanging body on the wall. Face the body on the wall, turn 180 degrees and there is a clock on the wall to the left
- Symbol: face the body on the wall, turn 180 degrees, the symbol is on the cabinet to the left
- Clock: when heading towards the turbine, at the end of the wooden stairs the clock is on the wall to the left
- Symbol: behind luggage next to the wooden stairs leading up
7. Find electrical outlets and complete challenges
- States Room, 1st on left, near gramophone and golden painting frames on floor
- Upper Grand Staircase, at the top of Grand Stairway, to the right of green couch
- 3rd Class main stairway, near the brown suitcase on floor
- Aft Decks, middle room, with red valve on ceiling
- Dinner Hall on left facing Ra
- 1st Class Lounge - On a pillar left of Zeus
8. Shoot the leaking engine room pipes
8. shoot the planets.
- Sun: Forecastle - on metal beam, near barrels
- Mercury: Mail Rooms - on metal beam, side wall
- Venus: Millionaire Suites - under bedside table
- Moon: Lower Grand Staircase - on the white wall, clearly visible
- Mars: Boiler Room - halfway up stairs on pipe
- Saturn: Bridge - on side of wooden cupboard, in room with lampshade and maps on the wall
- Jupiter: Engine Room - up the staircase, on the floor
- ?: Aft Decks - on the floor, in the middle of a lifebuoy
- Uranus: State Rooms - in room with black and white floor tiles, behind the green plant by mirrors
9. Frozen door challenge
10. boss fight.
- Phase 1: Outside ship - fight off the general horde
- Phase 2: Engine Room - take care of the blightfathers as a priority
- Phase 3: State Rooms - focus on hitting the eye ball
- Phase 4: Promenade Starboard Deck - focus on hitting the eye ball
- Phase 5: Poop Deck - focus on eye ball when sparking red, use melee to escape ice blast if trapped
More Black Ops 4

Popular Posts
- Black Ops 2
- Red Dead Redemption 2
Other Games
More call of duty: black ops 4, ancient evil zombies - all easter egg steps, ancient evil trailer confirms gaia gauntlet wonder weapon, pegasus horse and boss zombie, "ancient evil" dlc 2 zombies map confirmed for black ops 4, dead of the night zombies - side easter eggs, dead of the night zombies - all easter egg steps, "dead of the night" confirmed as black ops 4 dlc 1 zombies map, zombies ix - all easter egg steps (black ops 4), zombies classified - all easter egg steps (black ops 4), you might also like, zombies chronicles - all new easter eggs (black ops 3 remastered), origins lightning staff upgrade steps - zombies chronicles (dlc 5), origins wind staff upgrade steps - zombies chronicles (dlc 5), origins fire staff upgrade steps - zombies chronicles (dlc 5), origins ice staff upgrade steps - zombies chronicles (dlc 5).
- Commenting Policy
- Advanced Search
Dear Author
Romance, Historical, Contemporary, Paranormal, Young Adult, Book reviews, industry news, and commentary from a reader's point of view
Review: Voyage of the Damned by Frances White
A mind-blowing murder mystery on a ship full of magical passengers. If Agatha Christie wrote fantasy, this would be it! For a thousand years, Concordia has maintained peace between its provinces. To mark this incredible feat, the emperor’s ship embarks upon a twelve-day voyage to the sacred Goddess’s Mountain. Aboard are the twelve heirs of the provinces of Concordia, each graced with a unique and secret magical ability known as a Blessing. All except one: Ganymedes Piscero—class clown, slacker and all-around disappointment. When a beloved heir is murdered, everyone is a suspect. Stuck at sea and surrounded by powerful people and without a Blessing to protect him, Ganymedes’s odds of survival are slim. But as the bodies pile higher, Ganymedes must become the hero he was not born to be. Can he unmask the killer and their secret Blessing before this bloody crusade reaches the shores of Concordia? Or will the empire as he knows it fall?
Dear Frances White,
But I did mind so many other things. First of all, yes, the book does pay homage to Agatha Christie, I just don’t want you to think that this was an homage to “Murder on the Orient Express” because the main action and all the murders happen while on the train. No, one of the very important revelations closer to the end shows a very obvious homage to another one of her famous mysteries which I will of course not mention here. I did not think this was a bad thing, I actually think the mystery storyline in itself was okay although it could have been better, but I also think that the fantasy setting was so so thin and basically pretty terrible to me. It is as if the author wanted to make the mystery story flashier because it very much depends on the person investigating the murders figuring out the various Blessings the characters have, BUT had no desire whatsoever to delve just a little bit deeper in where the story takes place and show the actual world our main characters inhibit.
You would think then it could have been easily written as a contemporary mystery or historical mystery? Well, no, not really! As I said the actual murders and their investigation are very much connected to Blessings which for plot purposes need to be at least partially concealed from the reader till the time comes to reveal it and you think “ah that is why!”
It was quite frustrating to read. The empire consists of twelve provinces, Blessed lead them, this province does this, another does this, all briefly sketched, the end and the origin legend is given and then of course we learn that various conflicts exists between them as much as we need to know while the murders are happening and Ganymedes and someone else is investigating with him.
There are many revelations happening as the story unfolds. Some villains’ motivations barely made sense, another villain-wanna-be’s (so to speak) motivation to me made no sense whatsoever.
Surprisingly enough Ganymedes I had the least amount of problems with maybe because we are in his head all the time and I can see his motivation and his angst at least quite clearly. The rest had the potential to be very interesting characters, but alas, not enough depth for me.
There is a love story too, no I won’t talk much about it for the fear of spoiling it because it is also very much connected with murders and their investigation. I will just say this. I did like the chemistry between Ganymedes and the “mystery person”, however the actual plot turns surrounding the love story made me roll my eyes several times.
Amazon BN Kobo Book Depository Google
Share this:
Sirius started reading books when she was four and reading and discussing books is still her favorite hobby. One of her very favorite gay romances is Tamara Allen’s Whistling in the Dark. In fact, she loves every book written by Tamara Allen. Amongst her other favorite romance writers are Ginn Hale, Nicole Kimberling, Josephine Myles, Taylor V. Donovan and many others. Sirius’ other favorite genres are scifi, mystery and Russian classics. Sirius also loves travelling, watching movies and long slow walks.
When the blurb starts off with how wonderful the cover is, it doesn’t bode well for the story inside. Never mind the plot, buy it for the shiny. I started off with two guesses on the Christie, and have narrowed it down to one.

Yes, that is often my experience as well. I can email you what Christie I thought it was if you wish :).
A Tiktok sensation is an immediate red flag that only occasionally turns out to be accurate for me. I do like the cover, however. Thanks for the review, Sirius. Also, I have a guess about the Christie title, which I will keep to myself.
@ Darlynne : The cover is lovely, just not the most of the rest for me.
s p o i l e r
I mean, the narrator is asking someone for help in his investigation, right? So this person turns out to be involved ( in the somewhat unexpected way… spoilers spoilers ) and if that person helped, WELL half of the deaths and problems could have been avoided. At the end that person says that he decided not to help so the narrator would have more self confidence?? What? Few more bodies, but hey self confidence so who is counting, right?
There is another person who is ready to commit a murder, but decides to *postpone* that, because they wanted to be heard by somebody who had similar issues to them ( presumably) before they will try to kill them.
The more I think about it, the more I think that mystery plot was also a head desk worthy one.
Also I apologize if I asked it before, but what does book do to be considered TikTok sensation? Is the same as booktube? The most talked book about etc? Thanks
I can think of two other Agatha Christie titles you might mean but won’t mention them here as they might be spoilers. From the review, this sounds like the kind of book I’m not interested in reading but would pick up in a bookstore and skim the end just to see if my guess was right.
@ Susan/DC : Honestly to me the revelation closer to the end leaves with only one answer, but entirely possible I missed the homage to others.
@ Sirius : Also I glanced at the reviews and at least couple of then on GR do mention it as well, so if anyone plans to read this and remain unspoiled don’t read the reviews.
Leave a Reply
Your email address will not be published. Required fields are marked *
Notify me of new posts by email.
FTC Disclaimer
We do not purchase all the books we review here. Some we receive from the authors, some we receive from the publisher, and some we receive through a third party service like Net Galley . Some books we purchase ourselves. Login
Discover more from Dear Author
Subscribe now to keep reading and get access to the full archive.
Type your email…
Continue reading
- Privacy Policy
- Corrections Policy
- Ethics Policy
- Fact-checking Policy
- Ownership Policy
- Looking for Eguides?

Black Ops 4 Zombies – How to Unlock the Voyage of Despair Easter Egg Song
On top of all the other little Easter eggs that you can find in the latest zombies maps in Call of Duty: Black Ops 4, players can also unlock songs for each map in the game. This gives players a secret song to listen to, such as the Voyage of Despair Easter egg song. Each map has its own secret song and this article will go over everything you need to know to unlock the Easter egg song in Voyage of Despair.
How to Unlock the Secret Song in Voyage of Despair
In order to unlock the secret song in Voyage of Despair players are going to need to find and shoot four different coins, all of which are located in different areas of the boat. You’ll need to unlock some different areas of the boat in order to reach the places you need to reach, but we’ll outline those areas below.
The first coin that you’re going to need to find and shoot can be found on the Poop Deck. When facing the main portion of the ship, look on the right-hand side at the large coil of wire on the wall. From here, look for the coin between the wire and a wooden crate off to the side. Shoot it to claim it.
The second coin can be found in the Forecastle section of the ship. Look for a wooden crate on the right-hand side of the ship, beneath a set of stairs. Once you’ve found it, look for the coin on the side of the crate that faces a set of three barrels. Shoot it to add it to your collection.
The next coin can be found in the same area where one of the Pack-A-Punch pedestals stands, in the Lower Grand Staircase section. Look up at the staircase from the bottom and you should see the coin among the wooden beams that run along the ceiling above you.
Finally, the last coin can be found over on the Sun Deck. Look out for the rescue boat on the side—the one full of all kinds of bags and other luggage. The coin should be easily spottable on the boat. Shoot it before moving on.
There’s no special way that you need to activate the coins—just find and shoot them all in any order. Once you’ve shot all of the coins, the secret song will unlock and you can listen to it while you mow down waves of zombies. Make sure you check out our other Black Ops 4 guides for more helpful information about Call of Duty: Black Ops 4, including guides on best perks in Blackout as well as our guide how to get the Kraken Wonder Weapon in Voyage of Despair.

Black Ops 4: Voyage of Despair and Mad Hatter easter eggs unlocked
It wouldn’t be a Call of Duty game without a few easter eggs, but you’re going to have to jump through quite a few hoops to get them.
Easter eggs come in all shapes and sizes in Black Ops 4, so let’s take a look at some of our favourites so far. We’ll update this list regularly with more easter eggs as we find them.
You can find out how to unlock the Brazen Bull shield and how to complete the IX arena challenges here to get that sweet ix easter egg. For everything else, check out our Black Ops 4 guide.
Voyage of Despair easter egg
The Voyage of Despair Zombies map in Call of Duty Black Ops 4 is massive. It’s one of the biggest maps that’s been created for the Zombies mode and definitely takes a fair amount of time to get your head around. In order to unlock the Voyage of Despair easter egg, you’ll first need to Pack-a-Punch machine on the Voyage of Despair map, so here’s how to do that first:
Voyage of Despair Pack-a-Punch
Head to the opposite side of the ship from where you spawn, and unlock the doors to the Poop Deck . Climb up the raised platform to find the Sentinel Artefact , which is glowing blue. Once you’ve collected it, the teleporters will activate, and four glowing symbols will appear around the map.
Collect the Glowing Symbols Visit each of the glowing symbols on Voyage of Despair map and activate them. They can be found in the following locations:
- Poop Deck , above the pedestal.
- In the turbine room , swim underwater and through the open passage to the red turbine.
- The bottom of the grand staircase.
- You must drain all the water out of the Cargo Hold with the red lever and the symbol is along the wall to the right.
The pedestal where you claimed the artefact will transform into the Pack-a-Punch upgrade station once you’ve interacted with all the symbols. It’ll cost 5000 points to upgrade your weapon at the station once you’ve unlocked it.

How to Unlock Kraken Weapon in Voyage of Despair
You can unlock the elite Kraken weapon through the Mystery Box, or you can follow these steps to find it to make it a little more interesting. First, kill a Stoker by shooting it in the bright glowing spot and the Stoker will drop a key. There are chests all around the map which you can open with the key. The chests are found here:
- State Rooms
- Turbine Room
- Provisions Room
You need to find one of these chests, open it, and fill it with souls by slaying Zombies while standing near it. Once full, the chest will spawn in another of the above locations.
Repeat this process three times, and an item will spawn out of the chest. If a compass spawns, the Kraken weapon will spawn on the top deck , and if it’s a telescope that means it will spawn on the Poop deck.
Voyage of Despair Easter Eggs
There are quite a few easter eggs available in the Voyage of Despair map, so here’s our guide to help you track them down. We suggest unlocking the Pack-a-Punch machine and the Kraken before you do this.
After unlocking the Pack-a-Punch machine, four of the six clocks located on the ship will change their time. If a clock has changed its time, an elemental symbol will appear nearby which you need to collect. The clocks can be found at the following locations:
- The Mailroom on the right side of the door, with the corresponding symbol sitting under the stairs.
- The Captain’s Bridge above the main ship wheel, with the symbol underneath a desk behind you to the right.
- At the very top of the Grand Staircase , with its corresponding symbol located above a door to the right and up the stairs.
- The First Class Lounge clock is on the fireplace and the symbol is found on the left of the Mystery Box in the lounge.
- The Kitchen/Galley clock is near the hanging body on the wall and the symbol is found by cabinets on your left.
- The Third Class clock is located by finding the stairs leading down to the turbine and turning left at the end of the stairs and the symbol can be found behind some luggage.
After this, you’ll want to head back to the Captain’s Wheel on the Bridge. There are four turnable dials with the elemental symbols on them that correlate to a clock with the same symbol. There are two hands on the clock, the bigger of which you can interact with. The larger hands represent the minutes and the smaller the hours. To move the hour hand of all four clocks, you must interact with the minute hands of the dials found on the Poop Deck and the Engine Room.
What you need to do is align the dials at the bridge to the minutes and hours of the clocks with the same element. The minute hands move left or right in five-minute intervals, whereas the hour hand moves left to right in one-hour intervals. When properly aligned, you’ll hear a noise and will no longer be able to change the dials.

Next, you will see power outlets dotted around the map. Four of these outlets will be emitting a different element and you will need to kill an elemental Catalyst of the same element which is nearby the outlet. To give you some content, an outlet emitting blue sparks would need a water Catalyst to be killed next to it, and so on.
If done correctly, a ritual symbol will appear on the ground where you killed the Catalyst. The power outlets can be found here:
- Dining Hall
- Next to Zeus Statue
- Top of the Staircase
- In a barricade on the Aft Decks
This next sequence must be carried out in the following order:
You then have to have every player standing on the ritual symbol and it’ll then start glowing. You must have every player hold the interact button to be teleported into a trial where you have to defeat every enemy. Once you’ve done so, the screen will flash grey and you’ll then be able to pick up a fake Sentinal Artefact. Do this for all four of the ritual circles and the real Sentinal Artefact.
Head down to the Turbine room and shoot the leaking blue pipes with the Jӧrmungandr’s Fang Poison variant of the Kraken. The water erupting from the pipes will put out the surrounding fires.
Now, head to the Pack-a-Punch and place the artefact in it. Nine symbols will now appear on the map, representing the Solar System. We suggest you have a quick look at what order our planets are in from the Sun. Interact the with following symbols in any order you like:
- Sun - Forecastle
- Mercury - Mail Rooms
- Venus - Millionaire Suite
- Moon - Lower Grand Staircase
- Mars - Boiler room
- Jupiter - Engine Room
- Saturn - Bridge
- Uranus - State Room
- Neptune - Aft Decks
You’ve already lowered the water in the Cargo Hold and should be able to see a model of the Solar system. And the planets will flash. Take a note of the order they flash in and then get ready to run, as this triggers an infinite zombie round that won’t end until this next step is complete.
Holograms of the Sun and planets will now appear in the sky outside, except for the moon which is real. You must shoot the holograms in the order than they flashed on the model. Neptune will spawn in the water near the spawn room and you’ll have to wait until it peeks out of the water to shoot it.
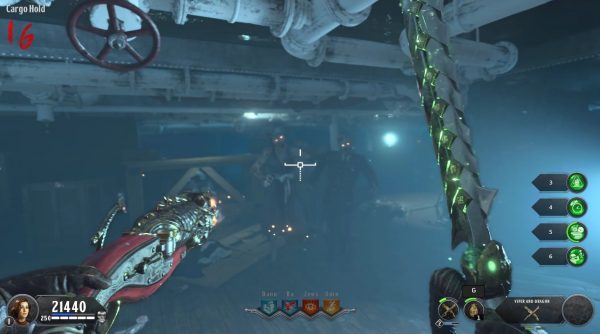
When you shoot a planet’s hologram, a blue orb will spawn and fly to the original location of its symbol for the steps above. A timer will start and you need to find it before it expires. It would be useful to send different party members to each location to help you find them quickly.
Do this for each planet until you reach the sun. Before shooting the sun, make sure all players are at the spawn room and have specialist weapons ready, and stock up on some ammo while you’re at it.
Have someone shoot the sun and then have all players interact with the blue orb at the same time. The screen will go white and a timer will begin. Ice will not block all paths around the ship, so you must destroy these blocks to make your way to the other end of the ship as fast as you can.
Take the staircase on the right of the spawn location and destroy the right-most ice blocks for a quick path through. Now would be a good time to use the Staff of Ra and upgraded Kraken weapons, too.
At the other end of the ship, you must destroy a final ice block and then your screen will turn white, and a red symbol will spawn on the ground which teleports you to the boss fight. All players must interact with it at the same time.

Voyage of Despair Boss fight
You will spawn underwater in front of a tree. Swim towards the tree and you will see the Artefact. All players must interact with it to continue. You will be teleported back to the boat and a giant iceberg will appear out of the water followed by a giant blue eye.
Shoot the eye until it teleports to the stairs behind you. You cannot damage the eye during this first phase. You must survive the onslaught of zombies and once you have completed this stage you will be teleported to the next area.
You’ll then be teleported to the Engine room to do the same again. Again, the eye won’t take any damage. Eventually, you will be transported to the Staterooms and the eye will appear in different doorways, using an eye beam. It can one-shot you so be careful, however, if you shoot the eye while it's using the beam, it will take damage.
If anyone in your party has a rocket launcher , now would be an excellent time to use it. Once enough damage has been done, the screen will go white and you’ll be transported to the other side of the ship, where you’ll need to repeat these steps.
The final phase of this Boss battle begins with a horde that you must survive. The eye can insta-kill you, so time your shots. If the eye starts crying mist, you must shoot it as much as possible to prevent this ttack. If you have a level 3 Staff of Ra using the revive field shields you from the insta-kill attack.
Failure to stop or avoid the attack will end the game. Once you have destroyed the eye, a cutscene will play and you’ll have your easter egg. Lengthy, but worth it.
Mad Hatter Song
To trigger an Avenged Sevenfold song to play while you’re slaying Zombies, you have to track down and shoot special coins in the following locations:
- Ra Tower - Burial Chamber.
- Danu Tower - Entrance.
- Odin Tower - Entrance.
- Zeus Altar Room.

Read this next
- Call of Duty Black Ops 4's scrapped campaign has leaked online
- Call of Duty: Modern Warfare smashes franchise sales record
- Call of Duty: Black Ops Cold War leaked by bag of Doritos
- Mbappe, Rodri and Haaland highest rated players in EA Sports FC 25, plus big upgrade for Bellingham
- Following Arrowhead's update announcement, PlayStation asks Helldivers 2 players how they feel about the game, cue "over 5,000 responses" in less than an hour
- A very small but very nice number of people managed to get Concord's Platinum trophy before it shutdown
- Baldur's Gate 3 modders have already cheekily unlocked a developer mode in Larian's toolkit, potentially paving the way for full custom adventures
- People are already cheating in Deadlock, a game that isn't even technically out yet
- What do you mean Silent Hill: Ascension, possibly the worst game in the whole series, won an Emmy for ‘Outstanding Innovation In Emerging Media Programming’
- Remember SEGA's Yakuza Wars trademark? Well, it seemingly is a mobile strategy game with Kiryu and Majima that you'll be able to play on the loo
- NBA 2K25 shooting guard build
- NBA 2K25 point guard build
- All NBA 2K25 locker codes
- Units Battlegrounds codes
- Multiverse Tower Defense codes
- Ijul Piece 2 codes
- Anime Royale codes
- Sony hasn't said the PS5 Pro is the focus of tomorrow's Technical Presentation, but come on, it pro-bably is, right? 7
- Will Concord ever come back? Nearly 2,000 people have signed a petition willing the game to, but even the experts reckon it's in an "unprecedented situation" 1
- Confused why Nintendo said The Legend of Zelda: Tears of the Kingdom's title was a big spoiler? That's because it had a different name for most of development 1
- Praise the emperor! Space Marine 2 hits Very Positive on Steam the day before its general release 1
VOYAGE OF DESPAIR EASTER EGG STEPS & GUIDES CALL OF DUTY BLACK OPS 4 ZOMBIES
Need additional help.
Follow me on Twitch at http://twitch.tv/doskit we stream live Monday,Wednesday and Friday at 7PM EST. Hop into chat and ask questions about the Easter Egg.
MAIN EASTER EGG STEPS
- Open up your way to the other side of the map (Poop Deck) to obtain the Sentinel Artifact
- Unlock Pack-A-Punch by finding 4 PAP Pedestals across the map
- Captains Bridge
- Grand Staircase
- 1st Class Lounge
- Galley (Kitchen)
Watch Video of All Clock Locations
- After unlocking PAP 4 of the Clocks time will change
Watch Video of All Symbol Locations
- Locate the bridge, in front of the Captain’s Wheel you will find 4 Turnable Dials
- The Dials will have the Elemental Symbols on them relating to a Clock with the same symbol
- These Dials will have 2 hands on them, One Big Hand that you can interact with and a small hand
- The Big Hand represents minutes and the Small Hand represents hours
- To move the hour hands on all dials, you need to interact with minute hands on the dials found at Poop Deck and Engine room.
- Align the dials at the bridge to the minutes and hours of the clocks with same elemental symbol
- When properly aligned with the clocks you will hear a noise and no longer be able to interact with dials
- State Rooms
- Dining Hall
- Left of Zeus Statue on First Class Lounge
- Top of Grand Staircase
- In a barricade on the Aft Decks
Watch a Video on All Outlet Locations
- You need to kill an elemental Catalyst of the same element next to the outlet(1 Catalyst Per Round)
- When done correctly there will be a ritual symbol on the ground where you killed the Catalyst(Complete Rituals in the following order Acid-Water-Electric-Fire)
- Have every player stand on the Ritual Symbol and it will start to glow
- You need to have every player hold the interact button to be teleported into a trial where you need to kill every enemy.
- When done correctly your screen will turn grey and will be able to pick up the Sentinel Artifact
- Do this for all 4 ritual circles and when completed you will receive the Real Sentinel Artifact
- Shoot the leaking blue pipes by the Turbine Room with the Jormungandr’s Fang (Poison variant of the Kraken)
- Once you have shot them the water will start leaking and put out the fires
- Place Artifact in the Pack-A-Punch(Pack Must Be in Boiler Room)
- Mercury Located in the Mail Rooms
- Venus Located in the Millionaire Suite
- Uranus Location in the State Room
- Mars Located in the Boiler Room Near Furnace
- Saturn Located on Bridge
- Sun Located in Forecastle
- Jupiter Located in Engine Room
- Neptune Location on the Aft Decks
- Moon Located on the Lower Grand Staircase
Watch Video of All Planet Symbol Locations
- Lower the water in Cargo Hold and this will reveal a model of the solar system (interact with solar system model and the planets will flash, take note of what order they flash in)
- Holograms of the Sun and the planets will appear in the sky outside ( the planet Neptune does not appear in the sky, it appears in the water in the spawn room)
- You must shoot these holograms in the order they flashed on the solar system model
- Neptune will need to poke out of water before shooting it
- When you shoot a planet a blue orb will spawn and fly to original location of its symbol
- A timer starts and you need to find the planet before it expires (the timer is very short, have friends waiting at each planet location)
- Repeat for each planet in the order until you reach the sun
- Make sure all players are at the spawn room and have someone shoot the sun
- All players need to interact with the blue orb at the same time, your screen will turn white and a timer will begin
- Ice Blocks will block your pathing all across the map, you must destroy these blocks and make your way to the other side of the boat
- Once you reach the end of the boat you need to destroy the last ice block located at the end of the Poop Deck where you first obtain the Sentinel Artifact
- Your screen will turn white and a red symbol will spawn on the ground (this symbol teleports you to you to the boss fight)
Perk Locations
- Engine Room
Watch Video On All Perk Locations
CONTRIBUTORS:
- Life Serial Gaming
- TwztedNinja
LIVE STREAMERS:
Leave a comment cancel reply.
You must be logged in to post a comment.
New Easter Egg Seemingly Discovered on 6-Year-Old Call of Duty Zombies Map

Your changes have been saved
Email is sent
Email has already been sent
Please verify your email address.
You’ve reached your account maximum for followed topics.
Call of Duty Zombies Fans Are Turning Black Ops 6's HUD Into a Meme
Warhammer 40,000: space marine 2 - how to claim pre-order and special edition content, fallout fan transforms their broken hand into a franchise tribute, key takeaways.
- A Call of Duty: WW2 fan discovered a new Easter egg on a 6-year-old Zombies map, The Frozen Dawn.
- The Easter egg involves firing a rocket launcher at specific towers near the volcano on The Frozen Dawn map.
- The Easter egg, referred to as "tower deflect," creates unique interactions with the towers.
A Call of Duty: WW2 fan has discovered a new Easter egg on the 6-year-old Zombies map, The Frozen Dawn. Call of Duty: WW2 Zombies began many years ago, but gamers continue to find hidden details in some locations to this day.
The Call of Duty Zombies game mode originated in Call of Duty: World at War , and it has become a staple of the series since. While it was a prominent feature of the Treyarch Call of Duty games at first, games made by other studios like Modern Warfare 3 and Vanguard include the mode as well. Each installment provides its own unique twist on the Zombies formula while maintaining the core gameplay loop. Easter eggs have been vital to the Zombies experience over the years, many of them requiring players to complete specific tasks. One gamer has discovered a unique Call of Duty Zombies Easter egg on The Frozen Dawn map.
Fans of Call of Duty Zombies are turning the HUD from the Black Ops 6 iteration of the mode into a meme, pointing out several issues with it.
Reddit user Pizayumyum recently shared a clip of their experience on the Call of Duty Zombies map, The Frozen Dawn. The video shows their character firing a Bazooka at a tower next to the volcano in the Overlook portion of the Call of Duty: WW2 map. The final zombie of round four reaches the player shortly after the first shot is fired, and it is subsequently blown up. Perhaps surprised by the outcome, the player then shoots their Bazooka at each of the towers surrounding the distant volcano. The towers in the foreground return the rockets to the player, with one nearly killing them in the process. However, the other explosives blow up in the background.
This Call of Duty Zombies Easter Egg Was Found After 6 Years
This map is the final Zombies location in Call of Duty: WW2 as part of the game's fourth DLC. Because it's a DLC map, fewer people may have explored every detail in it compared to Call of Duty: WW2 maps like Groesten Haus or The Final Reich. For players to replicate this Easter egg, they must first acquire a rocket launcher, with the Bazooka available in the Mystery Box. Once acquired, rockets should specifically be fired at the closest towers near the volcano. These towers track the movement of the rockets and return fire if the explosive trajectory concludes at the tower. According to the Reddit user, the game's files refer to this Easter egg as "tower deflect," and it has the same results regardless of which rocket launcher a player is using.
Because gamers continue to find Easter eggs in WW2 's Zombies, there may be more to uncover in subsequent releases. As the series has moved on to Call of Duty: Modern Warfare 3 and the upcoming Black Ops 6 , it's unlikely that these Easter eggs will be adjusted through an update.
Call of Duty: WW2
Your rating.
Your comment has not been saved
Call of Duty® returns to its roots with Call of Duty®: WWII - a breathtaking experience that redefines World War II for a new gaming generation. Land in Normandy on D-Day and battle across Europe through iconic locations in history’s most monumental war. Experience classic Call of Duty combat, the bonds of camaraderie, and the unforgiving nature of war against a global power throwing the world into tyranny. Call of Duty®: WWII creates the definitive World War II next generation experience across three different game modes: Campaign, Multiplayer, and Co-Operative. Featuring stunning visuals, the Campaign transports players to the European theater as they engage in an all-new Call of Duty® story set in iconic World War II battles. Multiplayer marks a return to original, boots-on-the ground Call of Duty gameplay. Authentic weapons and traditional run-and-gun action immerse you in a vast array of World War II-themed locations. The Co-Operative mode unleashes a new and original story in a standalone game experience full of unexpected, adrenaline-pumping moments.
We hope you like the items we recommend and discuss! Game Rant has affiliate and sponsored partnerships, so we receive a share of the revenue from some of your purchases. This won’t affect the price you pay and helps us offer the best product recommendations.
Screen Rant
Hidden fallout 4 easter egg has an incredibly macabre inspiration.

Your changes have been saved
Email is sent
Email has already been sent
Please verify your email address.
You’ve reached your account maximum for followed topics.
Every Major Fallout 4 Faction, Ranked
After playing fallout 4 since launch, i've decided the sole survivor is the worst part of the game, if you really enjoyed the fallout games, there's one franchise you should try next.
Fallout 4 ’s dystopian landscape is hard to top when it comes to the creepy aspect. In a nuclear wasteland, players go through the game as Sole Survivor , a character who witnessed the murder of their spouse and the kidnapping of their child and now must try to find them . Yet there is an Easter egg in the game that hints at even more violence and darkness beneath an already tumultuous surface, and it’s inspired by a great literary work from over 100 years ago.
The scene in reference takes place at The Castle, or more specifically, in the tunnels. Once players find the remains of General McGann, they also discover another body nearby, and it becomes clear the game took a lot of inspiration from Edgar Allen Poe’s The Cask of Amontillado . This story is a dark and twisted tale about two men and betrayal, with one of those men ending up being buried alive. Fallout 4 draws a lot of inspiration from that story for the visuals found in the game.
A Horrific Image Makes For Top-Tier World Building
Inspired by edgar allen poe’s the cask of amontillado.
The visual references are spot on, as noted in the comments of this Reddit post by user TwinSong . In the original story, a man named Montresor invites his friend Fortunato down into the catacombs with the promise of amontillado. Instead, he chains Fortunato to a wall, builds another wall around him, and buries him alive . In Fallout 4 , this is the exact image audiences are left with once they explore The Castle; there is a skeleton, with his hands chained above his head, buried behind another wall.
McGann is likely not directly tied to the body in the wall; his body is also found in the Castle tunnels after he became trapped there. This is a more subtle nod to the original story, but one that still notes being stuck in this place and unable to get out . McGann is also tied to wine, as this is his last beverage before he eventually loses his life. The ties to wine, being trapped, and literally being buried in the wall illustrate the strength of this story and how macabre it can still be.
These References Strengthen The World-Building
A great literary work from over 100 years ago.
While a lot of people could make the connection to the reference with this scene alone, Fallout 4 is full of hidden quests and other small nods to The Cask of Amontillado . One of the junk items in the game is a bottle of amontillado . Players can find these bottles sprinkled throughout the game, particularly in the Castle tunnels. The bottles also have even further evidence of the reference on them, with the signature “P. Edgar.” The reference is clear and shows how much fun developers had when integrating it into the game.
There are some great factions in Fallout 4 with a mixture of new and returning groups for the Sole Survivor to meet and potentially join up with.
The Cask of Amontillado has been referenced countless times, but the additional mystery within Fallout 4 makes this reference one of the creepier. Players don’t know who this skeleton is or why they are there, allowing imagination to go wild with speculation. It’s a nice creepy element that elevates the atmosphere, making the threats seem even more intimidating as motivations aren’t known. Fallout 4 clearly uses literary references well to create a better atmosphere for the gamer.
Source: TwinSong/Reddit , Mitten Squad/Youtube

COMMENTS
The Complete Voyage of Despair Easter Egg Walkthrough. After days of searching, the community has finally cracked the Easter Egg for Voyage of Despair. Much like every other typical Zombies Easter ...
Step 4: Kill the Elemental Catalysts. The next step is to locate 4 outlets across the map, with each spewing a different element. Players will simple need to kill an Elemental Catalyst of the same ...
Here's how it works. The Black Ops 4 Zombies Voyage of Despair Easter eggs see the Chaos crew right in the thick of it as the undead clamber aboard the Titanic on its infamous maiden voyage ...
Black Ops 4 - Zombies - Voyage of Despair Easter Egg
Voyage of Despair is One of if not THE HARDEST Easter Egg in BO4 Zombies, But with this video, you'll never struggle to beat this Easter Egg again.----------...
THE ULTIMATE FULL BLACK OPS 4 ZOMBIES VOYAGE OF DESPAIR EASTER EGG GUIDE (TUTORIAL WALKTHROUGH)!!No nonsense, easy guide to get the Voyage of Despair Easter ...
Mail Room Call of Duty: Black Ops 4 Zombies - Voyage of Despair Mail Room Clock • IGN • Fair Use [Clock] To the right of the doorway leading to the Cargo Hold.[Symbol] Underneath the stairs ...
BLACK OPS 4 ZOMBIES VOYAGE OF DESPAIR EASTER EGG GUIDE! Found this video useful? Hit 👍 "LIKE" 👍 to let me know! IX Easter Egg Guide: https://youtu.be/gKkHX...
All Call of Duty: Black Ops 4 Zombies - Voyage of Despair Easter Eggs. Main Easter Egg. Retrieve the Sentinel Artifact. Activate Pack-A-Punch. Once you activate Pack-A-Punch, 4/6 clocks will change its time. For the clocks that change time, one of the Pack-A-Punch elemental symbols will spawn nearby. Here are the spawns for the clocks and ...
Before starting the Main Easter Egg quest, you'll need to activate the Sentinel Artifact and unlock the Pack-a-Punch machine. Check the 'Voyage of Despair' Pack-a-Punch guide above for details.
Stage 1: Kill the Zombies. Stage 2: Kill more boss Zombies. Stage 3: Hide in the laundry room and shoot the boss by peeking around the corner when it fires its ice beam. If you get frozen, knife ...
The Easter Egg for Voyage of Despair is called "Abandon Ship" and is rewarded for successfully completing the trial. Of all of the zombies maps included at launch, this EE is one of the longer quests in Black Ops 4, on par with Blood of the Dead. By comparison, Classified (which comes through the Black Ops Pass) and IX both contain easier EE's.
How To Unlock The Voyage of Despair Easter Egg Song. Much like the process used in IX, you will be required to find and shoot four different coins that are located across the map. The coins can be ...
Call of Duty Zombies is a first-person shooter survival mode developed by Treyarch, Infinity Ward, Sledgehammer Games, and Raven Software and published by Activision. r/CODZombies is a developer-recognized community focused on the franchise. Voyage of Despair Main Easter Egg Cheat Sheet. Ah, sweet!
For a thousand years, Concordia has maintained peace between its provinces. To mark this incredible feat, the emperor's ship embarks upon a twelve-day voyage to the sacred Goddess's Mountain. Aboard are the twelve heirs of the provinces of Concordia, each graced with a unique and secret magical ability known as a Blessing.
Look out for the rescue boat on the side—the one full of all kinds of bags and other luggage. The coin should be easily spottable on the boat. Shoot it before moving on. There's no special way that you need to activate the coins—just find and shoot them all in any order. Once you've shot all of the coins, the secret song will unlock and ...
Black Ops 4 Zombies - Secret Easter Egg Song in Voyage of Despair.🎮 Improve your aim, use code 'MrWilliamThor' for 10% off: http://bit.ly/blackops4thumbstic...
A good strategy to get an early Cryo foot is to; Pick up poison foot when you do the lockdown objective. Go and upgrade your kraken to the jurmaganders fang (applying the ammo mod) and then during the Water lockdown (2nd one) just pick up and ice foot so you can apply it after you complete the pipe shooting step.
Blood of the Dead Walkthrough - Black Ops 4 Guide
Voyage of Despair Easter Eggs. There are quite a few easter eggs available in the Voyage of Despair map, so here's our guide to help you track them down. We suggest unlocking the Pack-a-Punch ...
I haven't yet written a guide for the Engine Room flooding section or planets, but I plan to eventually. I hope you guys can get some use out of it! And if you have any suggestions or requests feel free to leave a comment. I'm pretty busy lately but I'll do my best to make this a useful tool for everyone interested. Sort by: Add a Comment.
MAIN EASTER EGG STEPS. Find 6 Clocks across the map. Clock Locations: An Elemental Symbol will appear at 4 different locations around the map. Symbol Locations: To move the hour hands on all dials, you need to interact with minute hands on the dials found at Poop Deck and Engine room. Around the map there will be power outlets, 4 of the outlets ...
Nice and easy detailed guide on how to complete the clock / lever step on the Voyage Of Despair (Call Of Duty Black Ops 4 Zombies BO4) Subscribe to see more ...
A Call of Duty: WW2 fan discovered a new Easter egg on a 6-year-old Zombies map, The Frozen Dawn. The Easter egg involves firing a rocket launcher at specific towers near the volcano on The Frozen ...
Fallout 4's dystopian landscape is hard to top when it comes to the creepy aspect.In a nuclear wasteland, players go through the game as Sole Survivor, a character who witnessed the murder of their spouse and the kidnapping of their child and now must try to find them.Yet there is an Easter egg in the game that hints at even more violence and darkness beneath an already tumultuous surface ...